Creating amigurumi is such a delightful craft, isn’t it? 🌟 The process of making an amigurumi snowflake pattern is like weaving a little bit of winter magic with every loop and stitch. It’s captivating how you can transform a simple skein of yarn into intricate snowflakes, each one unique and brimming with charm. There’s something joyful about sitting cozily by the window, watching the snow fall outside, while my fingers dance nimbly with a crochet hook, crafting these tiny wonders that bring winter’s beauty indoors. Truly, it feels like capturing the enchantment of a snow day in the palm of my hand.
Designing a snowflake amigurumi pattern involves a bit of creativity and a dash of mathematical precision. ❄️ I enjoy the challenge of imagining the geometric patterns of snowflakes and translating them into crochet language. It’s a process that requires focus and imagination, as I experiment with different stitches and techniques to achieve those delicate details. The best part is seeing the finished piece come to life—a soft, fluffy snowflake that can be used as a decoration, a gift, or even a little winter-themed addition to a cozy sweater. Making these amigurumi creations is not just a hobby; it’s a joyful celebration of the season, shared through every stitch.
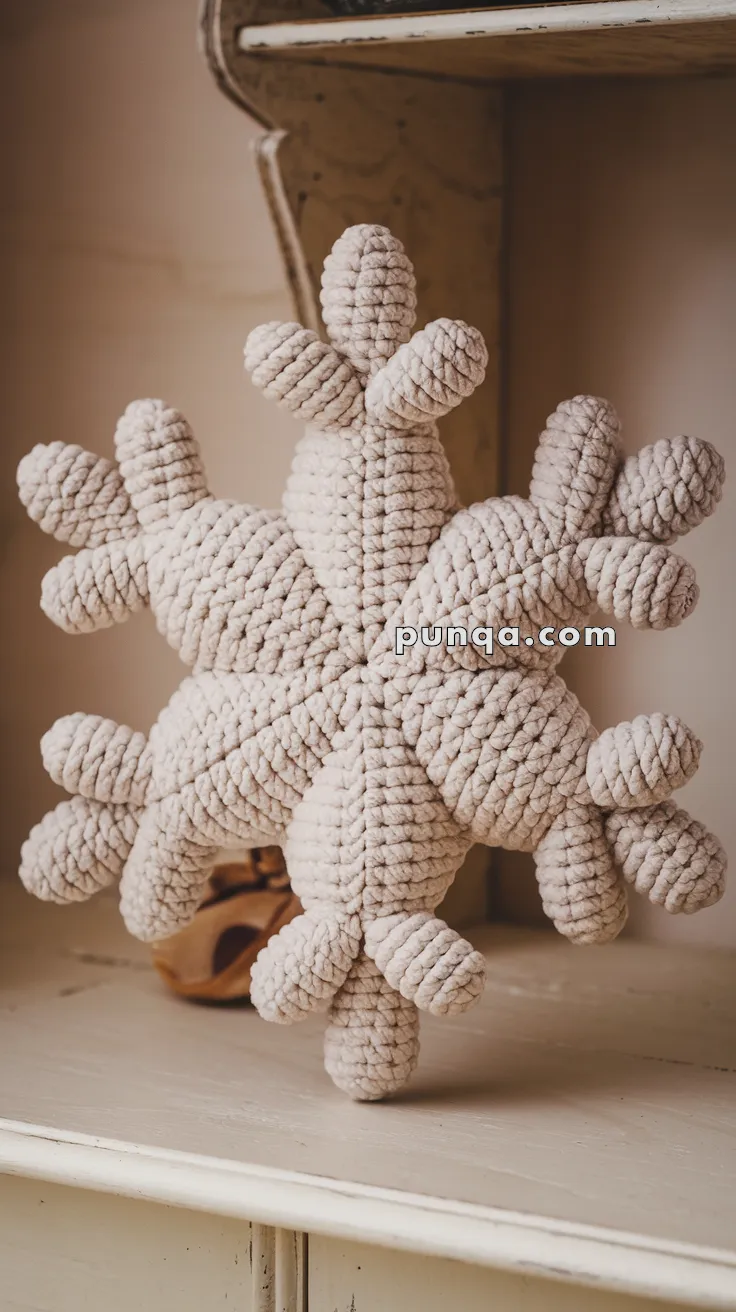
Amigurumi Snowflake Pattern
Skill Level: Intermediate
Finished Size: Approximately 10 inches in diameter
Materials
– Bulky weight yarn in white or light blue
– Crochet hook size H/8 (5.0 mm)
– Tapestry needle
– Scissors
– Stitch marker (optional)
Abbreviations (US Terminology)
– ch: chain
– sc: single crochet
– inc: increase (2 sc in same stitch)
– dec: decrease (single crochet 2 together)
– sl st: slip stitch
– st(s): stitch(es)
Pattern Instructions
Center
1. Magic ring, 6 sc into ring. (6)
2. Inc in each st around. (12)
3. *Sc in next st, inc in next st* around. (18)
4. *Sc in next 2 sts, inc in next st* around. (24)
5. *Sc in next 3 sts, inc in next st* around. (30)
6. Fasten off and weave in ends.
Spokes (Make 6)
1. Ch 10, sc in second ch from hook and in each ch across. (9)
2. Turn, ch 1, sc in each st across. (9)
3. Repeat Row 2 five more times.
4. Fasten off, leaving a long tail for sewing.
Snowflake Tips (Make 18)
1. Magic ring, 6 sc into ring. (6)
2. *Sc in next st, inc in next st* around. (9)
3. Sc in each st around. (9)
4. Fasten off, leaving a long tail for sewing.
Assembly
1. Attach each spoke evenly around the center piece using the long tails.
2. Sew 3 snowflake tips to the end of each spoke, spacing them evenly for a symmetrical look.
Finishing Touches
– Weave in any remaining ends.
– Shape your snowflake gently to ensure it lays flat and even.
Tips:
– Consider adding a little sparkle by using metallic or glitter yarn! ✨
– Perfect for holiday decorations or a unique handmade gift. ❄️
– You can adjust the size by changing yarn weight and hook size. Enjoy your cozy crafting! 🧶
🎉 Your handmade crochet creation for Amigurumi Snowflake Pattern is complete! Enjoy your one-of-a-kind amigurumi masterpiece and experiment with various yarn colors for a personal touch! 🧶✨