Say hello to the Amigurumi Skunk Baby, a surprisingly sweet and snuggly crochet critter that’s full of woodland charm! 🦨🧶 With its fluffy tail, tiny paws, and gentle expression, this little stinker is anything but trouble—bringing cozy vibes and playful personality to your handmade collection. Whether you’re crafting for a forest-themed nursery, a quirky gift, or just adding to your lineup of adorable animals, this skunk baby is sure to win hearts.
Perfect for crocheters who love expressive shaping and unexpected cuteness, this pattern invites you to explore soft textures, bold contrasts, and a sprinkle of mischief. Add a flower crown, stitch on a pacifier, or pair it with other woodland babies for a full enchanted scene. The Amigurumi Skunk Baby is a delightful way to stitch up smiles, snuggles, and a dash of handmade fun—one loop at a time! 🧵🌲
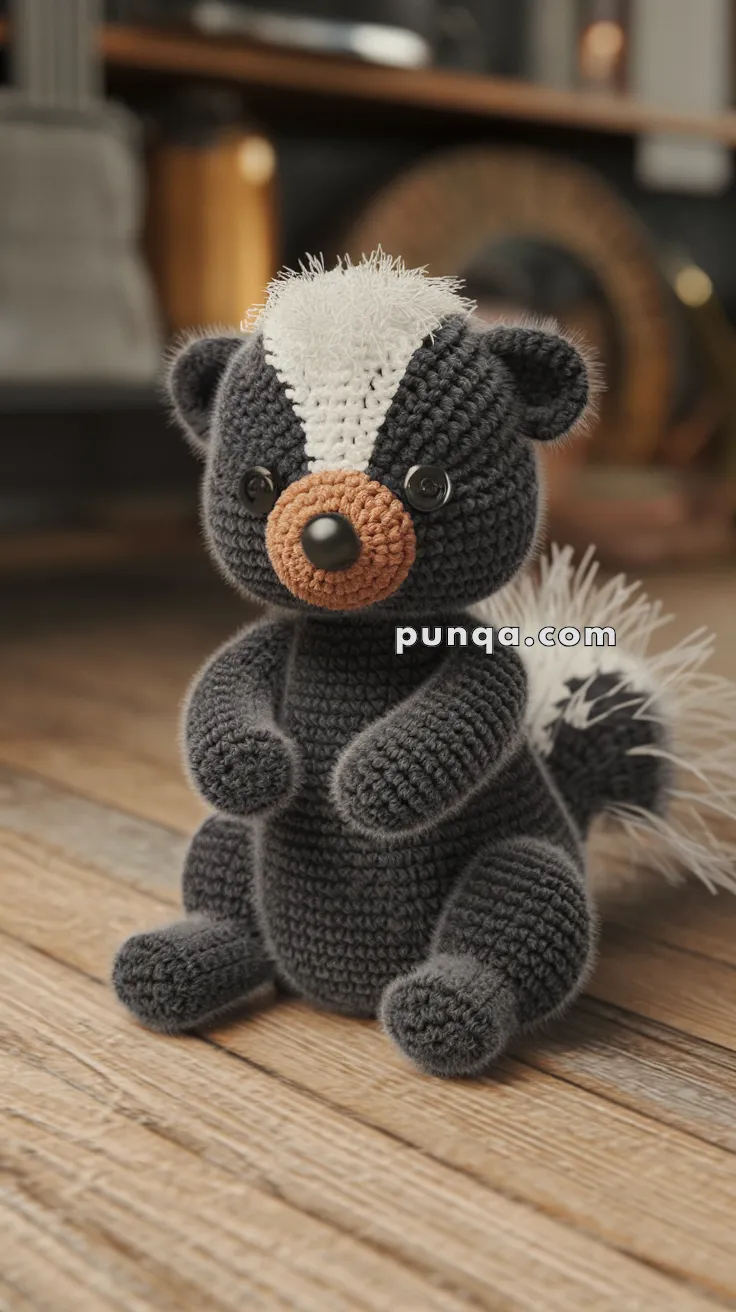
🦨 Amigurumi Skunk Baby Crochet Pattern
This cuddly little skunk baby is made with soft worsted yarn and lots of charm — featuring a white fuzzy stripe, plump body, and tiny arms ready for a hug! Perfect for woodland nurseries or nature-themed gifts.
✨ Skill Level
Intermediate – includes shaping, surface detailing, and working with fuzzy yarn accents.
📏 Finished Size
Approx. 18–20 cm (7–8 in) tall when seated, using worsted-weight yarn and a 3.0–3.5 mm hook.
🧶 Materials
Yarn (Worsted Weight)
- Charcoal or very dark grey – main body
- Warm tan / caramel – snout
- White – stripe base
- White fuzzy / eyelash yarn – stripe & tail plume
Notions
- 3.0–3.5 mm crochet hook
- 6–8 mm safety eyes (black, glossy)
- 10–12 mm safety nose (black)
- Polyester fiberfill
- Tapestry needle
- Stitch marker
- Scissors
🧵 Abbreviations (US Terms)
MR – magic ring
sc – single crochet
inc – increase
dec – decrease (sc2tog)
sl st – slip stitch
FO – fasten off
🐾 Head (Charcoal)
- R1: 6 sc in MR (6)
- R2: inc ×6 (12)
- R3: (sc, inc) ×6 (18)
- R4: (2 sc, inc) ×6 (24)
- R5: (3 sc, inc) ×6 (30)
- R6: (4 sc, inc) ×6 (36)
- R7–R12: sc around (36)
Insert safety eyes between R8–R9, 7 sts apart.
- R13: (4 sc, dec) ×6 (30)
- R14: (3 sc, dec) ×6 (24)
- R15: (2 sc, dec) ×6 (18)
Stuff firmly. - R16: (sc, dec) ×6 (12)
- R17: dec ×6 (6)
FO and close.
🐽 Snout (Tan)
- R1: 6 sc in MR (6)
- R2: inc ×6 (12)
- R3: (sc, inc) ×6 (18)
- R4: sc around (18)
Insert safety nose centrally.
Stuff lightly and sew to lower front of head.
👂 Ears (Make 2 – Charcoal)
- R1: 6 sc in MR (6)
- R2: (sc, inc) ×3 (9)
- R3: sc around (9)
Flatten slightly.
Sew low and wide on head sides.
🧸 Body (Charcoal – Seated Shape)
- R1: 6 sc in MR (6)
- R2: inc ×6 (12)
- R3: (sc, inc) ×6 (18)
- R4: (2 sc, inc) ×6 (24)
- R5: (3 sc, inc) ×6 (30)
- R6–R10: sc around (30)
- R11: (3 sc, dec) ×6 (24)
- R12: (2 sc, dec) ×6 (18)
Stuff very firmly, shaping into a rounded seated base. - R13: (sc, dec) ×6 (12)
- R14: dec ×6 (6)
FO and close.
💪 Arms (Make 2 – Short & Rounded)
- R1: 6 sc in MR (6)
- R2: inc ×6 (12)
- R3–R4: sc around (12)
- R5: (2 sc, dec) ×3 (9)
Lightly stuff, flatten slightly.
FO and sew high on body, angled inward.
🦵 Legs (Make 2 – Stubby)
- R1: 6 sc in MR (6)
- R2: inc ×6 (12)
- R3–R4: sc around (12)
- R5: (2 sc, dec) ×3 (9)
Stuff firmly.
FO and sew to front bottom of body for seated pose.
🦨 Tail (Charcoal Base)
- R1: 6 sc in MR (6)
- R2: inc ×6 (12)
- R3: (sc, inc) ×6 (18)
- R4: (2 sc, inc) ×6 (24)
- R5–R9: sc around (24)
- R10: (3 sc, dec) ×6 (18)
Stuff firmly.
FO and sew centered on back, angled upward.
🤍 Signature Stripe & Fluff
Stripe Base (White – Smooth)
Surface crochet a single straight stripe:
- Start at top of forehead
- Continue down center of head only
- Stop at snout base
Fluffy Accent (White Fuzzy Yarn)
- Add short loops at crown of head
- Add heavier tufts along top of tail only
- Brush gently with fingers for plume effect
(No side stripes are added.)
🧷 Assembly Order
- Attach snout & ears to head
- Sew head to body
- Attach arms & legs
- Attach upright tail
- Add stripe & fuzzy details
🎉 Final Thoughts
Your amigurumi skunk baby is now complete — with its fluffy tail, bold white stripe, and sweet round face, it’s ready to bring woodland magic to your handmade collection. Whether perched on a nursery shelf or gifted to someone special, this little skunk is sure to charm everyone who meets it.