Get ready to stitch up some underwater cuteness with the Amigurumi Shrimp Baby, a quirky and lovable crochet project that’s sure to make a splash! 🦐🧶 With its curved body, tiny legs, and sweet little face, this baby shrimp brings a delightful twist to your amigurumi collection. Whether you’re crafting for a sea-themed nursery, a playful gift, or just adding a pinch of ocean whimsy to your décor, this tiny swimmer is full of charm.
Perfect for crocheters who enjoy fun shapes and miniature details, this pattern invites you to explore soft textures, cheerful colors, and a touch of crustacean creativity. Add a pacifier, a tiny bow, or pair it with other sea babies for a full handmade reef. The Amigurumi Shrimp Baby is a joyful way to stitch up smiles, silliness, and a whole lot of handmade magic—one loop at a time! 🧵🌊
🦐 Amigurumi Shrimp Baby Crochet Pattern
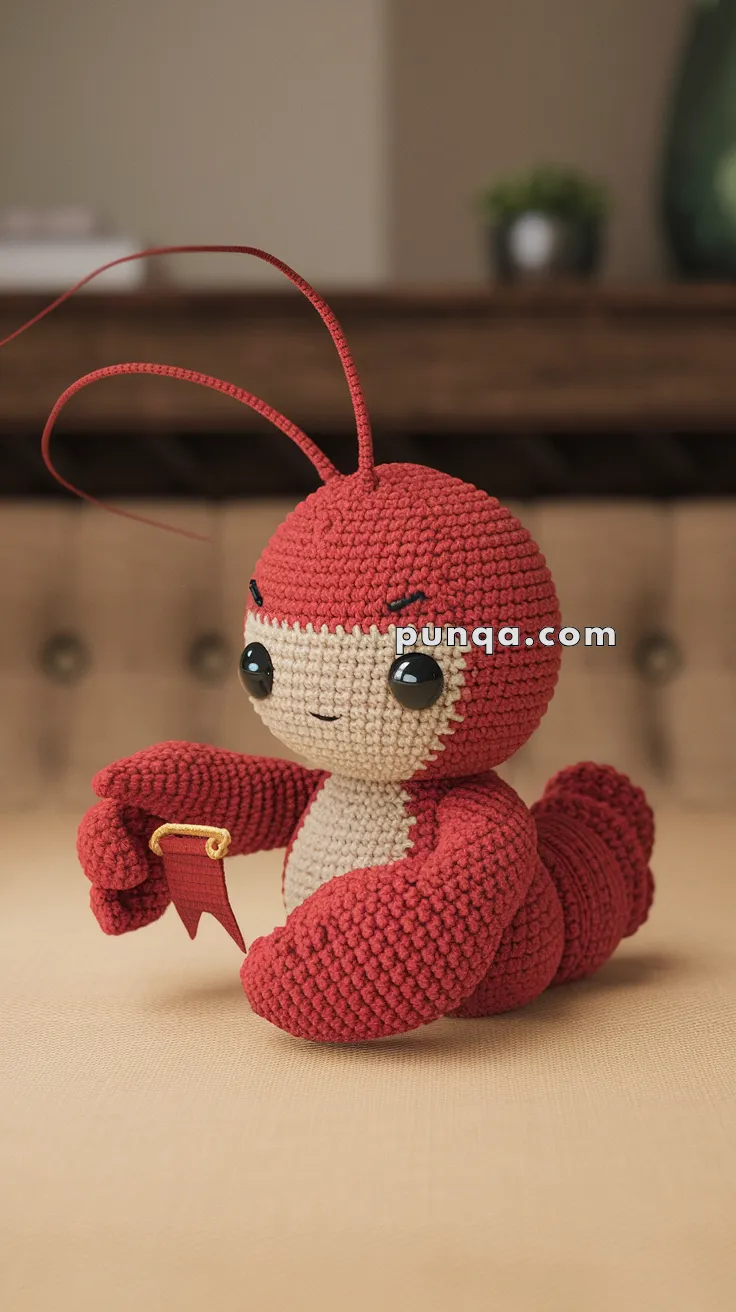
This little shrimp baby is full of charm, personality, and a cheeky smile! With its big round head, long antennae, curled segmented tail, and mini flag accessory, it’s the perfect sea creature to add to your amigurumi collection.
✨ Skill Level
Intermediate – includes shaping, working in segments, and small details like antennae and a flag.
📏 Finished Size
Approx. 22 cm (8.5 inches) long when using DK yarn and a 2.75 mm hook.
🧶 Materials
- DK yarn in:
- Red (main body, limbs, antennae, shell)
- Beige/light peach (face & belly patch)
- Yellow (flag stick)
- Burgundy (flag)
- 2.75 mm crochet hook
- 12 mm black safety eyes
- Polyfill stuffing
- Tapestry needle, scissors, stitch marker
- Black embroidery thread (eyebrows, mouth)
- Pipe cleaners or craft wire (optional for bendable antennae)
🪡 Abbreviations (US Terms)
- MR – Magic Ring
- sc – single crochet
- inc – increase (2 sc in same st)
- dec – decrease (sc 2 together)
- ch – chain
- sl st – slip stitch
- FO – fasten off
- BLO – back loop only
🦐 Head
With red yarn:
- MR 6 sc (6)
- inc x6 (12)
- (1 sc, inc) x6 (18)
- (2 sc, inc) x6 (24)
- (3 sc, inc) x6 (30)
- (4 sc, inc) x6 (36)
7–13. sc around (36) → extra rounds for a larger head
Switch to beige:
14–16. sc around (36) (face area)
- (4 sc, dec) x6 (30)
- (3 sc, dec) x6 (24)
– Insert safety eyes between rounds 10–11, spaced ~6 sts apart.
– Embroider thick curved eyebrows and a small smile. - (2 sc, dec) x6 (18)
- (1 sc, dec) x6 (12)
- dec x6 (6)
FO, close, stuff firmly.
🦐 Body & Tail Segments
Instead of one piece, crochet 5 separate segments to form the curled tail.
Segment 1 (largest, attaches to head) – Red
- MR 6 sc (6)
- inc x6 (12)
- (1 sc, inc) x6 (18)
- (2 sc, inc) x6 (24)
5–7. sc around (24)
FO, stuff.
Segment 2 – Red
- MR 6 sc (6)
- inc x6 (12)
- (1 sc, inc) x6 (18)
4–6. sc around (18)
FO, stuff.
Segment 3 – Red
- MR 6 sc (6)
- (sc, inc) x3 (9)
3–5. sc around (9)
FO, stuff.
Segment 4 – Red
- MR 6 sc (6)
- sc around (6) for 3 rounds
FO.
Segment 5 (tail tip) – Red
- MR 4 sc (4)
- sc around for 3 rounds
FO.
👉 Sew segments together in a curved shape. For added definition, work 1 round in BLO on each segment to give a segmented shell look.
🤲 Arms (make 2, longer)
With red yarn:
- MR 6 sc (6)
- inc x6 (12)
3–6. sc around (12) - (2 sc, dec) x3 (9)
8–10. sc around (9)
FO, stuff lightly.
👉 Sew angled forward, long enough to hold the flag naturally.
🧷 Belly Patch
With beige yarn:
Ch 8
Row 1: sc 6, 3 sc in last ch, rotate, sc 5, inc (16)
Row 2: sc around, shaping into oval (18)
FO, sew flat to underside of body.
🧢 Antennae (make 2)
With red yarn:
Ch 25–30 (long strands)
sl st back down chain.
FO, attach to head.
👉 Optionally insert thin wire/pipe cleaner to make them poseable.
🚩 Mini Flag
With burgundy:
Ch 7, turn.
Row 1–6: sc across (6 sts).
Row 7: dec 1 st each side to shape into a point.
With yellow:
Ch 6 → use as stick.
Sew flag to stick and attach to one arm.
✂️ Assembly
- Attach head to the largest tail segment.
- Join tail segments in descending size, curving as you sew.
- Sew belly patch under body.
- Attach arms so one holds the flag.
- Add antennae on top of head.
- Embroider facial details.
🎉 Finished Shrimp Baby
Your shrimp baby is ready! With its curled segmented tail, oversized head, expressive eyebrows, and proud little flag, it’s the perfect playful companion for ocean-themed amigurumi collections.