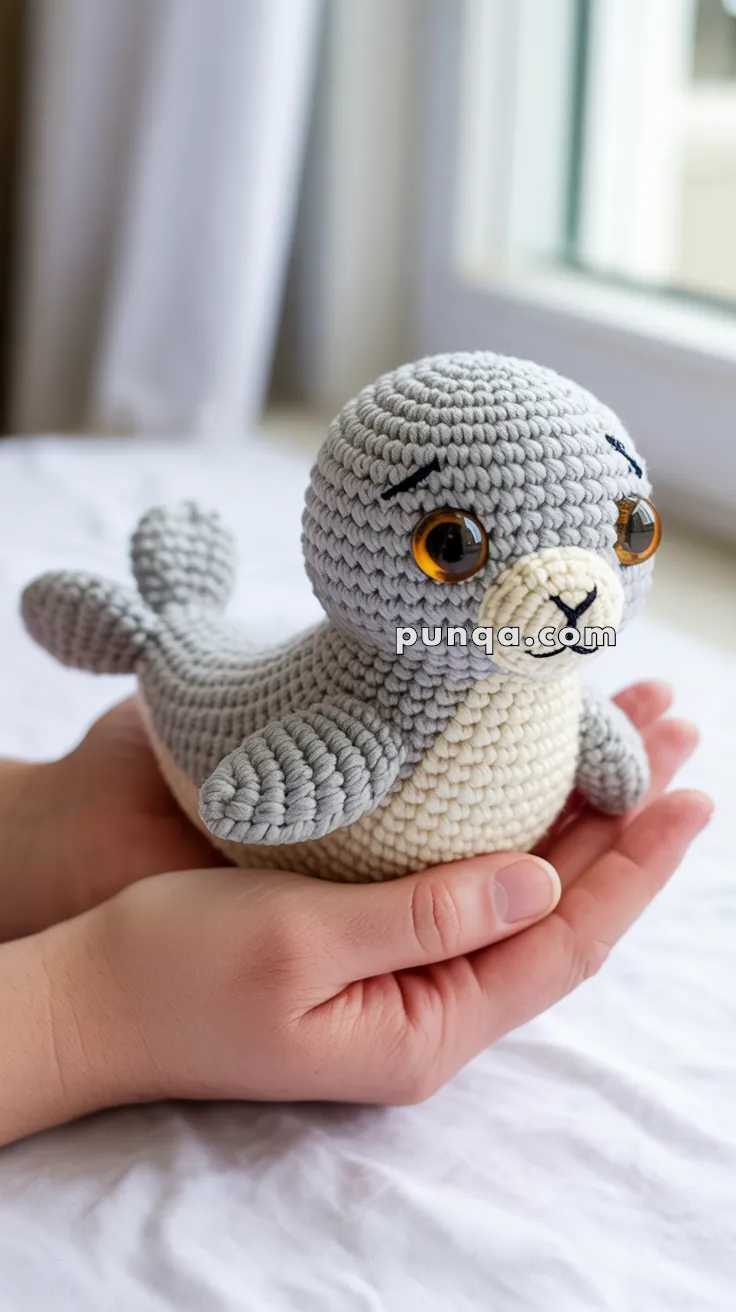
Dive into cuteness with the Amigurumi Seal, a snuggly little sea friend that’s ready to splash into your heart! 🦭🧶 With its round body, flippered limbs, and sweet stitched face, this adorable seal is perfect for ocean-themed décor, playful gifts, or simply adding a touch of marine magic to your amigurumi collection. Whether you’re crafting a solo swimmer or a whole pod of pals, this pattern brings cozy charm to every stitch.
Ideal for crocheters who love animal-inspired projects and soft, huggable shapes, this pattern invites you to experiment with gentle greys, creamy whites, or even pastel hues for a whimsical twist. Add a tiny scarf, a beach ball, or a name tag to personalize your seal and make it truly one-of-a-kind. The Amigurumi Seal is a delightful way to stitch up smiles, seaside vibes, and a whole lot of handmade joy—one loop at a time! 🌊🧵

🦭 Amigurumi Seal Crochet Pattern (Two Sizes)
This sleepy-eyed seal is the softest little friend you’ll ever make! With its rounded body, big amber eyes, and calico-style gray-and-cream coloring, this amigurumi captures the charm of a real baby seal. The pattern includes two sizes: a small handheld seal and a larger cuddle-sized plush.
✨ Skill Level
Intermediate – includes shaping, color changes, and embroidery.
📏 Finished Sizes
- Small Seal: 6–7 in (15–18 cm) long, using worsted cotton yarn and 3.5 mm hook.
- Large Seal: 10–12 in (25–30 cm) long, using bulky yarn (#5) and 4.5–5 mm hook.
🧶 Materials
- Small Seal
- Worsted cotton yarn (#4):
- Light Gray – ~50 g (head, back, flippers, tail)
- Cream / Off-White – ~30 g (belly, muzzle)
- 14–16 mm amber safety eyes
- 3.5 mm crochet hook
- Worsted cotton yarn (#4):
- Large Seal
- Bulky yarn (#5):
- Light Gray – ~120 g
- Cream / Off-White – ~70 g
- 20–24 mm amber safety eyes
- 4.5–5 mm crochet hook
- Bulky yarn (#5):
- Both Sizes
- Fiberfill stuffing
- Black embroidery thread (nose, mouth, eyebrows)
- Yarn needle, scissors, stitch marker
🔤 Abbreviations (US Terms)
- MR = Magic Ring
- sc = single crochet
- inc = increase (2 sc in same st)
- dec = decrease (sc2tog)
- sl st = slip stitch
- ch = chain
- FO = fasten off
🪡 Pattern Instructions
🐭 Head & Body (Worked as One Piece)
Start with cream (belly), switch to gray (back).
Small Seal
- R1: MR, 6 sc (6)
- R2: inc ×6 (12)
- R3: (sc, inc) ×6 (18)
- R4: (2 sc, inc) ×6 (24)
- R5: (3 sc, inc) ×6 (30)
- R6–9: sc around (30)
👉 Keep cream centered on belly side, switch to gray on back stitches. - R10: (4 sc, inc) ×6 (36)
11–16. sc around (36)
👉 Place eyes between R11–12, ~8–9 sts apart. - R17: (4 sc, dec) ×6 (30)
- R18: (3 sc, dec) ×6 (24)
- R19: (2 sc, dec) ×6 (18)
- R20: (sc, dec) ×6 (12)
- R21: dec ×6 (6). FO.
Large Seal
Follow same shaping but continue increasing to 48 sts before maintaining even rounds. Add 4–5 rounds at 48 sts before decreasing gradually.
🐾 Muzzle (Cream)
Small Seal
- MR, 6 sc (6)
- R2: inc ×6 (12)
- R3–4: sc around (12)
FO, stuff lightly, sew to lower face.
Large Seal
Work up to 18 sts before holding even rounds.
👉 Embroider black nose + mouth (Y-shaped smile).
🐟 Front Flippers (Make 2, Gray)
Small Seal
- MR, 6 sc (6)
- (sc, inc) ×3 (9)
3–5. sc around (9) - (2 sc, dec) ×2 + sc (7)
FO, stuff lightly.
Large Seal
Start with 8 sc in MR, increase to 12 sts, then work 6–7 even rounds.
🐟 Tail Flippers (Make 2, Gray)
Small Seal
- MR, 5 sc (5)
- inc ×5 (10)
3–4. sc around (10) - (3 sc, dec) ×2 (8)
FO, flatten and sew side by side at back.
Large Seal
Start with 6 sc in MR, increase to 12, extend 3 more rounds.
🧵 Assembly
- Stuff body and head firmly.
- Sew muzzle to face, just below eyes. Embroider nose + mouth.
- Insert and secure safety eyes. Embroider small angled eyebrows.
- Sew flippers low on the body sides.
- Attach tail flippers at the back, slightly angled outward.
🎉 Final Look
- The small seal fits in the palm of your hand – perfect as a gift or child’s toy.
- The large seal is extra cuddly – great as a plush for display or hugging.
💡 Tip: For the larger seal, try velvet yarn for a super soft finish!


