Welcome to the whimsical and adventurous world of amigurumi! 🦆✨ Today, I’m excited to share my free crochet pattern for Scrooge McDuck—a charming and nostalgic creation perfect for Disney fans, classic cartoon lovers, or anyone who enjoys crafting expressive and iconic plush designs! 💰 Whether you love stitching up beloved characters, creating textured and lifelike figures, or simply want to add a touch of old-school charm to your handmade lineup, this pattern will guide you through crafting a beautifully sculpted plush with Scrooge’s signature top hat, round spectacles, and a hint of treasure-hunting spirit! 🏆
This design embraces rich blues, deep reds, and golden accents to bring a sense of adventure and wealth to your crochet projects! 🧶✨ I’ve carefully outlined each step to ensure your Amigurumi Scrooge McDuck turns out just right—ready to waddle into your collection or become a treasured handmade gift! 🎁 So grab your hooks, pick out classic colors, and let’s stitch up a legendary duck with a heart (and vault) full of gold! 💰
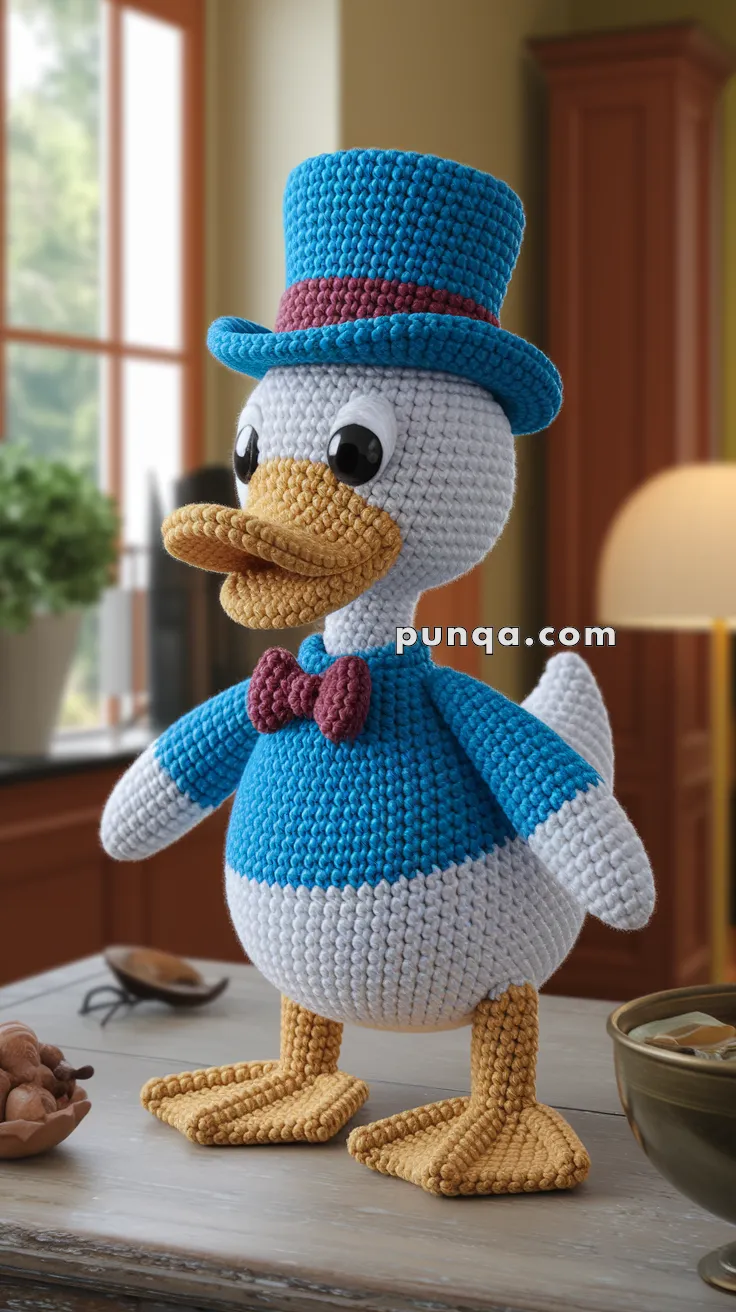
💰 Amigurumi Scrooge McDuck – FREE Crochet Pattern
Bring the beloved duck tycoon to life with this charming Amigurumi Scrooge McDuck doll! With his signature blue coat, top hat, red bow tie, and clever expression, this plush version of the classic character is perfect for collectors, Disney fans, and nostalgic crocheters alike.
✨ Skill Level
Intermediate – shaping, color changes, and accessory details involved.
📏 Finished Size
Approximately 28–30 cm (11–12 inches) tall using worsted weight yarn and a 3.0 mm hook.
🧶 Materials
-
Yarn:
-
White (head, body, tail, arms)
-
Blue (shirt & top hat)
-
Mustard/Yellow (beak & feet)
-
Burgundy (hat band & bow tie)
-
Black (eyebrow embroidery)
-
-
3.0 mm crochet hook
-
12 mm safety eyes + small white crochet circles for backing
-
Fiberfill stuffing
-
Yarn needle
-
Stitch markers
🪡 Abbreviations (US Terms)
-
MR – Magic Ring
-
sc – single crochet
-
inc – increase (2 sc in same st)
-
dec – decrease (sc 2 together)
-
sl st – slip stitch
-
ch – chain
-
BLO – back loop only
🐤 Pattern Instructions
Head (White)
-
MR, 6 sc
-
(inc) x 6 → 12
-
(sc, inc) x 6 → 18
-
(2 sc, inc) x 6 → 24
-
(3 sc, inc) x 6 → 30
-
(4 sc, inc) x 6 → 36
7–16. sc around (36) -
(4 sc, dec) x 6 → 30
-
(3 sc, dec) x 6 → 24
Insert safety eyes at round 10, add small white crochet circles behind eyes for highlight. -
(2 sc, dec) x 6 → 18
-
(sc, dec) x 6 → 12
-
dec around → 6, FO. Stuff firmly.
Beak (Mustard/Yellow)
Upper Beak
-
Ch 8, sc in 2nd ch, sc 5, 3 sc in last, continue other side, sc 5, inc → 16
-
sc around (16)
-
(3 sc, inc) x 4 → 20
-
sc around 2 rows. FO.
Lower Beak
Same as above but stop at round 3 → 16 sts. FO.
Sew both pieces slightly apart for 3D curve.
Body (Blue & White)
-
MR, 6 sc (White)
-
(inc) x 6 → 12
-
(sc, inc) x 6 → 18
-
(2 sc, inc) x 6 → 24
-
(3 sc, inc) x 6 → 30
-
(4 sc, inc) x 6 → 36
-
(5 sc, inc) x 6 → 42
8–12. sc around (42)
13–18. Switch to Blue, sc around → this forms shirt. -
(5 sc, dec) x 6 → 36
-
(4 sc, dec) x 6 → 30
-
(3 sc, dec) x 6 → 24
-
(2 sc, dec) x 6 → 18
-
(sc, dec) x 6 → 12. FO. Stuff well.
Arms (Make 2 – White with Blue Sleeves)
-
MR, 6 sc
-
(inc) x 6 → 12
3–5. sc around (12) -
Switch to Blue, sc 12
7–15. sc around (12). Stuff lightly. FO. Sew to sides of body.
Tail (White)
-
MR, 6 sc
-
(inc) x 6 → 12
-
sc around (12), FO. Attach to back bottom of body.
Feet (Make 2 – Mustard/Yellow)
Base:
-
Ch 9
-
sc in 2nd ch, sc 6, 3 sc in last, continue other side, sc 6, inc → 18
-
(2 sc, inc) x 6 → 24
4–5. sc around (24)
Toes:
Ch 6, sc back across for each toe. Make 3 toes per foot, shaping into flat triangle webbed foot.
Attach legs to underside of body, ensuring balance for standing.
Bow Tie (Burgundy)
-
Ch 9, sc in rows for 5 rows → rectangle.
-
Pinch center, wrap with yarn tightly, and sew under head.
Top Hat (Blue with Burgundy Band)
Brim:
-
MR, 6 sc
-
(inc) x 6 → 12
-
(sc, inc) x 6 → 18
-
(2 sc, inc) x 6 → 24
-
(3 sc, inc) x 6 → 30
-
(4 sc, inc) x 6 → 36
-
sc around in BLO (36)
Hat Body (Blue):
8–22. sc around (36) → this makes the tall hat body
Hat Top:
23. (4 sc, dec) x 6 → 30
24. (3 sc, dec) x 6 → 24
25. (2 sc, dec) x 6 → 18
26. (sc, dec) x 6 → 12
27. dec around → 6. FO.
Hat Band:
With Burgundy yarn, ch 36, sl st into ring. Wrap around base of hat body.
Attach hat to duck’s head at a jaunty angle.
Assembly
-
Sew head to body securely.
-
Attach beak pieces in curved 3D shape.
-
Place arms and tail.
-
Sew large flat webbed feet to base for standing.
-
Add bow tie at neck.
-
Place top hat and stitch firmly in place.
-
Embroider black eyebrows for expression.
🌟 Final Touches
And there you have it – your very own Scooge McDuck Amigurumi with his striking tall blue hat, puffed bow tie, and proud stance. This project is sure to bring smiles and will stand out beautifully in your handmade collection.
Crochet one for yourself or as a gift – because nothing says classy like a duck in a top hat! 🦆🎩✨


Impecable. Felicitaciones