Hey there! 😊 Have you ever stumbled upon those adorable little crochet creations known as amigurumi and wondered how to give them a mythical twist? Well, let me introduce you to the whimsical world of satyr amigurumi! These playful and mischievous creatures, with their goat-like features and cheeky personalities, are a fantastic project for anyone eager to add a touch of mythology to their crochet repertoire. Crafting a satyr amigurumi is not just about following a pattern—it’s about weaving a bit of magic into each stitch, bringing these enchanting beings to life right in the comfort of your own home. ✨
The process of creating a satyr amigurumi pattern is a delightful journey from imagination to reality. It starts with gathering your favorite yarns and tools. Visualizing the character is half the fun—imagining the curly horns, the cheeky smile, and those tiny hooves. 🐐 With a hook in hand, you begin to crochet, watching each piece come together like a puzzle. The head, body, arms, and legs are crafted separately before being assembled with care. Adding details like embroidered eyes or a tuft of hair gives your satyr its unique personality. Each finished piece feels like a small victory, a joyful testament to creativity and patience. And let me tell you, there’s nothing quite like the satisfaction of seeing your very own mythical creature come to life!
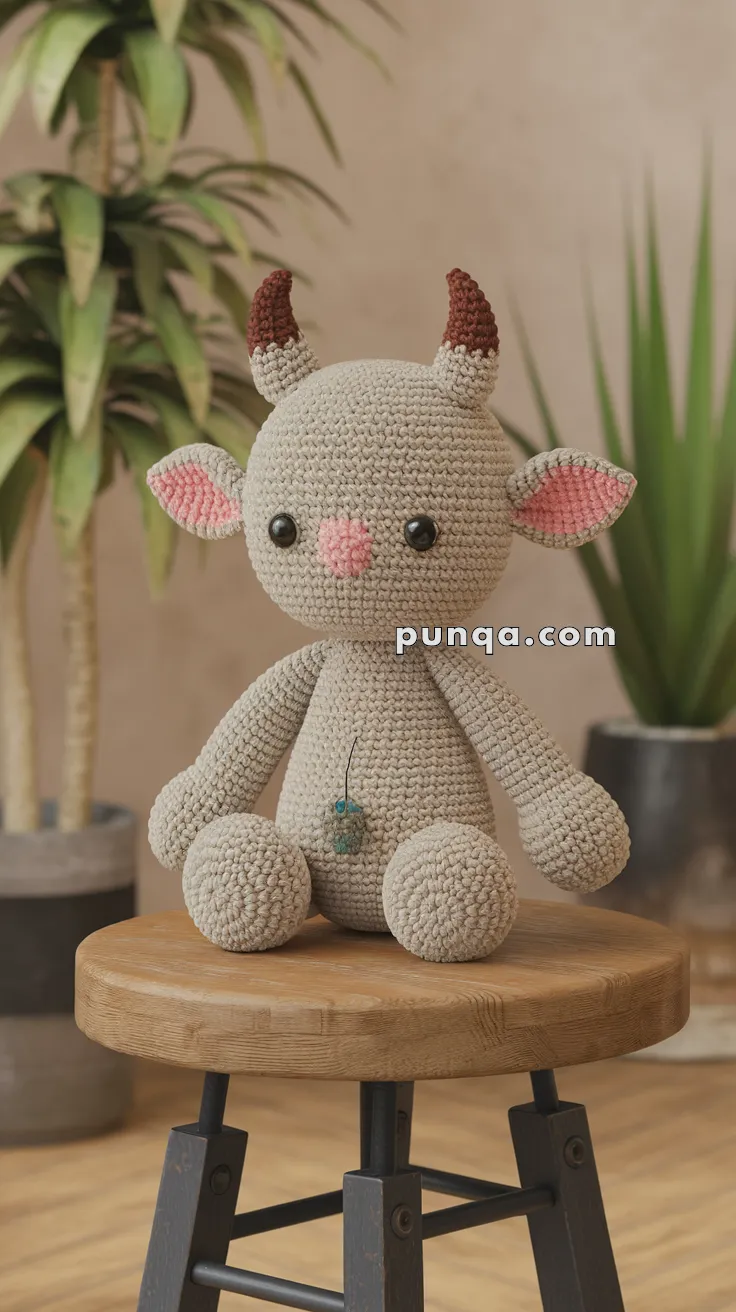
🐐 Amigurumi Satyr Doll Crochet Pattern
Bring a touch of forest magic to your handmade collection with this adorable Amigurumi Satyr! With his soft beige body, curved brown horns, fluffy pink-lined ears, sweet round nose, and cuddly sitting pose, this little woodland friend is perfect for fantasy lovers, nursery décor, or gifting.
This pattern is carefully designed to match the reference photo — featuring a round head, slightly smaller body, long relaxed arms, chunky sitting legs, and gentle goat-like details.
✨ Skill Level
Intermediate
Includes shaping, color changes, ears with inner detail, and curved horns.
📏 Finished Size
Approx. 28–32 cm (11–13 inches) tall sitting
Using DK or worsted yarn with a 3.0–3.5 mm hook
🧶 Materials
Yarn (DK or Worsted):
-
Light beige / oatmeal – main body
-
Brown – horn tips
-
Light pink – inner ears & nose
Other supplies:
-
10–12 mm black safety eyes
-
Polyester fiberfill
-
3.0–3.5 mm crochet hook
-
Yarn needle
-
Stitch marker
-
Scissors
🧵 Abbreviations (US Terms)
-
MR – Magic Ring
-
sc – Single Crochet
-
inc – Increase
-
dec – Decrease
-
ch – Chain
-
sl st – Slip Stitch
-
FO – Fasten Off
🧠 Head
With beige yarn:
R1: MR 6 sc (6)
R2: inc ×6 (12)
R3: (1 sc, inc) ×6 (18)
R4: (2 sc, inc) ×6 (24)
R5: (3 sc, inc) ×6 (30)
R6: (4 sc, inc) ×6 (36)
R7–13: sc around (36)
Insert safety eyes between R9–10, spaced 7–8 stitches apart.
R14: (4 sc, dec) ×6 (30)
R15: (3 sc, dec) ×6 (24)
R16: (2 sc, dec) ×6 (18) – begin stuffing
R17: (1 sc, dec) ×6 (12)
R18: dec ×6 (6)
FO and close.
🐽 Nose
With pink yarn:
R1: MR 6 sc (6)
R2: inc ×6 (12)
R3: sc around (12)
FO, stuff lightly and flatten into oval shape.
Sew centered between eyes.
🐐 Ears (Make 2)
Outer Ear (Beige)
R1: MR 6 sc (6)
R2: (1 sc, inc) ×3 (9)
R3: (2 sc, inc) ×3 (12)
R4–7: sc around (12)
FO
Inner Ear (Pink)
R1: MR 6 sc (6)
R2: (1 sc, inc) ×3 (9)
R3: sc around (9)
FO
Place pink piece inside beige ear and stitch together around edges.
Flatten slightly and sew to sides of head.
🐐 Horns (Make 2)
Start with brown yarn:
R1: MR 6 sc (6)
R2–4: sc around (6)
Switch to beige:
R5: (1 sc, inc) ×3 (9)
R6–8: sc around (9)
R9: (2 sc, inc) ×3 (12)
R10–12: sc around (12)
Stuff lightly, curve gently, FO.
Sew to top of head angled slightly outward.
🧸 Body
With beige yarn:
R1: MR 6 sc (6)
R2: inc ×6 (12)
R3: (1 sc, inc) ×6 (18)
R4: (2 sc, inc) ×6 (24)
R5: (3 sc, inc) ×6 (30)
R6–12: sc around (30)
R13: (3 sc, dec) ×6 (24)
R14: (2 sc, dec) ×6 (18)
Stuff firmly.
R15: (1 sc, dec) ×6 (12)
R16: dec ×6 (6)
FO and close.
Sew head to body.
💪 Arms (Make 2)
Long relaxed arms.
R1: MR 6 sc (6)
R2: (1 sc, inc) ×3 (9)
R3–14: sc around (9)
Stuff lightly only at top.
FO and flatten slightly.
Sew to body sides just under head.
🦵 Legs (Make 2)
Chunky sitting legs.
R1: MR 6 sc (6)
R2: inc ×6 (12)
R3: (1 sc, inc) ×6 (18)
R4–10: sc around (18)
R11: (1 sc, dec) ×6 (12)
Stuff firmly.
R12: dec ×6 (6)
FO and close.
Sew to front bottom of body for seated pose.
🪡 Assembly
-
Sew head to body
-
Attach ears to sides of head
-
Sew horns on top, angled outward
-
Attach arms just below head
-
Sew legs to front for sitting pose
-
Attach nose centered between eyes
🌿 Final Touches
Your woodland satyr is now complete — a soft, magical forest companion with gentle horns, floppy goat ears, chunky sitting legs, and the sweetest little expression. Whether perched on a shelf, nestled in a nursery, or gifted to a fantasy lover, this cozy creature brings storybook charm to any handmade collection.
This pattern is designed for cuddling, decorating, and dreaming up magical adventures deep in the forest glades. 🐐🍃✨