Snuggle up with holiday cheer and a touch of handmade magic—the Amigurumi Santa Pillow is here to make your season extra cozy! 🎅🧶 With his jolly face, fluffy beard, and classic red hat, this oversized plush brings festive charm to any corner of your home. Whether he’s perched on the couch, nestled under the tree, or greeting guests from a cozy chair, Santa’s soft and huggable design is sure to spread smiles all around.
This pattern is perfect for crocheters who love bold shapes and joyful details. You can personalize Santa’s expression, add sparkly accents to his hat, or even stitch up a matching Mrs. Claus for double the fun. Whether you’re decorating for the holidays or gifting a handmade hug, the Santa Pillow is a heartwarming way to celebrate the season—one merry stitch at a time! 🎄✨
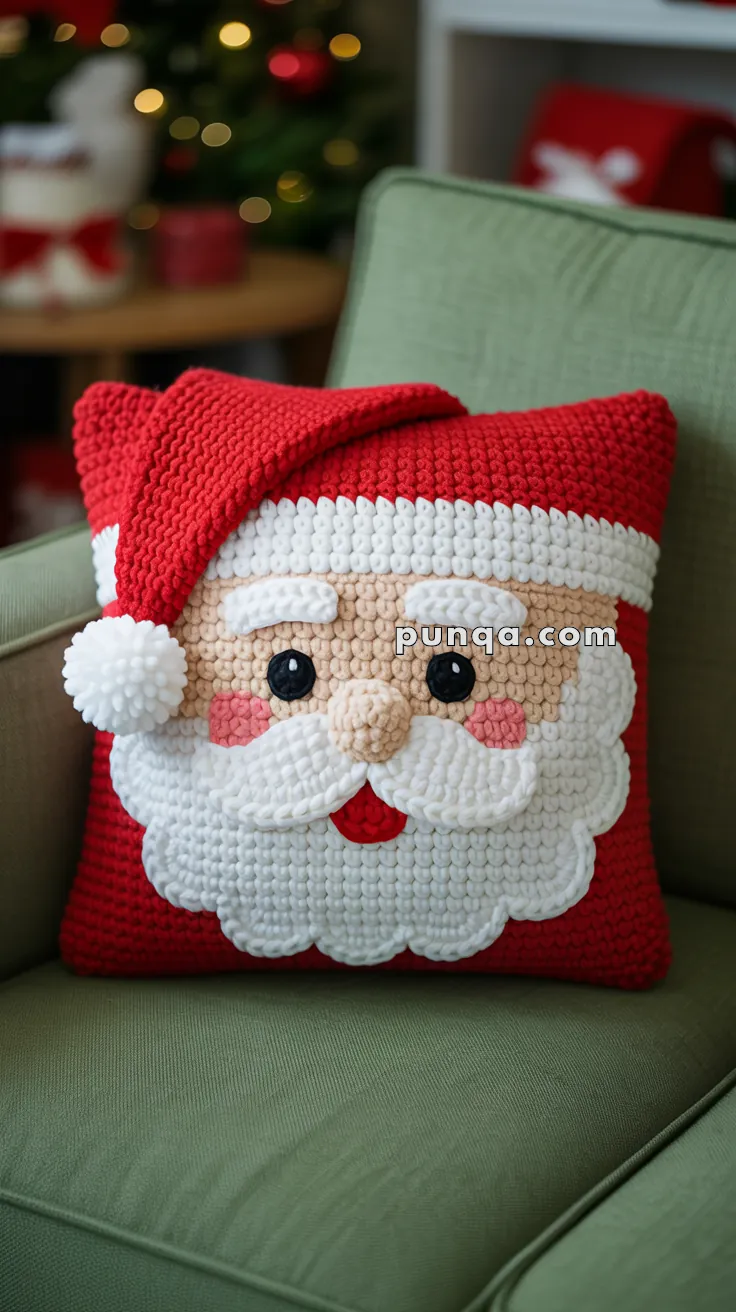
🎅 Santa Claus Crochet Pillow Pattern
This cozy Santa Claus pillow brings instant Christmas cheer! With its fluffy white beard, rosy cheeks, and classic red hat, it’s the perfect handmade accent for your couch or holiday nook. Soft chenille yarn gives it a plush, huggable texture — making it as cuddly as it is festive.
✨ Skill Level
Intermediate — uses bobble stitch, center single crochet (waistcoat stitch), and appliqué assembly.
📏 Finished Size
Approx. 16 × 16 in (40 × 40 cm) — fits a standard square pillow insert.
🧶 Materials
Chenille / Velour Bulky Yarn (Weight 5–6):
- Red — 350–400 g (pillow + hat)
- White — 250 g (beard, trim, mustache, pom)
- Beige — 120 g (face circle + nose)
- Pink — 15–20 g (cheeks)
Other Supplies:
- Black felt or black yarn (eyes)
- 5.0 mm hook
- Pillow insert (16 × 16″)
- Yarn needle, scissors
🔤 Abbreviations (US terms)
MR – magic ring
sc – single crochet
inc – increase
dec – decrease
sl st – slip stitch
ch – chain
st – stitch
FO – fasten off
🟥 Pillow Base (Make 2 Panels)
With red yarn, ch 61.
Row 1: sc in 2nd ch and across (60).
Rows 2–60: ch 1, turn, sc across (60).
FO and make a second identical panel.
👨🦳 Face Circle
With beige yarn:
R1: MR 6
R2: inc around (12)
R3: (sc, inc) ×6 (18)
R4: (2 sc, inc) ×6 (24)
R5: (3 sc, inc) ×6 (30)
R6: (4 sc, inc) ×6 (36)
R7: (5 sc, inc) ×6 (42)
R8: (6 sc, inc) ×6 (48)
R9: (7 sc, inc) ×6 (54)
R10: (8 sc, inc) ×6 (60)
R11: (9 sc, inc) ×6 (66)
FO.
Pin the circle to the upper half of the front pillow panel.
☁️ Beard
Beard Base
With white yarn, ch 42.
Rows 1–6: sc across (41). FO.
Scalloped Edge
Attach white yarn to lower-left corner.
Repeat across bottom edge:
• (sc, 3 dc, sc) in next st
• skip 2 sts
• sl st in next st
• skip 1 st
Repeat this sequence to the opposite corner.
Lightly stuff the upper area of the beard before sewing it beneath the face circle.
👃 Nose
With beige yarn:
R1: MR 6
R2: inc around (12)
R3–4: sc around (12)
FO, stuff, sew at the center of the face.
🥨 Mustache
Make 2 pieces:
R1: MR 6
R2: (sc, inc) ×3 (9)
R3: sc around (9)
R4: (sc, dec) ×3 (6)
FO and lightly stuff.
Sew both halves directly under the nose.
😊 Cheeks
With pink yarn:
R1: MR 6
R2: inc around (12)
R3: (sc, inc) ×6 (18)
FO.
Sew slightly below each eye area.
😄 Mouth
With red yarn:
R1: MR 6, stop tightening before fully closing so it forms a small oval.
Flatten gently and sew between the center beard scallops for a soft smile.
👀 Eyes
Use black felt circles or crochet:
R1: MR 6
FO. Do not stuff.
Add a tiny white stitch for shine.
Sew evenly above the nose.
🤍 Eyebrows
Ch 7.
Row 1: sc across (6). FO.
Sew slightly curved above each eye.
🎅 Hat
With red yarn:
R1: MR 4
R2: (sc, inc) ×2 (6)
R3: sc around
R4: (2 sc, inc) ×2 (8)
R5: sc around
R6: (3 sc, inc) ×2 (10)
Continue increasing by +2 sts every 1–2 rounds until reaching 48 sts.
Then work 10–12 rounds even.
Do not stuff. Allow the top third to fold naturally to the right.
🤍 Hat Brim
With white yarn, ch 7.
Rows 1–52: sc across (6), ch 1, turn.
FO and join ends to form a loop.
Slide onto the hat base and sew around neatly.
🎈 Pom-Pom
Wrap white yarn approximately 150–160 times.
Tie tightly, trim to shape, and sew to the hat tip.
🪡 Assembly
- Sew the beige face circle onto the upper front pillow panel.
- Attach the beard so it meets the lower edge of the face.
- Add mustache, nose, cheeks, mouth, eyes, and eyebrows.
- Position the hat slightly diagonally on the left side, folding the tip to the right.
- Attach the brim and add the pom-pom.
- Join the front and back pillow panels with sc around 3 sides, insert the pillow form, then finish the final side.
🌟 Finishing Touches
• Gently fluff the beard and mustache.
• Shape the scallops evenly.
• Adjust the hat fold until it drapes naturally.
• Add a small touch of blush if desired.
This Santa pillow becomes a heartwarming holiday centerpiece — soft, plush, jolly, and textured everywhere it counts. Perfect beside the tree, on a cozy sofa, or gifted to someone who loves the magic of handmade Christmas décor.


I really like the Christmas patterns! Everything is beautiful