Bring the charming amphibian to life with this Amigurumi Salamander crochet pattern! 🦎✨ With its sleek body, expressive eyes, and adorable little limbs, this design captures the essence of these fascinating creatures in yarn form. Whether you’re crafting for a nature-inspired décor piece, a playful gift, or simply love reptile-themed amigurumi, this pattern is a fantastic addition to your collection.
Designed for intermediate crocheters, this pattern allows for customization in body textures, color variations, and even tiny accessories like embroidered spots or a miniature habitat to enhance its personality. Choose classic oranges and blacks for a realistic look or experiment with vibrant hues for a whimsical twist! Whether displayed as part of a wildlife setup or gifted to a fellow crochet enthusiast, this amigurumi salamander is sure to impress.
Grab your hook, select your favorite yarn, and let’s bring this delightful amphibian to life—one stitch at a time! 🧶✨
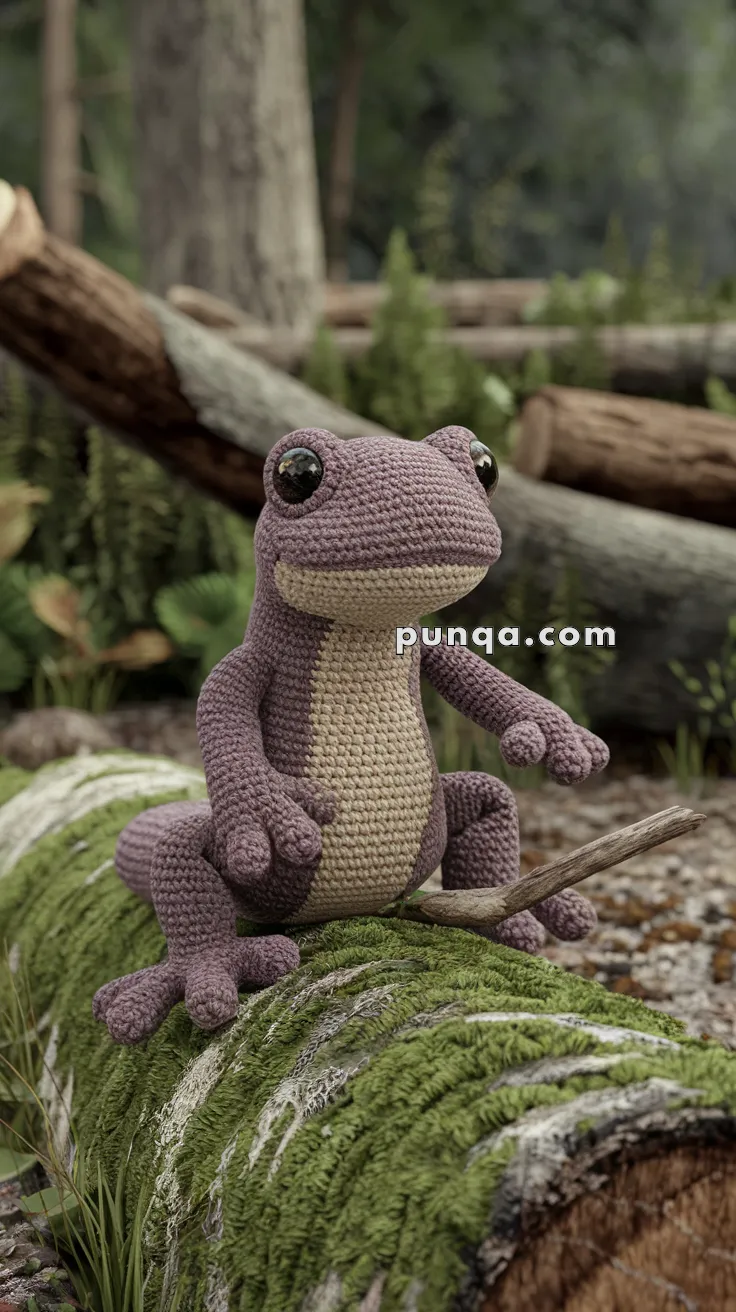
🦎 Amigurumi Woodland Salamander Crochet Pattern
Bring the forest floor to life with this expressive Amigurumi Salamander! With its soft purple body, beige belly, rounded snout, and large glossy eyes, this woodland creature looks ready to crawl across a mossy log. Designed for intermediate crocheters, it combines smooth shaping with natural curves for an authentic amphibian look.
✨ Skill Level
Intermediate – requires confident shaping, clean color changes, multiple sewn parts, and careful assembly for posture.
📏 Finished Size
Approx. 20–22 cm (8–9 in) tall when seated, using DK / light-worsted yarn and a 2.75–3.0 mm hook.
🧶 Materials
Yarn (DK / light-worsted):
-
Muted purple – head, back, limbs, tail
-
Warm beige – belly and lower jaw
Tools:
-
2.75–3.0 mm crochet hook
-
12 mm glossy black safety eyes
-
Fiberfill stuffing
-
Stitch markers
-
Yarn needle
Optional (for posing):
-
Thin floral wire or pipe cleaners (legs only)
🧵 Abbreviations (US Terms)
MR – Magic Ring
sc – Single Crochet
inc – Increase
dec – Decrease
sl st – Slip Stitch
ch – Chain
FO – Fasten Off
🟣 Head (Purple)
R1: 6 sc in MR (6)
R2: inc ×6 (12)
R3: (sc, inc) ×6 (18)
R4: (2 sc, inc) ×6 (24)
R5: (3 sc, inc) ×6 (30)
R6: (4 sc, inc) ×6 (36)
R7–R11: sc around (36)
Insert safety eyes between R8–R9, wide-set and forward.
R12: (4 sc, dec) ×6 (30)
R13: (3 sc, dec) ×6 (24)
R14: (2 sc, dec) ×6 (18)
Stuff firmly, keeping the face slightly rounded.
R15: (sc, dec) ×6 (12)
R16: dec ×6 (6)
FO, close.
👁 Eye Domes (Make 2 – Purple)
These are essential for photo accuracy.
R1: 6 sc in MR (6)
R2: inc ×6 (12)
R3: sc around (12)
Insert safety eye through center.
R4: (sc, dec) ×4 (8)
Lightly stuff.
FO.
Sew high on the head so eyes protrude slightly forward and upward.
🟤 Torso (Integrated Belly – Color Blocked)
Start in beige.
R1: 6 sc in MR (6)
R2: inc ×6 (12)
R3: (sc, inc) ×6 (18)
R4: (2 sc, inc) ×6 (24)
R5: (3 sc, inc) ×6 (30)
R6–R10: sc around (30)
Switch to purple, but keep front 10 sts beige each round to form a clean belly panel.
R11–R16: sc around (30)
R17: (3 sc, dec) ×6 (24)
R18–R19: sc around (24)
Stuff firmly, shaping into a gentle forward lean.
R20: (2 sc, dec) ×6 (18)
R21: (sc, dec) ×6 (12)
FO.
💜 Front Arms (Make 2)
Short and rounded.
R1: 6 sc in MR (6)
R2: (sc, inc) ×3 (9)
R3–R7: sc around (9)
Lightly stuff only the upper half.
FO.
Attach high on torso, angled slightly forward.
💜 Back Legs (Make 2)
Thicker, bent, weight-bearing.
R1: 6 sc in MR (6)
R2: inc ×6 (12)
R3: (3 sc, inc) ×3 (15)
R4–R5: sc around (15)
R6: (3 sc, dec) ×3 (12)
R7–R10: sc around (12)
R11: (2 sc, dec) ×3 (9)
Stuff firmly at top, lightly at bottom.
FO.
Sew low on body with knees angled outward and feet forward.
🌀 Tail (Short & Thick)
R1: 6 sc in MR (6)
R2: (sc, inc) ×3 (9)
R3–R10: sc around (9)
R11: (sc, dec) ×3 (6)
Stuff lightly.
FO.
Attach centered at back, curving gently to one side.
😊 Face Detail
-
Optional: a very short, straight beige stitch under the muzzle for a subtle mouth
-
Do not add smile curves or embroidery lines
🧍♂️ Shaping & Standing Pose (Important)
To match the photo’s natural log-sitting posture:
-
Angle the torso slightly forward when sewing the head
-
Back legs must sit wider than the body, acting as supports
-
Front arms should rest forward, not down
-
Tail acts as a light counterbalance, not a stand
Optional wiring:
Insert thin wire into back legs only if you want the salamander to grip a branch or log. Do not wire arms or tail.
🌿 Finishing Notes
This woodland salamander is all about calm realism. The clean belly panel, raised eyes, compact limbs, and relaxed posture work together to create a lifelike forest creature without unnecessary decoration. Display it on a shelf, log slice, or among plants for a quiet, natural accent that feels thoughtfully handmade.
A peaceful little forest friend—stitched one round at a time. 🌲🦎