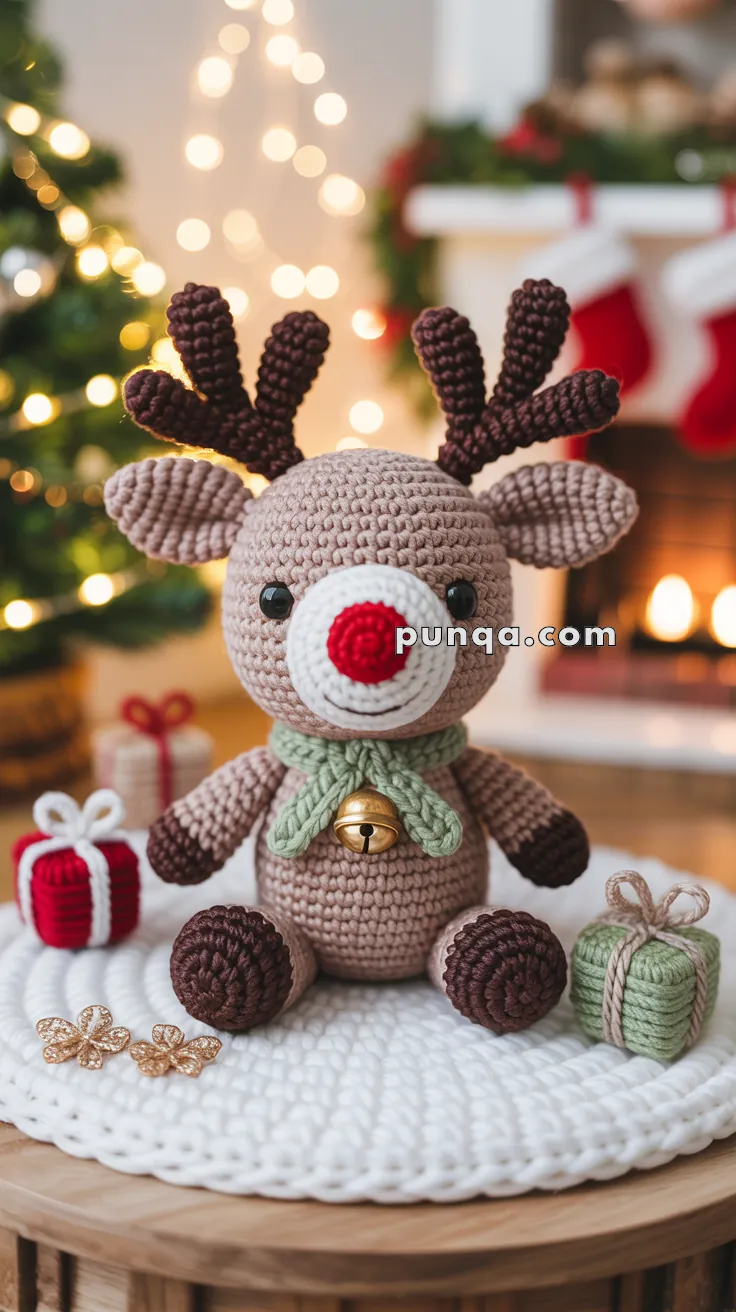
Get ready to stitch up some holiday cheer with the Amigurumi Rudolph the Reindeer, a festive crochet project that’s full of personality and charm! 🦌🎄 Complete with thick antlers, a cozy green scarf, and a jingling bell, this adorable reindeer is ready to prance into your seasonal décor or gift-giving lineup. Whether perched on a mantel, nestled under the tree, or wrapped up for someone special, Rudolph brings a joyful touch to every corner of the holidays.
Perfect for crocheters who love playful details and heartwarming makes, this pattern invites you to explore fun shaping, bold accessories, and a dash of whimsy. Add a twinkle to his eyes, customize his scarf, or pair him with other festive friends for a handmade winter wonderland. The Amigurumi Rudolph the Reindeer is a delightful way to stitch up holiday spirit—one loop at a time! 🧵✨
🦌 Amigurumi Rudolph the Reindeer Crochet Pattern
Nothing says Christmas like Rudolph with his shiny red nose! This adorable amigurumi reindeer, complete with thick antlers, a green scarf, and a jingling bell, is the perfect holiday decoration or handmade gift. Let’s bring this festive cutie to life!
✨ Skill Level
Intermediate – involves shaping, color changes, and assembly of small parts.
📏 Finished Size
Rudolph measures 8–10 inches (20–25 cm) tall when made with DK/worsted yarn and a 2.5–3.0 mm hook.
🧶 Materials
- Yarn (DK or Worsted weight):
- Light Brown – body, head, ears
- Dark Brown – hooves, antlers
- White – snout
- Red – nose
- Green – scarf
- Hook: 2.5–3.0 mm
- Safety eyes: 8–10 mm
- Fiberfill stuffing
- Small jingle bell
- Black embroidery floss (for smile)
- Tapestry needle, stitch marker, scissors
🧵 Abbreviations (US Terms)
- MR – Magic Ring
- sc – Single Crochet
- inc – Increase (2 sc in same st)
- dec – Decrease (sc2tog)
- sl st – Slip Stitch
- ch – Chain
- FO – Fasten Off
- BLO – Back Loop Only
🧠 Pattern Instructions
Head – Light Brown
- MR, 6 sc (6)
- inc × 6 (12)
- (1 sc, inc) × 6 (18)
- (2 sc, inc) × 6 (24)
- (3 sc, inc) × 6 (30)
6–13. sc around (30) - (3 sc, dec) × 6 (24)
- (2 sc, dec) × 6 (18)
👉 Place safety eyes between R9–10, about 6 sts apart.
👉 Stuff firmly. - (1 sc, dec) × 6 (12)
- dec × 6 (6), FO.
Snout – White (Flat Circle)
- MR, 6 sc (6)
- inc × 6 (12)
- (1 sc, inc) × 6 (18)
- (2 sc, inc) × 6 (24)
- (3 sc, inc) × 6 (30)
👉 FO, do not stuff. Sew flat to face covering the lower half of the head.
Nose – Red
- MR, 6 sc (6)
2–3. sc around (6)
👉 FO and sew to center of snout.
Mouth – Embroidery
Using black yarn, embroider a simple curved smile directly under the snout.
Ears (Make 2) – Light Brown
- MR, 6 sc (6)
- (1 sc, inc) × 3 (9)
3–5. sc around (9) - (1 sc, dec) × 3 (6)
👉 FO, flatten and sew to sides of head.
Antlers (Make 2) – Dark Brown
Branch A (Short):
- MR, 6 sc (6)
2–7. sc around (6), FO.
Branch B (Long):
- MR, 6 sc (6)
2–10. sc around (6), do not FO.
Join Branch A to B:
11–14. sc around both (~12 sts total)
👉 FO and sew firmly to head top.
Body – Light Brown
- MR, 6 sc (6)
- inc × 6 (12)
- (1 sc, inc) × 6 (18)
- (2 sc, inc) × 6 (24)
- (3 sc, inc) × 6 (30)
6–12. sc around (30) - (3 sc, dec) × 6 (24)
- (2 sc, dec) × 6 (18)
- (1 sc, dec) × 6 (12)
👉 Stuff well. - dec × 6 (6), FO.
👉 Sew head to body.
Arms (Make 2) – Dark Brown → Light Brown
- With dark brown: MR, 6 sc (6)
- inc × 6 (12)
- (1 sc, dec) × 4 (8)
- Switch to light brown, sc around (8)
5–10. sc around (8)
👉 Stuff lightly, FO, sew to body sides.
Legs (Make 2) – Dark Brown → Light Brown
- With dark brown: MR, 6 sc (6)
- inc × 6 (12)
3–4. sc around (12) - Switch to light brown, sc around (12)
6–10. sc around (12) → gives flat, forward-facing paws.
👉 Stuff firmly, FO, sew to base.
Scarf – Green
- Ch 40
- Row 1: sc across (39)
3–4. Rows 2–3: sc across (39) → wider scarf
👉 FO and tie around neck.
👉 Sew a small jingle bell at the center.
🎁 Gift Boxes (Optional)
Box Base:
- MR, 6 sc (6)
- inc × 6 (12)
- (1 sc, inc) × 6 (18)
- BLO sc around (18)
5–9. sc around (18) - (1 sc, dec) × 6 (12)
- dec × 6 (6), FO, stuff.
Ribbon & Bow:
- Ribbon Strips: Ch 16, sc across (15). Make 2.
- Bow: Ch 7, sl st to 1st ch, sc around ring, wrap yarn around center, FO.
Attach ribbon around box and bow on top.
🧷 Final Assembly
- Sew snout flat to face.
- Attach nose and embroider smile.
- Sew on ears, antlers, arms, and legs.
- Tie scarf, add bell.
- Place Rudolph with little gift boxes for a cozy Christmas display.
🎄 Final Thoughts
Your cuddly Rudolph the Reindeer is complete! With his round white snout, bright red nose, thick antlers, and a festive scarf, he’s ready to bring holiday cheer to your home. Add the gift boxes for an extra magical touch!