Get ready to stitch up some serious puppy love with this Amigurumi Rottweiler Puppy crochet pattern! 🐶🧶 With its oversized paws, floppy ears, and soulful little eyes, this cuddly companion captures all the charm of a Rottie pup in miniature form. Whether you’re crafting a gift for a dog lover or adding to your own menagerie of handmade pets, this pattern brings playful energy and irresistible cuteness to your crochet hook.
From its soft snout to its wag-worthy tail, every detail is designed to celebrate the sweet, sturdy personality of a Rottweiler puppy. You can personalize your pup with accessories like a tiny collar, a name tag, or even a crocheted chew toy for extra flair. Perfect for intermediate crocheters looking for a heartwarming project, this little Rottie is sure to become a favorite snuggle buddy—no leash required! 🐾💛
🐾 Amigurumi Rottweiler Puppy Crochet Pattern
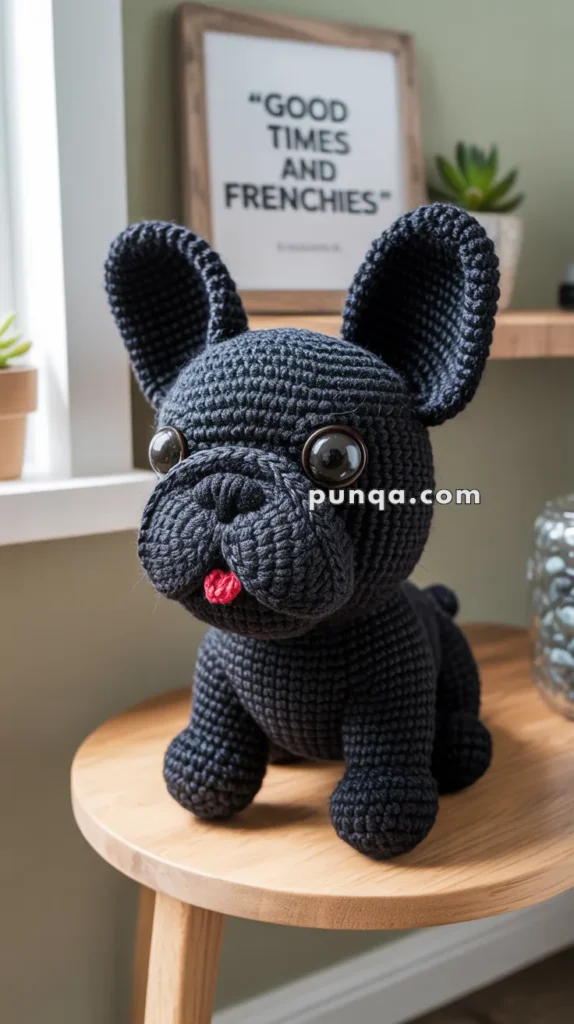
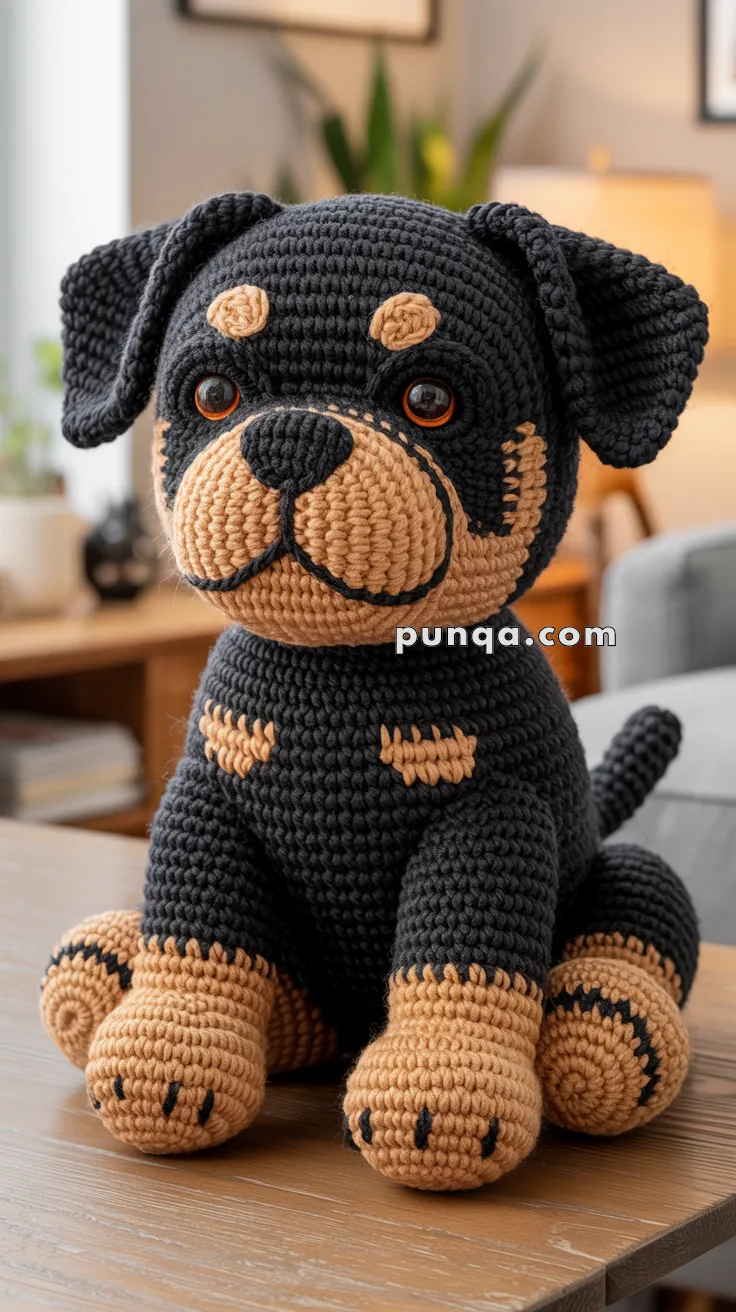
This adorable Rottweiler puppy has floppy ears, a big tan muzzle, amber eyes, and realistic markings that bring the breed to life. With chunky paws and a cuddly sitting posture, this amigurumi is the perfect gift for dog lovers or a sweet handmade keepsake.
✨ Skill Level
Intermediate – shaping, color changes, embroidery, and assembly.
📏 Finished Size
Approx. 28 cm (11 in) tall using worsted yarn and a 3.0 mm hook.
🧶 Materials
- Worsted yarn:
- Black (main body, ears, tail) – ~120 g
- Tan/Beige (muzzle, paws, markings) – ~70 g
- 3.0 mm crochet hook
- 14 mm amber/brown safety eyes
- Fiberfill stuffing
- Tapestry needle, stitch markers, scissors, sewing pins
🔤 Abbreviations (US Terms)
MR = Magic Ring
sc = single crochet
inc = increase (2 sc in same st)
dec = decrease (sc2tog)
sl st = slip stitch
FO = fasten off
🧵 Pattern Instructions
🐶 Head (Black)
- MR, 6 sc [6]
- inc in each [12]
- (sc, inc) × 6 [18]
- (2 sc, inc) × 6 [24]
- (3 sc, inc) × 6 [30]
- (4 sc, inc) × 6 [36]
- (5 sc, inc) × 6 [42]
- (6 sc, inc) × 6 [48]
9–15. sc [48] - (6 sc, dec) × 6 [42]
- (5 sc, dec) × 6 [36]
- (4 sc, dec) × 6 [30]
- (3 sc, dec) × 6 [24]
- (2 sc, dec) × 6 [18]
FO, stuff.
👉 Insert safety eyes between R11–12, ~12 sts apart.
🐾 Muzzle (Tan)
- MR, 6 sc [6]
- inc in each [12]
- (sc, inc) × 6 [18]
- (2 sc, inc) × 6 [24]
- (3 sc, inc) × 6 [30]
6–8. sc [30]
FO, stuff firmly.
👉 Sew centered below eyes.
👉 Embroider triangular black nose, vertical line, and smile.
👉 Outline muzzle top edge with black slip stitch embroidery.
🐕 Cheek Patches (Tan, 2 pcs)
- Ch 5, work around chain: sc 3, 3 sc in last, continue other side sc 3 → [9].
- FO, leave tail.
👉 Sew patches so they overlap muzzle edges slightly for seamless blending.
🐕 Ears × 2 (Black)
- MR, 6 sc [6]
- inc in each [12]
- (sc, inc) × 6 [18]
4–6. sc [18] - (sc, dec) × 6 [12]
8–9. sc [12] - sc [12] → extra round for longer floppy ear
FO. Flatten, sew to head sides so they flop forward.
🐶 Body (Black)
- MR, 6 sc [6]
- inc in each [12]
- (sc, inc) × 6 [18]
- (2 sc, inc) × 6 [24]
- (3 sc, inc) × 6 [30]
- (4 sc, inc) × 6 [36]
7–13. sc [36] - (4 sc, dec) × 6 [30]
- (3 sc, dec) × 6 [24]
- (2 sc, dec) × 6 [18]
FO, stuff.
🐾 Front Legs × 2 (Tan + Black)
With tan:
- MR, 6 sc [6]
- inc in each [12]
- (sc, inc) × 6 [18]
- (2 sc, inc) × 6 [24]
5–8. sc [24] → 2 extra rounds for chunkier paws
Switch to black:
9–10. sc [24] - (2 sc, dec) × 6 [18]
12–14. sc [18] - (sc, dec) × 6 [12]
FO, stuff.
👉 Embroider 3 black claws on each paw.
🐾 Back Legs × 2 (Tan + Black)
With tan:
- MR, 6 sc [6]
- inc in each [12]
- (sc, inc) × 6 [18]
4–5. sc [18]
Switch to black:
6–14. sc [18] - (sc, dec) × 6 [12]
FO, stuff. Sew angled outward for sitting pose.
🐕 Tail (Black)
- MR, 6 sc [6]
2–9. sc [6]
FO, stuff lightly, sew to back.
🔸 Markings (Tan)
- Eyebrows × 2: MR, 6 sc, FO. Sew above eyes.
- Chest patches × 2: MR, 6 sc. (sc, inc) × 3 → [9]. Flatten into oval. Sew to chest.
- Cheek patches: As above, stitched overlapping muzzle for smooth look.
- Optional paw pads: Embroider or crochet small ovals.
🧵 Assembly
- Sew head to body.
- Attach front legs under chest; back legs angled outward.
- Sew tail at back.
- Attach muzzle; embroider nose & mouth.
- Sew floppy ears.
- Add eyebrows, chest patches, and cheek patches.
- Outline muzzle top with black slip stitches.
- Embroider paw claws.
🎀 Finishing Touches
✔ Shape snout with fingers for extra bulge.
✔ Angle ears forward for natural droop.
✔ Blend cheek patches into muzzle for realism.
✔ Adjust chest patch placement to mirror photo.
🐶 Final Look
Your Amigurumi Rottweiler Puppy is complete!
- Chunky sitting posture with oversized paws 🐾
- Big tan muzzle and cheek patches seamlessly blended
- Droopy floppy ears and long tail
- Breed-accurate tan eyebrows and chest patches
This huggable pup is perfect for nurseries, gifts, or any dog lover’s collection.
💡 Pro Tip: Change ear shapes or markings to create other dog breeds!