Welcome to the romantic and timeless world of floral amigurumi! 🌹🧶 Today, I’m delighted to share my FREE crochet pattern for an Amigurumi Rose—a delicate and everlasting bloom that captures the beauty of nature in yarn. Whether you’re crafting a heartfelt gift for a loved one, creating a bouquet that never wilts, or simply adding a touch of floral elegance to your home, this design features velvety petals, a graceful stem, and lifelike details that celebrate the rose’s classic charm.
This design blends elegance and simplicity, with step-by-step instructions for the rose’s layered petals, textured leaves, and optional dewdrop beads for extra realism. Choose passionate reds, soft pinks, or creamy whites for a traditional look—or experiment with bold blues or golden hues for a whimsical twist! 🌸 So grab your hooks, pick your most romantic yarn, and let’s crochet a flower that blooms stitch by stitch. “A rose by any other yarn would smell as sweet… if yarn could smell!” ✨🧶
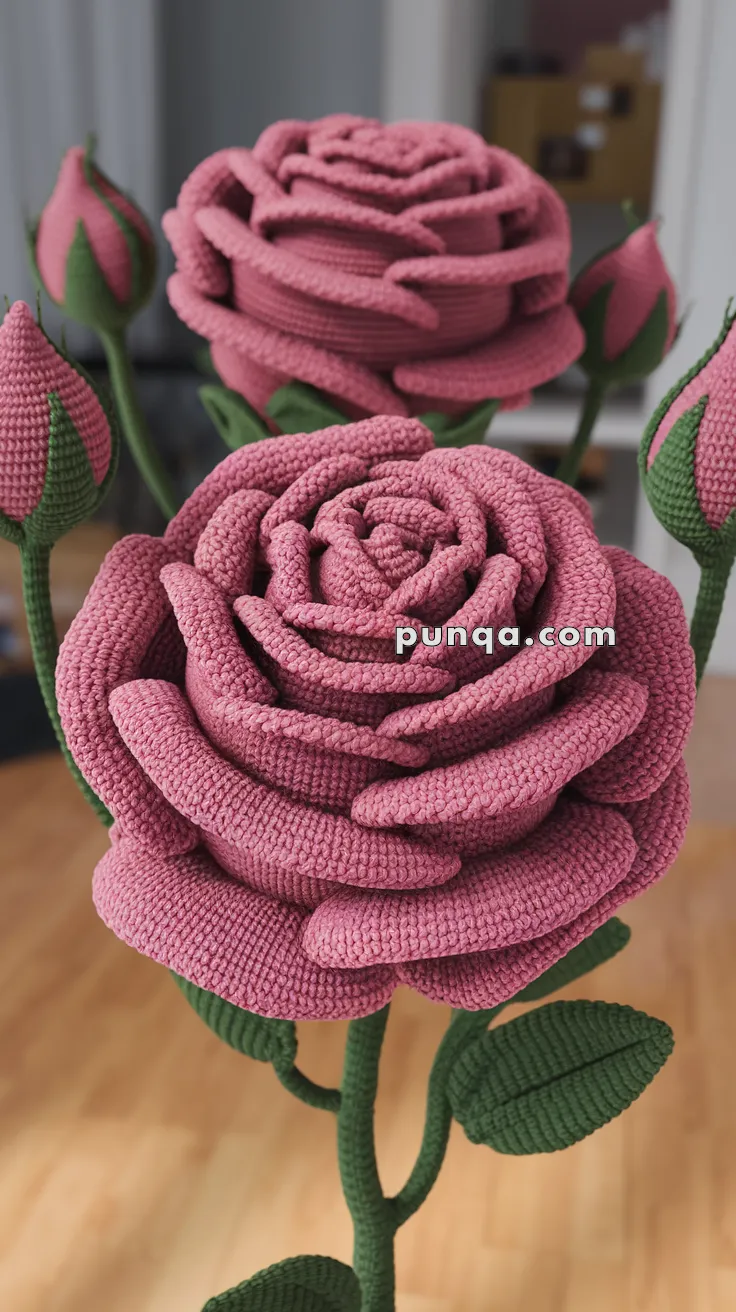
🌹 Amigurumi Rose Crochet Pattern
This highly detailed rose features layered, realistic petals, a firm green stem, sculpted leaves, and graceful buds. A beautiful, everlasting flower—perfect for bouquets, gifts, or home decor!
✨ Skill Level
Advanced – Requires confident shaping, structured assembly, and petal layering.
📏 Finished Size
Approx. 10–14″ (25–35 cm) tall depending on yarn and hook size.
🧶 Materials
-
Yarn (Cotton or Velvet, DK/Light Worsted):
-
Rose pink (petals)
-
Deep green (stem, leaves, calyx)
-
Optional: light green (accents for buds)
-
Hook size: 2.5–3 mm
-
Wire (for stems & shaping)
-
Floral tape or green yarn to wrap stems
-
Polyfill (for buds if desired)
-
Tapestry needle
-
Stitch markers & glue (optional for securing base petals)
🧵 Abbreviations (US Terms)
🌹 Center Rose Bud (Start of Bloom)
With pink:
-
MR, 6 sc
-
(inc) x6 (12)
-
sc around (12)
-
(1 sc, inc) x6 (18)
5–6. sc around (18)
-
(2 sc, inc) x6 (24)
-
sc around
-
FO and stuff
This forms the center around which the first layer of petals wraps.
🌸 Petals (Make in 3–4 Size Tiers)
Small Petals (Make 6):
-
Ch 9
-
Row 1: sc, hdc, 4 dc, hdc, sc
-
FO, leave long tail for sewing
Medium Petals (Make 5):
-
Ch 12
-
Row 1: sc, hdc, 6 dc, hdc, sc
-
FO, leave tail
Large Petals (Make 5–7):
-
Ch 16
-
Row 1: sc, hdc, 10 dc, hdc, sc
-
FO, leave tail
Extra-Large Petals (Optional for Fullness – Make 4):
-
Ch 20
-
Row 1: sc, hdc, 12–14 dc, hdc, sc
-
FO, leave long tail
🧷 Assembling the Rose Head
-
Start with the center bud.
-
Sew small petals tightly around the bud, slightly overlapping each one.
-
Add medium petals around the first layer. Angle each one outward for blooming shape.
-
Continue layering large and optional extra-large petals until the rose looks full and realistic.
-
Curl outer edges slightly with fingers or using glue if desired.
🌱 Calyx (Green Base)
-
MR, 5 sc
-
(ch 6, sc in 2nd ch from hook, hdc, dc, dc, tr, sl st in next st of ring) x5 to form 5 pointed sepals
-
FO and sew underneath the flower head
🌿 Stem (Wire-wrapped)
-
Cut 12–14″ floral wire
-
Insert into rose base
-
Wrap with green floral tape or crochet a tight green tube (e.g., ch 40, sc around to desired length) and slide over
-
Secure base of head to stem with glue or extra yarn
🍃 Leaves (Make 3–5)
-
Ch 11
-
sc in 2nd ch, hdc, 2 dc, 2 tr, 2 dc, hdc, sc
-
Ch 1, turn and repeat down other side for symmetrical leaf
-
FO and leave long tail
-
Sew or wrap leaves to stem at intervals
🌹 Rose Buds (Optional – Make 2–4)
-
MR, 6 sc
-
inc x6 (12)
-
(1 sc, inc) x6 (18)
4–5. sc around (18)
-
dec x9 (9)
-
FO, stuff lightly
-
Sew calyx (ch 4, sl st, repeat for 4–5 sepals) around base
-
Attach to stem or a separate wire stem
🧷 Final Assembly Tips
-
Wrap base of rose head securely with yarn or glue
-
Attach leaves and buds symmetrically or naturally along stem
-
Curl petal edges slightly outward for a more natural shape
-
Use wire or pipe cleaners inside petals for adjustable shaping (optional)
This breathtaking rose will never wilt—perfect for eternal bouquets, wedding keepsakes, or floral arrangements. 💐🌹

