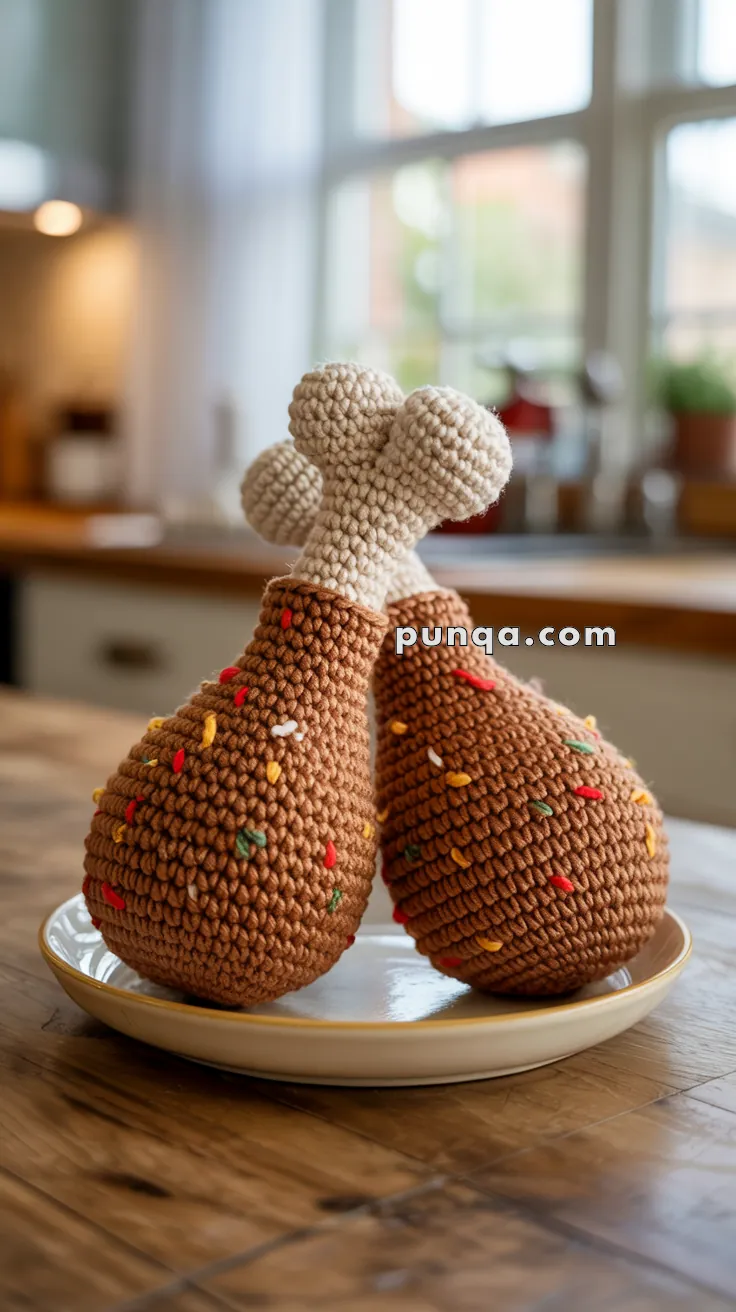
Serve up some handmade fun with the Amigurumi Roast Chicken Drumsticks, a crochet project that’s as quirky as it is cozy! 🍗🧶 Designed to closely match the photo, these drumsticks feature a chunky, pear-shaped meat body, a short angled bone with two soft lobes, and a tight single-crochet texture that gives them a realistic feel. Scattered embroidered seasoning flecks add a playful finishing touch, making them look deliciously handmade.
With their intentionally organic, not-too-perfect shape, these drumsticks capture the charm of homemade crochet while doubling as whimsical décor or imaginative play food. Perfect for kitchen displays, pretend cooking sets, or gifting to food lovers, the Amigurumi Roast Chicken Drumsticks are a joyful way to crochet flavor, creativity, and a sprinkle of handmade magic—one loop at a time! ✨🍴🧵
🍗 Crochet Roast Chicken Drumsticks Pattern
These crocheted roast chicken drumsticks are a fun and cozy take on a classic comfort food, perfect for adding a touch of handmade charm to your kitchen or play space.
This pattern creates one drumstick. Make two for a matching set.
✨ Skill Level
Intermediate
(continuous rounds, shaping with increases/decreases, surface embroidery)
📏 Finished Size
Approximately 16–18 cm (6.5–7 in) tall
- Bone: ~4 cm
- Meat body: ~12–13 cm
Size may vary slightly depending on tension.
🧶 Materials
- Worsted weight yarn
- Medium brown (meat)
- Warm cream or off-white (bone)
- Small scraps of red, yellow, green, and white (seasoning)
- 3.25–3.5 mm crochet hook
- Polyester fiberfill
- Yarn needle
- Scissors
📖 Abbreviations (US Terms)
- MR – magic ring
- sc – single crochet
- inc – increase (2 sc in one stitch)
- dec – invisible decrease
- st(s) – stitch(es)
Work in continuous rounds unless stated otherwise.
🦴 Bone (top of drumstick)
The bone is short, thick, and slightly irregular, with two uneven lobes.
Bone Shaft
R1: MR 6 sc (6)
R2: inc in each st (12)
R3–5: sc around (12)
Lightly stuff only the upper half of the bone.
Bone Lobes (worked flat)
Divide the top stitches visually into two opposite sections.
For each lobe:
- Attach yarn
- Row 1: sc 5, turn
- Row 2: dec, sc, dec (3)
Fasten off.
Do not overstuff; the lobes should be soft and slightly flattened.
🍗 Meat Body (worked downward from the bone)
Attach brown yarn at the base of the bone.
R1: sc 12 around (tight collar round)
R2: (sc, inc) ×6 (18)
R3: sc around (18)
R4: (2 sc, inc) ×6 (24)
R5: sc around (24)
R6: (3 sc, inc) ×6 (30)
R7: sc around (30)
R8: (4 sc, inc) ×6 (36)
R9–11: sc around (36)
Begin stuffing firmly, shaping the body so the widest point sits low, near the bottom.
R12: (4 sc, dec) ×6 (30)
R13: sc around (30)
R14: (3 sc, dec) ×6 (24)
R15: sc around (24)
R16: (2 sc, dec) ×6 (18)
R17: (sc, dec) ×6 (12)
R18: dec ×6 (6)
Fasten off and close. Gently press the base so it sits flat and rounded, not pointed.
🌈 Seasoning Specks
Using small yarn scraps and a yarn needle, embroider short straight stitches directly onto the meat body.
- Place stitches randomly, with no pattern
- Concentrate most specks around the middle of the drumstick
- Use more red and yellow, fewer green and white
- Keep stitches short and subtle
This irregular placement is key to the realistic look.
🧵 Final Shaping
- Gently tilt the bone forward so it isn’t perfectly vertical
- Massage the meat body lightly to soften the shape
- Allow the finished drumstick to lean naturally when set down
Repeat all steps to make the second drumstick.
🍽 Styling Ideas
- Kitchen or dining shelf décor
- Play kitchen food
- Market or craft fair display
- Fall or Thanksgiving table accent
Once finished, these drumsticks have a satisfyingly weighty feel and a naturally relaxed shape that makes them look right at home resting together on a plate or shelf. Small variations between each piece only add to their charm, reinforcing the handmade quality that makes them special. Enjoy styling them, gifting them, or pairing them with other crochet food projects to build a cozy, personality-filled kitchen collection.