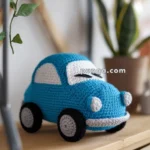
Welcome to the sleek and stylish world of amigurumi! 🚗✨ Today, I’m excited to share my free crochet pattern for an Amigurumi Roadster—a dynamic and detailed creation perfect for car enthusiasts, collectors, or anyone who enjoys crafting structured and lifelike plush designs! 🧶 Whether you love stitching up miniature vehicles, experimenting with aerodynamic shaping, or simply want to add a classic roadster to your handmade lineup, this pattern will guide you through crafting a beautifully sculpted plush with smooth curves, sporty details, and a touch of high-speed charm! 🏁
This design embraces bold colors, precise shaping, and intricate details to bring an energetic and sophisticated presence to your crochet projects! 🧶✨ I’ve carefully outlined each step to ensure your Amigurumi Roadster turns out just right—ready to race into your collection or become a treasured handmade gift! 🎁 So grab your hooks, pick out fiery reds, sleek silvers, or deep blacks, and let’s stitch up a legendary roadster! 🚗
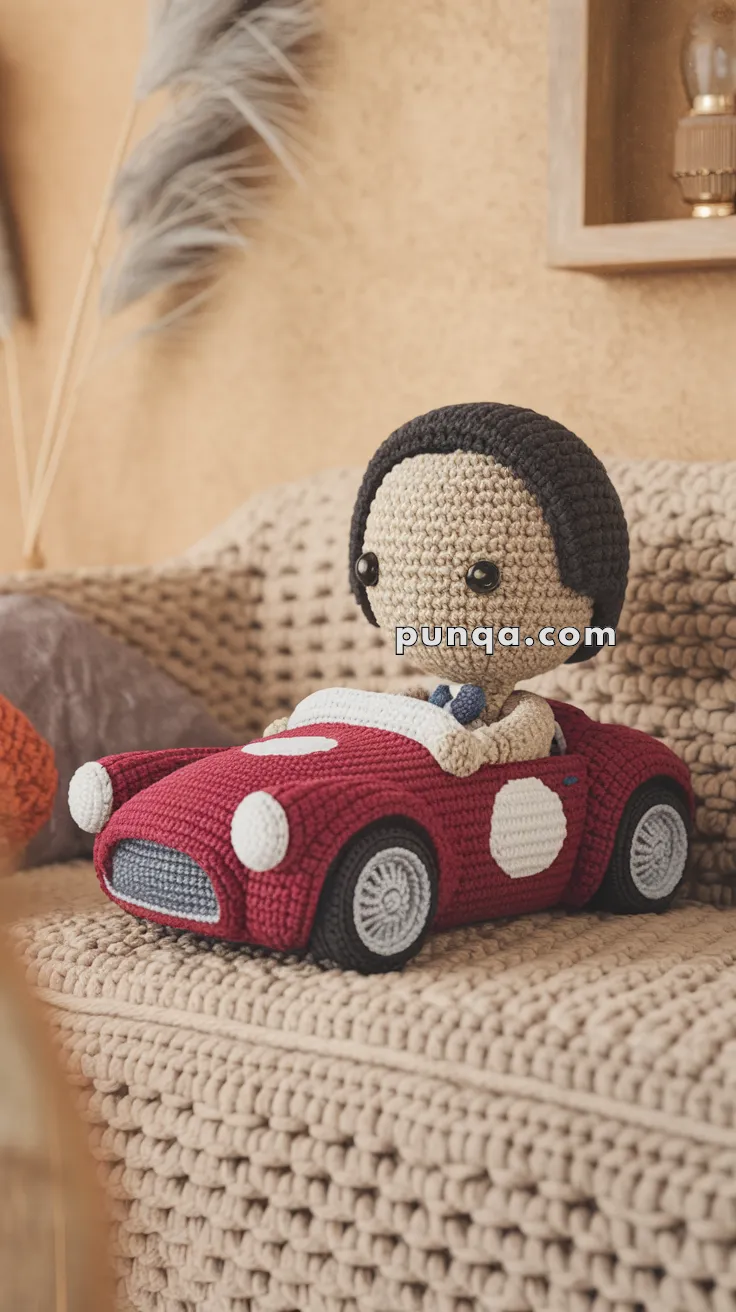
🏎️ Amigurumi Roadster with Driver – Free Crochet Pattern
Bring this stylish, vintage-inspired crochet roadster to life! With curved wheel wells, detailed tires, and a suited driver figure, it’s a charming centerpiece or imaginative toy.
✨ Skill Level
Intermediate to Advanced – includes shaping, color changes, surface details, and amigurumi character work.
📏 Finished Size
Approx. 10″ (25 cm) long, 5″ (13 cm) tall using worsted-weight yarn.
🧶 Materials Needed
-
Worsted weight yarn in:
-
Red (car body)
-
White (headlights, racing decals)
-
Black (tires, grille outline, eyes, hair)
-
Light gray (rims, grille mesh)
-
Beige (driver’s skin)
-
Navy/dark blue (suit)
-
-
3.0–3.5 mm crochet hook
-
Stitch markers
-
Fiberfill stuffing
-
Safety eyes (12 mm for driver)
-
Wire (optional: to shape arms or windshield)
-
Yarn needle
-
Small piece of plastic canvas or cardboard (for base support)
🧵 Abbreviations (US Terms)
-
MR – Magic ring
-
ch – Chain
-
sc – Single crochet
-
inc – Increase (2 sc in same stitch)
-
dec – Decrease (sc 2 together)
-
sl st – Slip stitch
-
FO – Fasten off
-
BLO – Back loop only
-
FLO – Front loop only
🛻 Pattern Instructions
🚗 Roadster Body (Red)
Main Body – worked in rounds, then rows
-
MR, 6 sc (6)
-
inc x6 (12)
-
(sc, inc) x6 (18)
-
(2 sc, inc) x6 (24)
-
(3 sc, inc) x6 (30)
6–10. sc around (30) -
Begin oval shaping:
-
ch 1, turn, sc 28, leave last 2 unworked
12–20. Work flat in rows to create upper body shape: -
ch 1, turn, sc across (decrease 1 at start and end of every 2nd row)
-
Continue until narrowed to ~16 stitches across
-
-
FO and leave tail for joining later.
🚘 Front Grille & Headlights
Grille (Light gray)
-
Ch 8
-
sc across 7
3–5. sc in each, ch 1, turn
Switch to black and surface crochet mesh (optional)
Sew to front-center of car body.
Headlights (White, make 2)
-
MR, 6 sc
-
inc x6 (12)
FO and sew to either side of the grille.
Racing Decals (White)
-
Use white to make 2 flat ovals (ch 7, sc around) or sew on white felt rounds.
🛞 Wheels (Make 4)
Tire (Black)
-
MR, 6 sc (6)
-
inc x6 (12)
-
(sc, inc) x6 (18)
-
sc in BLO around (18)
-
sc in each (18)
FO.
Rim (Gray)
-
MR, 6 sc (6)
-
inc x6 (12)
-
(sc, inc) x6 (18)
Sew to the front of each tire.
Sew wheels symmetrically to the car base.
🧍 Driver Head (Beige)
-
MR, 6 sc
-
inc x6 (12)
-
(sc, inc) x6 (18)
-
(2 sc, inc) x6 (24)
5–10. sc in each (24) -
(2 sc, dec) x6 (18)
-
(sc, dec) x6 (12)
-
dec x6 (6)
Stuff firmly and FO.
Attach safety eyes, embroider smile and blush.
👔 Driver Torso
Shirt/Suit (Navy)
-
MR, 6 sc
-
inc x6 (12)
-
sc in each (12)
-
(3 sc, inc) x3 (15)
5–7. sc in each
FO and sew under the head.
Arms (Make 2, Beige to Navy)
-
MR, 6 sc (Beige)
-
sc in each
Switch to navy
3–6. sc
FO and attach to sides, positioned as if holding steering wheel.
Hair (Black)
-
Create a cap:
MR, 6 sc -
inc x6 (12)
-
(sc, inc) x6 (18)
-
(2 sc, inc) x6 (24)
-
(3 sc, inc) x6 (30)
FO and sew neatly around head.
🪑 Seat & Interior (optional)
-
Use black yarn to make a small rectangle seat base
-
You may stitch a small blue belt across chest or add a white steering wheel using a crocheted ring or felt circle
🧷 Finishing Touches
-
Embroider dashboard details or door seams
-
Add a thin strip of white embroidery as a windshield outline
-
Optionally, insert a wire outline for the windshield
Now your adorable Amigurumi Roadster with Driver is ready to zoom into the hearts of everyone who sees it! 🏁💕