Welcome to the vibrant and playful world of amigurumi! 🌈🦖 Today, I’m excited to share my free crochet pattern for an Amigurumi Rainbow Dinosaur—a cheerful and colorful creation perfect for dinosaur lovers, whimsical décor, or anyone who enjoys crafting expressive and eye-catching plush designs! 🎨 Whether you love stitching up prehistoric creatures, creating textured and detailed figures, or simply want to add a bright and joyful dinosaur to your handmade lineup, this pattern will guide you through crafting a beautifully sculpted plush with bold rainbow hues, adorable spikes, and a touch of prehistoric charm! 💖
This design embraces vivid colors, rounded shapes, and delightful details to bring a fun and adventurous presence to your crochet projects! 🧶✨ I’ve carefully outlined each step to ensure your Amigurumi Rainbow Dinosaur turns out just right—ready to brighten up your space or become a treasured handmade gift! 🎁 So grab your hooks, pick out fiery reds, sunny yellows, cool blues, and lush greens, and let’s stitch up a dazzling dinosaur! 🦕
🦕 Amigurumi Rainbow Dinosaur Crochet Pattern
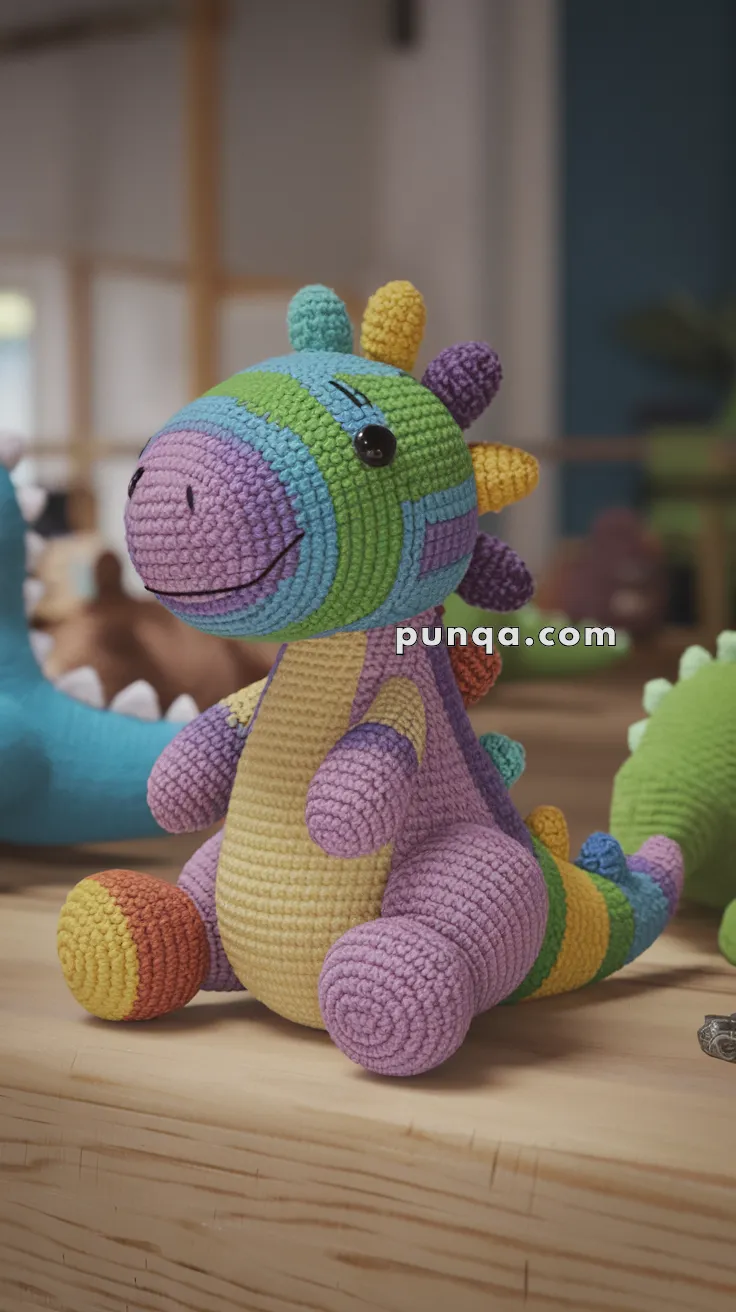
This cheerful rainbow dinosaur is designed to sit proudly on a shelf just like the reference photo. With soft pastel colors, a rounded belly, chunky feet, and a friendly smile, this dinosaur is perfect for nursery décor, gifts, or a playful handmade companion.
✨ Skill Level
Intermediate
Includes shaping, color changes, and multi-part assembly.
📏 Finished Size
Approx. 26–28 cm (10–11 inches) tall when sitting
Using worsted cotton yarn and a 3.25–3.5 mm hook
🧶 Materials
Worsted / DK cotton yarn:
-
Pastel purple (main body, arms, legs)
-
Aqua blue
-
Grass green
-
Lemon yellow (belly)
-
Soft pink (snout)
-
Mustard yellow (spikes)
-
Lilac (spikes)
-
Teal (spikes)
-
Orange (tail end & foot accents)
10 mm safety eyes
Black embroidery thread (smile + eyelashes)
Polyester stuffing
Tapestry needle
Stitch marker
Hook: 3.25–3.5 mm
🧵 Abbreviations (US Terms)
MR – Magic ring
sc – Single crochet
inc – Increase
dec – Decrease
sl st – Slip stitch
FO – Fasten off
🦖 Head (large rounded snout)
Start with pink
-
MR 6
-
inc ×6 (12)
-
(1 sc, inc) ×6 (18)
-
(2 sc, inc) ×6 (24)
-
(3 sc, inc) ×6 (30)
-
(4 sc, inc) ×6 (36)
7–10. sc around (36)
Change to aqua
11–12. sc around (36)
Change to green
13–15. sc around (36)
Insert eyes between rounds 9–10, spaced 8 stitches apart.
Embroider curved smile and small lash line.
Stuff firmly.
-
(4 sc, dec) ×6 (30)
-
(3 sc, dec) ×6 (24)
-
(2 sc, dec) ×6 (18)
-
(1 sc, dec) ×6 (12)
-
dec ×6 (6)
FO and close.
🦖 Body (thick spiral cylinder)
Start with yellow
-
MR 6
-
inc ×6 (12)
-
(1 sc, inc) ×6 (18)
-
(2 sc, inc) ×6 (24)
-
(3 sc, inc) ×6 (30)
-
(4 sc, inc) ×6 (36)
Now change colors every 4 rounds:
7–10. Purple
11–14. Green
15–18. Aqua
19–22. Yellow
23–26. Purple
Stuff firmly.
-
(4 sc, dec) ×6 (30)
-
(3 sc, dec) ×6 (24)
-
(2 sc, dec) ×6 (18)
-
(1 sc, dec) ×6 (12)
-
dec ×6 (6)
FO and close.
🦖 Belly Panel (oval front)
With yellow
Ch 10
Work around oval:
-
sc 8, inc 3, sc 8, inc 3 (22)
-
sc 8, inc ×3, sc 8, inc ×3 (28)
3–10. sc around (28)
FO and sew centered on front.
🦖 Arms (make 2)
With purple
-
MR 6
-
inc ×6 (12)
3–7. sc around (12) -
(2 sc, dec) ×3 (9)
Lightly stuff, flatten slightly.
FO.
🦖 Legs (make 2)
Start with orange sole
-
MR 6
-
inc ×6 (12)
-
(1 sc, inc) ×6 (18)
4–5. sc around (18)
Change to purple
6–11. sc around (18)
12. (2 sc, dec) ×6 (12)
13. dec ×6 (6)
Stuff firmly.
FO.
🦖 Tail (long and thick)
Start with yellow
-
MR 6
-
inc ×6 (12)
3–6. sc around (12)
Change colors every 2 rounds:
Green → Aqua → Purple → Orange
Continue until 16 rounds total.
-
(2 sc, dec) ×4 (8)
-
(1 sc, dec) ×3 (6)
-
dec ×3 (3)
FO and close.
🦖 Spikes (make 8)
Alternate colors: mustard, teal, lilac
-
MR 4
-
inc ×4 (8)
3–4. sc around (8) -
(1 sc, dec) ×3 (6)
Lightly stuff.
FO.
🧩 Assembly
• Sew head slightly tilted forward onto body
• Attach belly panel
• Sew legs wide apart for sitting pose
• Attach arms slightly forward
• Sew tail low at back so it rests on floor
• Sew spikes from top of head down spine
• Embroider smile and lashes last
💛 Final Touch
Your Rainbow Dinosaur is now complete — sitting proudly with a round belly, chunky feet, long striped tail, and a gentle smile just like the reference photo. This soft pastel dinosaur is perfect for nursery décor, handmade gifts, or a colorful addition to any amigurumi collection.
Happy crocheting! 🌈🦕