Welcome to the colorful and cuddly world of amigurumi! 🌈🧸 Today, I’m excited to share my free crochet pattern for an Amigurumi Rainbow Bear—a cheerful and vibrant creation perfect for plush lovers, whimsical décor, or anyone who enjoys crafting expressive and heartwarming designs! 🎨 Whether you love stitching up adorable bears, creating textured and detailed figures, or simply want to add a bright and joyful teddy to your handmade lineup, this pattern will guide you through crafting a beautifully sculpted plush with bold rainbow hues, soft ears, and a touch of cozy charm! 💖
This design embraces vivid colors, rounded shapes, and delightful details to bring a fun and uplifting presence to your crochet projects! 🧶✨ I’ve carefully outlined each step to ensure your Amigurumi Rainbow Bear turns out just right—ready to brighten up your space or become a treasured handmade gift! 🎁 So grab your hooks, pick out fiery reds, sunny yellows, cool blues, and lush greens, and let’s stitch up a dazzling teddy bear! 🧸
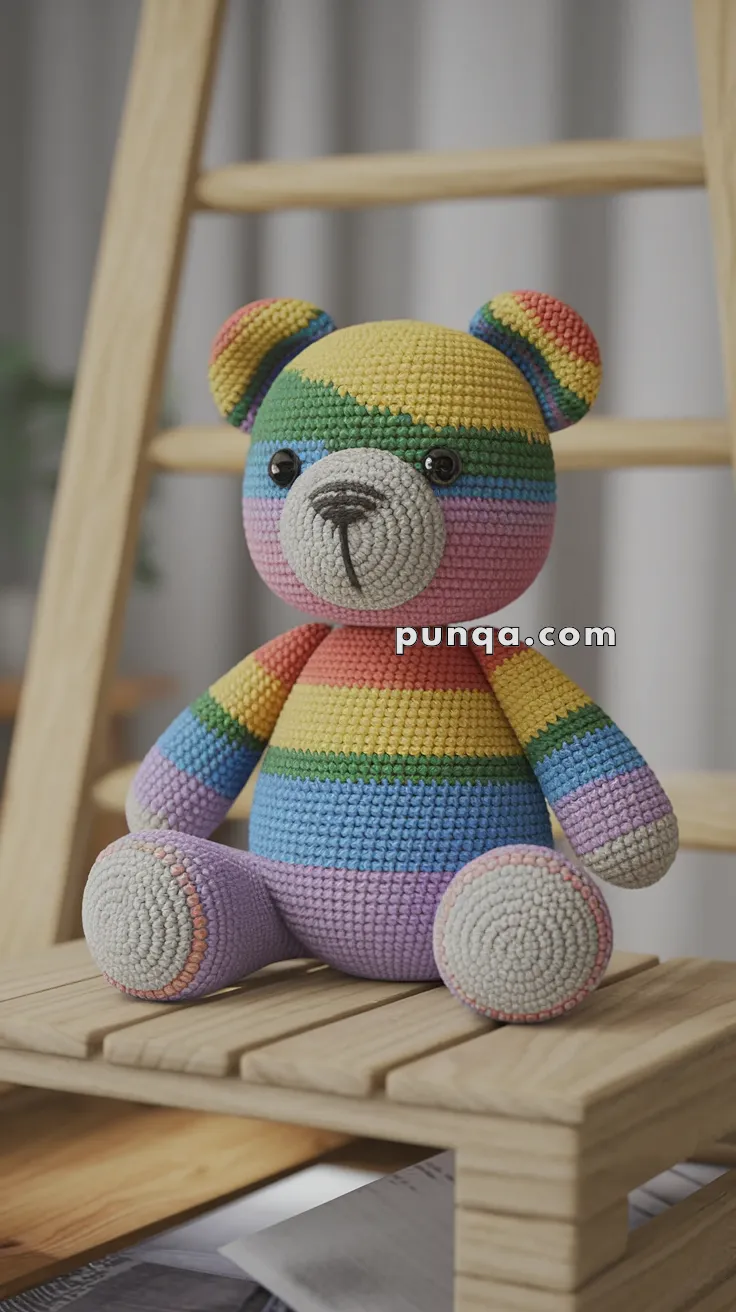
🧸 Rainbow Bear – FREE Crochet Pattern
This adorable rainbow bear features a plump body, classic round snout, pastel rainbow stripes, and cute gray accents. Let’s make your cuddly creation come to life!
🧶 Skill Level
Easy to Intermediate – Involves basic shaping and color changes.
📏 Finished Size
Approximately 25–28 cm (10–11 inches) tall when made with worsted weight yarn and 3.5 mm hook.
🧵 Materials
-
Worsted weight yarn in:
-
Rainbow shades: Red, Orange, Yellow, Green, Blue, Purple, Pink
-
Gray (snout, paw pads, ear centers)
-
Black embroidery thread (nose, smile)
-
-
Crochet hook 3.5 mm
-
10 mm black safety eyes
-
Yarn needle
-
Polyester fiberfill
-
Stitch marker
-
Scissors
🔁 Abbreviations (US Terms)
MR – Magic Ring
sc – Single Crochet
inc – Increase (2 sc in same st)
dec – Decrease (sc2tog)
sl st – Slip Stitch
ch – Chain
FO – Fasten Off
BLO – Back Loop Only
🐻 Pattern Instructions
🌈 Head (Start with Yellow, switch colors as desired)
-
MR, 6 sc
-
inc x6 (12)
-
(1 sc, inc) x6 (18)
-
(2 sc, inc) x6 (24)
-
(3 sc, inc) x6 (30)
-
(4 sc, inc) x6 (36)
-
(5 sc, inc) x6 (42)
8–16. sc around (42) -
(5 sc, dec) x6 (36)
-
(4 sc, dec) x6 (30)
-
(3 sc, dec) x6 (24)
-
(2 sc, dec) x6 (18)
Stuff firmly -
(1 sc, dec) x6 (12)
-
dec x6, FO, close hole
Insert safety eyes between rounds 11–12, ~10 stitches apart.
Change yarn color every 2–3 rounds for stripe effect.
🐽 Snout (Gray)
-
MR, 6 sc
-
inc x6 (12)
-
(1 sc, inc) x6 (18)
4–5. sc around (18)
FO and stuff lightly.
Sew to front of head between eyes.
Embroider nose and mouth in black thread.
🐻 Ears (Make 2 – start with Rainbow outer, then Gray inner)
-
MR, 6 sc
-
inc x6 (12)
-
(1 sc, inc) x6 (18)
-
sc around (18)
-
(1 sc, dec) x6 (12)
Flatten and sew to top of head.
🌈 Body (Start with red or pink, follow rainbow)
-
MR, 6 sc
-
inc x6 (12)
-
(1 sc, inc) x6 (18)
-
(2 sc, inc) x6 (24)
-
(3 sc, inc) x6 (30)
-
(4 sc, inc) x6 (36)
-
(5 sc, inc) x6 (42)
8–20. sc around (42) -
(5 sc, dec) x6 (36)
-
(4 sc, dec) x6 (30)
-
(3 sc, dec) x6 (24)
Stuff firmly -
(2 sc, dec) x6 (18)
-
(1 sc, dec) x6 (12)
-
dec x6, FO, close
🐾 Arms (Make 2 – Gray paw tip, then rainbow)
-
MR, 6 sc
-
inc x6 (12)
3–4. sc around (12) -
(2 sc, dec) x3 (9)
6–15. sc around (9)
Stuff lightly, FO, sew to sides of body.
🐾 Legs (Make 2 – Gray paw pad, then rainbow)
-
MR, 6 sc
-
inc x6 (12)
-
(1 sc, inc) x6 (18)
-
sc around (18)
-
(2 sc, dec) x6 (12)
6–12. sc around (12)
Stuff firmly
FO, sew to bottom of body.
🎨 Color Tips
-
Use 6–7 colors in the rainbow cycle
-
Each color section is 2–3 rounds
-
For cleaner transitions, finish each color change with a sl st, cut yarn, and switch cleanly to the next color
🧷 Assembly
-
Sew head to top of body with reinforced seam
-
Attach arms slightly below neck
-
Attach legs facing forward for seated pose
-
Sew ears on top at an angle
-
Attach snout and embroider smile and eyebrows
💡 Optional Add-ons
-
Add a bowtie or heart patch
-
Use safety joints for movable limbs
-
Sew a name or year on the belly as a keepsake
✅ Your Rainbow Bear is Complete!
This cozy, striped friend is now ready for display, hugs, or gift-giving.