Bring the playful charm of a Coati to life with this Amigurumi Coati crochet pattern! 🦝✨ With its long tail, curious expression, and adorable stance, this design captures the essence of this fascinating raccoon-like creature in yarn form. Whether you’re crafting for a wildlife-inspired décor piece, a heartfelt gift, or simply love animal-themed amigurumi, this FREE pattern is a fantastic addition to your collection.
Designed for intermediate crocheters, this pattern allows for customization in fur textures, facial details, and even tiny accessories like embroidered markings or a miniature forest setting to enhance its personality. Choose classic browns and blacks for a realistic look or experiment with pastel hues for a whimsical twist! Whether displayed as part of a nature-themed setup or gifted to a fellow crochet enthusiast, this amigurumi coati is sure to impress.
Grab your hook, select your favorite yarn, and let’s bring this charming little creature to life—one stitch at a time! 🧶✨
🦝 Amigurumi Coati Crochet Pattern
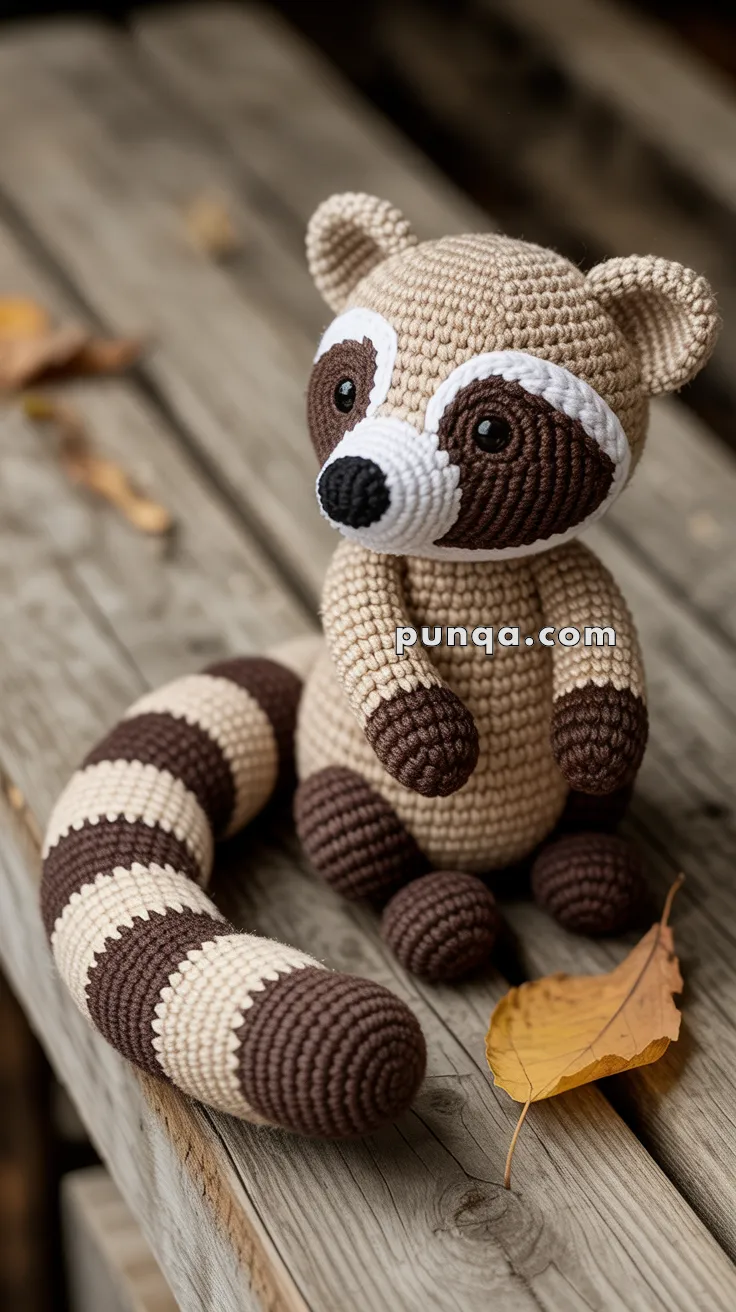
Bring a touch of woodland charm to your amigurumi collection with this adorable Coati. Its long ringed tail, soft rounded features, and expressive face markings make it a delightful project for makers and a perfect decorative companion for nature lovers.
✨ Skill Level
Intermediate – includes shaping, color changes, and assembly.
📏 Finished Size
Approximately 26–30 cm tall when seated (excluding tail curve).
🧶 Materials
- Color A: Beige / Light Tan (head, body, tail base)
- Color B: Dark Brown (paws, mask, tail stripes)
- Color C: White (face outline, snout)
- Color D: Black (nose embroidery)
- 3.0–3.5 mm crochet hook
- 10 mm safety eyes
- Polyfill stuffing
- Tapestry needle
- Stitch markers, scissors
🧵 Abbreviations (US Terms)
MR – Magic Ring
sc – single crochet
inc – increase
dec – decrease
sl st – slip stitch
FO – fasten off
🐾 Head (Color A)
- MR, 6
- inc ×6 = 12
- (1 sc, inc) ×6 = 18
- (2 sc, inc) ×6 = 24
- (3 sc, inc) ×6 = 30
- (4 sc, inc) ×6 = 36
- (5 sc, inc) ×6 = 42
8–17. sc around (42) - (5 sc, dec) ×6 = 36
- (4 sc, dec) ×6 = 30
- (3 sc, dec) ×6 = 24
- (2 sc, dec) ×6 = 18
- (1 sc, dec) ×6 = 12
- dec ×6 = 6
FO and close.
Eyes: Insert 10 mm safety eyes between R11–12, about 7 stitches apart.
🐽 Muzzle (Color C – White)
- MR, 6
- inc ×6 = 12
- (1 sc, inc) ×6 = 18
- (2 sc, inc) ×6 = 24
5–8. sc around (24)
Stuff lightly.
Sew centered on the lower face so it protrudes softly forward.
Embroider a black oval nose on the top front of the muzzle.
👁 Eye Mask Patches (2× – Color B)
Ch 8
Row 1: sc 7
Row 2: inc, sc 5, inc = 9
Row 3: inc, sc 7, inc = 11
Rows 4–6: sc 11
Row 7: dec, sc 7, dec = 9
Row 8: dec, sc 5, dec = 7
FO with long tail.
Sew around the eyes so:
- inner corners meet above the muzzle
- lower edges touch the top of the muzzle
- outer corners gently rise toward the ears
🤍 White Face Outline (Color C)
Make a long chain of 42–48 stitches.
Pin around the face forming a smooth, wide U that surrounds the masks and muzzle.
Sew neatly in place.
👂 Ears (2× – Color A)
- MR, 6
- (1 sc, inc) ×3 = 9
- (2 sc, inc) ×3 = 12
4–5. sc around (12)
Flatten and FO.
Sew slightly toward the back-upper sides of the head.
🧸 Body (Color A)
- MR, 6
- inc ×6 = 12
- (1 sc, inc) ×6 = 18
- (2 sc, inc) ×6 = 24
- (3 sc, inc) ×6 = 30
- (4 sc, inc) ×6 = 36
7–20. sc around (36) - (4 sc, dec) ×6 = 30
- (3 sc, dec) ×6 = 24
- (2 sc, dec) ×6 = 18
- (1 sc, dec) ×6 = 12
FO.
Sew head on slightly angled forward.
🦵 Legs (2× – Color B → A)
Start with Color B:
- MR, 6
- inc ×6 = 12
3–5. sc around (12)
Switch to Color A:
6–10. sc around (12)
FO, stuff lightly.
Sew legs in a seated position close together at the front.
✋ Arms (2× – Color B → A)
Start with Color B:
- MR, 6
- inc ×6 = 12
3–4. sc around (12)
Switch to Color A:
5–9. sc around (12)
FO, stuff very lightly.
Sew arms forward-facing and slightly angled inward.
🌀 Tail (Striped – Color A + B)
- MR, 6
- inc ×6 = 12
- (1 sc, inc) ×6 = 18
- (2 sc, inc) ×6 = 24
Stripe Sequence (repeat):
- 6 rounds Color A
- 3 rounds Color B
Repeat until tail reaches 26–30 cm long.
Tip of tail:
- (2 sc, dec) ×6 = 18
- (1 sc, dec) ×6 = 12
- dec ×6 = 6
FO and close.
Sew tail low on the back, curving naturally to the side.
✂️ Assembly
- Attach muzzle
- Sew eye masks overlapping top edges of muzzle
- Add white face outline
- Attach ears
- Sew head to body
- Add arms and legs
- Sew long striped tail
🌟 Finished Look
Your Coati is now ready to be displayed or gifted! Its expressive face, long striped tail, and soft woodland colors make it a charming and cuddly companion.