Snuggle up with the Amigurumi Pug Dog, a lovable crochet companion that’s full of personality and irresistible charm! 🐶🧶 With big expressive eyes, a wrinkly muzzle, and floppy ears that perfectly capture that classic “pug face,” this plush pup is a must-make for dog lovers and amigurumi fans alike. Whether perched on a shelf or tucked into a gift basket, this little pug brings warmth and whimsy to any space.
Perfect for crocheters who enjoy crafting cuddly characters with lifelike details, this pattern invites you to stitch up a furry friend that’s both playful and sweet. Add a tiny collar, customize its colors, or pair it with other canine companions for a tail-wagging display. The Amigurumi Pug Dog is a joyful way to stitch up loyalty, charm, and a sprinkle of handmade magic—one loop at a time! 🧵✨🐾

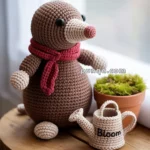
🐶 Amigurumi Pug Dog Crochet Pattern
Meet your squishy, squishy best friend — this adorable Amigurumi Pug! With those soulful eyes, wrinkly snout, and iconic floppy ears, this lovable pug is ready for cuddles, display, or gifting. A perfect pattern for dog lovers and anyone obsessed with cute plush pets! 🧶💛🐾
✨ Skill Level
Intermediate – facial shaping, color changes, optional no-sew joins.
📏 Finished Size
≈ 7–9 in (18–23 cm) tall with worsted-weight yarn & 3.5 mm hook.
🧶 Materials
-
Worsted weight yarn
• Beige – body & head
• Dark gray – muzzle, ears, paws, eye patches, nose
• White – eye highlight ring (optional) -
3.5 mm crochet hook
-
12 mm safety eyes
-
Polyfill stuffing
-
Tapestry needle & stitch marker
-
Scissors
🧵 Abbreviations (US)
MR – magic ring
sc – single crochet
inc – increase (2 sc in same st)
dec – decrease (sc 2 tog)
sl st – slip stitch
FO – fasten off
🐾 Head (Beige)
1️⃣ MR 6 sc (6)
2️⃣ inc ×6 (12)
3️⃣ (1 sc, inc) ×6 (18)
4️⃣ (2 sc, inc) ×6 (24)
5️⃣ (3 sc, inc) ×6 (30)
6️⃣ (4 sc, inc) ×6 (36)
7–14️⃣ sc around (36)
15️⃣ (4 sc, dec) ×6 (30)
16️⃣ (3 sc, dec) ×6 (24)
👉 Insert eyes between R 9–10, 6 st apart.
Add dark-gray eye patches behind each eye.
17️⃣ (2 sc, dec) ×6 (18)
18️⃣ (1 sc, dec) ×6 (12)
Stuff firmly.
19️⃣ dec ×6 (6)
FO and close.
🐽 Layered Muzzle (Dark Gray)
Upper snout piece
1️⃣ MR 6 sc (6)
2️⃣ (1 sc, inc) ×3 (9)
3–4️⃣ sc around (9) → slightly oval shape
FO leaving tail. Make 2 and sew side-by-side for the folded top snout.
Lower muzzle base
1️⃣ MR 6 sc (6)
2️⃣ inc ×6 (12)
3️⃣ (1 sc, inc) ×6 (18)
4️⃣ sc around (18)
Stuff lightly and stitch beneath the upper snout pieces to create the wrinkled three-part muzzle seen in photo.
Embroider small horizontal nose bridge line and two nostrils using dark gray yarn.
👁 Eye Patches (Dark Gray) × 2
MR 6 sc (6)
2️⃣ inc ×6 (12)
Flatten into oval and sew behind eyes before attaching to head.
Add tiny white stitch below each eye for highlight.
🐶 Body (Beige)
1️⃣ MR 6 sc (6)
2️⃣ inc ×6 (12)
3️⃣ (1 sc, inc) ×6 (18)
4️⃣ (2 sc, inc) ×6 (24)
5️⃣ (3 sc, inc) ×6 (30)
6–13️⃣ sc around (30)
14️⃣ (3 sc, dec) ×6 (24)
15️⃣ (2 sc, dec) ×6 (18)
Stuff firmly.
16️⃣ (1 sc, dec) ×6 (12)
17️⃣ dec ×6 (6)
FO and close.
🦴 Leg Options (Choose one)
A – No-Sew Front & Back Legs (Integrated Version)
To replicate the photo’s clean look (no visible joins):
Front legs (worked directly from body front):
-
On Round 8 of body, mark two 12-st sections separated by a 6-st gap.
-
Join beige yarn to left marked section.
R1: 12 sc around front panel only (12)
R2–R5: sc around (12)
R6: switch to dark gray (paws) sc around (12)
R7: (1 sc, dec) ×4 (8)
R8: dec ×4 (4)
FO, close flat. Repeat for right leg. Do not stuff (soft front legs).
Back legs (worked directly from body sides):
-
After completing body Round 15, mark two 10-st sections on lower back sides.
Join beige.
R1: 10 sc (10)
R2–R4: sc around (10)
R5: switch to dark gray, sc around (10)
R6: (3 sc, dec) ×2 (8)
FO, lightly stuff and close. Tack in a sitting angle.
B – Traditional Sewn Legs (Removable Option)
Front legs (2 pieces):
Start dark gray (MR 6 → inc ×6 = 12)
R3–4: sc around (12) → switch to beige R5–R8 (12).
Stuff lightly, FO, and sew just below neck curve angled slightly forward.
Back legs (2 pieces):
Start dark gray (MR 6 → inc ×6 = 12 → (1 sc, inc) ×6 = 18).
R4–6: sc around (18).
Switch to beige R7–9 (18).
FO, stuff, and sew low and wide for sitting pose.
👂 Ears (Dark Gray)
Ch 6
Row 1: sc in 2nd ch from hook and across (5)
Row 2: dec, sc, dec (3)
Row 3: sc 3 tog → 1 st remains
FO, flatten, and sew high on head then fold forward halfway for that floppy look.
🌀 Tail (Beige)
MR 6 sc (6)
2️⃣ inc ×6 (12)
3–4️⃣ sc around (12)
FO and curl into a tight coil. Sew to back center.
🧵 Finishing Touches
-
Stitch a tiny black nose at muzzle top.
-
Add two short eyebrow stitches above eyes.
-
Steam-shape ears and muzzle lightly if needed.
-
For extra character, embroider a thin mouth line beneath nose.
This sweet little pug is ready to be your loyal desk buddy, bedtime pal, or heartwarming gift for a dog-loving friend. Its chubby charm and soulful face will definitely earn it a top spot in your amigurumi collection! 🐾🐕🧶