Capture the charm of a Puffin Chick with this delightful Amigurumi Puffin Chick crochet pattern! 🐧✨ With its fluffy body, bright beak, and adorable little wings, this design brings the playful spirit of puffins to life in yarn form. Whether you’re crafting for a seabird-inspired décor piece, a heartfelt gift, or simply love animal-themed amigurumi, this FREE pattern is a fantastic addition to your collection.
Designed for intermediate crocheters, this pattern allows for customization in feather textures, beak colors, and even tiny accessories like a miniature fish or a cozy scarf to enhance its personality. Choose classic black and white with a pop of orange for a realistic look or experiment with pastel hues for a whimsical twist! Whether displayed as part of a coastal setup or gifted to a fellow crochet enthusiast, this amigurumi puffin chick is sure to bring smiles. Grab your hook, select your favorite yarn, and let’s bring this adorable little seabird to life—one stitch at a time! 🧶✨
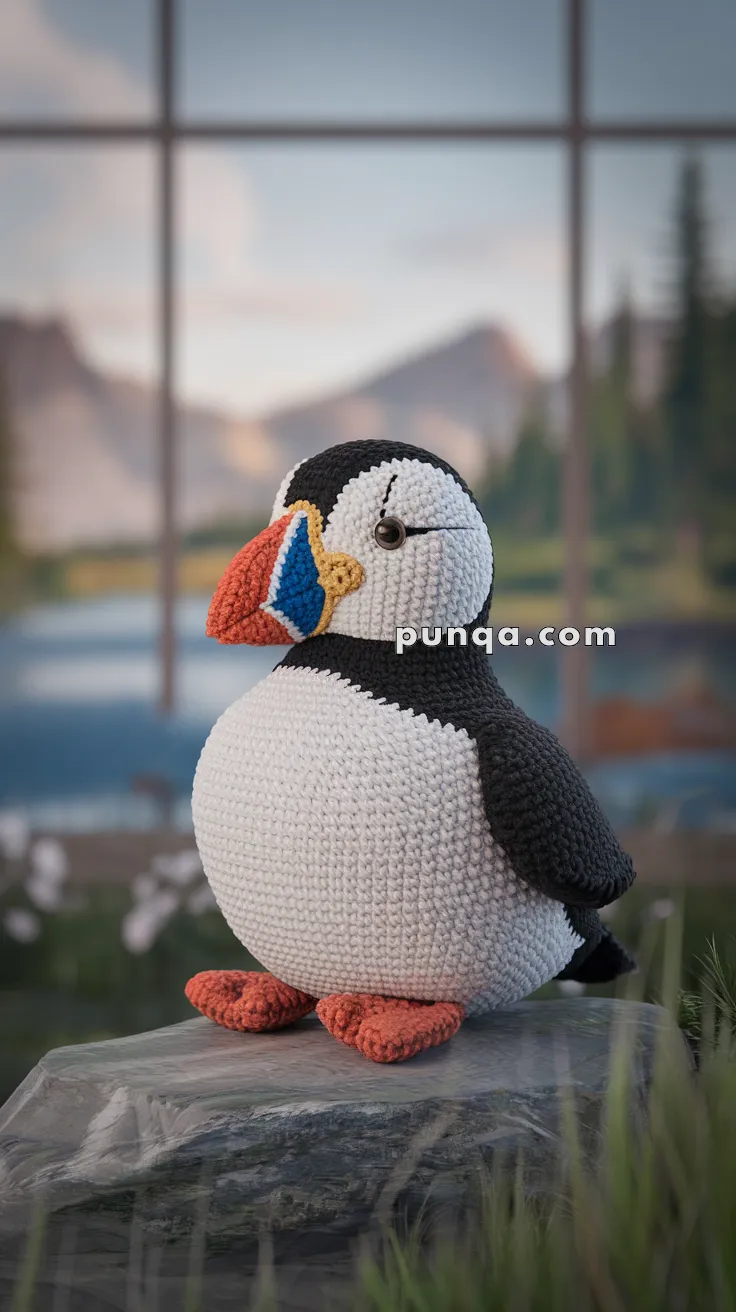
🐣 Amigurumi Puffin Chick – Free Crochet Pattern
Craft your own puffin chick with this cozy, plump design and signature colorful beak. This crochet pattern makes the perfect gift for bird lovers, ocean-themed nurseries, or wildlife decor collections.
✨ Skill Level
Intermediate – Requires color changes, shaping, and facial embroidery.
📏 Finished Size
Approx. 7–8 inches (18–20 cm) tall using worsted weight yarn and a 2.5–3.5 mm crochet hook.
🧶 Materials
-
Worsted weight yarn in:
-
White (face and belly)
-
Black (head, back, wings, tail)
-
Orange (beak base, feet)
-
Yellow (beak detail)
-
Royal Blue (beak stripe)
-
-
8 mm safety eyes or black felt circles
-
Stitch marker
-
Fiberfill stuffing
-
Crochet hook: 2.5 mm or 3 mm
-
Tapestry needle for sewing pieces
-
Optional: blush or pink thread for cheeks
🧵 Abbreviations (US Terms)
-
MR – Magic Ring
-
sc – Single Crochet
-
inc – Increase (2 sc in same stitch)
-
dec – Decrease (sc 2 together)
-
sl st – Slip Stitch
-
ch – Chain
-
st(s) – Stitch(es)
🧍♂️ Body & Head (Worked Bottom-Up in One Piece)
Start with white yarn (belly side):
-
MR, 6 sc
-
inc x6 (12)
-
(sc, inc) x6 (18)
-
(2 sc, inc) x6 (24)
-
(3 sc, inc) x6 (30)
-
(4 sc, inc) x6 (36)
-
(5 sc, inc) x6 (42)
8–14. sc around (42)
Color Change Tip
On round 15, start working color changes gradually:
-
Change to black at the midpoint of the round to split the top and belly cleanly.
-
To avoid harsh color jumps, change yarn on the final pull-through of the stitch before the new color starts.
15–21. Continue in sc, shaping body with 2 dec rounds as needed
22. (5 sc, dec) x6 (36)
23. (4 sc, dec) x6 (30)
24. (3 sc, dec) x6 (24)
25. (2 sc, dec) x6 (18)
26. (sc, dec) x6 (12)
27. dec x6 (6)
Fasten off and close.
Stuff firmly before final decrease rounds.
👁 Eyes
Insert safety eyes into the white face area, spaced 8–10 stitches apart. You may embroider or surface crochet a black brow line extending behind the eye for expression.
🧡 Beak (Worked in Color Sections)
Base (orange):
-
MR, 6 sc
-
inc x6 (12)
-
(sc, inc) x6 (18)
-
sc around (18)
-
dec x6, sc x6 (12)
-
(sc, dec) x4 (8)
Fasten off and stuff lightly.
Beak Stripes:
-
Use surface slip stitch or embroider with blue yarn and yellow yarn to create realistic puffin stripe and patch patterns.
-
Add dark outline using split stitch or embroidery floss for definition.
Sew the beak just under the eyes in the center of the face.
🐧 Wings (Make 2 – Black)
-
MR, 6 sc
-
inc x6 (12)
-
(sc, inc) x6 (18)
4–7. sc around (18) -
(2 sc, dec) x4, sc x2 (14)
9–10. sc around
Flatten, do not stuff. Stitch to each side just under the color transition on the body.
🦶 Feet (Make 2 – Orange)
Each foot is made of 3 small triangles joined together:
Triangle (Make 3 for each foot):
-
Ch 5
-
sc in 2nd ch from hook and across (4)
-
ch 1, turn, dec, sc x2 (3)
-
ch 1, turn, dec, sc (2)
-
ch 1, dec (1)
Fasten off.
Sew three triangles together side-by-side to form webbed foot, and sew under the puffin’s body.
🐤 Tail (Optional – Black)
-
MR, 6 sc
-
sc around
-
(sc, inc) x3 (9)
-
sc around
Flatten and sew at the back base.
🪄 Assembly
-
Attach wings slightly back and downward
-
Sew feet under body near the front belly
-
Position beak and eyes before fully securing
-
Add blush or embroidery for added cuteness
🎉 Final Touch
Your puffin chick is ready for a cozy rocky perch or to join a wildlife-inspired collection. It’s a great project for experimenting with fun beak embroidery and colorwork!
🧶 With bright eyes and a brilliant beak, this little puffin is ready to bring smiles and coastal cheer to your day! 🐧🌊
