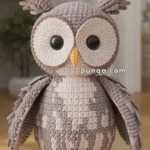
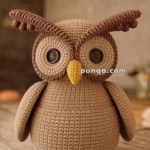
Bring the charm of the seaside to your crochet collection with this Amigurumi Puffin Baby pattern! Whether you’re crafting for bird lovers, adding a touch of coastal whimsy to your handmade creations, or simply enjoy making adorable amigurumi designs, this free pattern lets you stitch up a delightful puffin chick bursting with personality. With its fluffy little wings, bright beak, and expressive eyes, this crochet puffin baby captures the essence of these beloved seabirds in every stitch. Perfect for gifting to fellow crochet enthusiasts, decorating a nature-inspired space, or simply celebrating the joy of handmade creations, this amigurumi puffin baby is sure to bring smiles—one stitch at a time! 🐦✨
Designed for customization, this pattern allows you to experiment with different shades of black, white, and orange to create unique puffin markings, embroidered details for extra personality, or even tiny accessories like a miniature fish or nest for added charm. Craft a classic puffin chick with its signature bold patterns, create a pastel version for a dreamy aesthetic, or even stitch up a full set of seabird-inspired amigurumi for a stunning display! Whether gifted as a cherished keepsake, displayed as a playful accent, or made simply for the joy of crafting, this Amigurumi Puffin Baby is a fun and creative project—perfect for bringing a touch of handmade coastal magic to every stitch! 🧶💖

🐧 Amigurumi Puffin Crochet Pattern
This majestic puffin stands tall with its plump belly, striking beak, and charming expression. A wonderful intermediate project for bird lovers and coastal décor.
✨ Skill Level
Intermediate – Requires shaping, color changes, embroidery, and structured assembly.
📏 Finished Size
Approx. 12–14 inches (30–35 cm) tall using worsted weight yarn and a 3.5–4.0 mm hook.
🧶 Materials
-
Worsted weight yarn:
-
White – belly, face
-
Black – head, back, wings, eye stripes
-
Orange – beak, feet
-
Yellow – cheek dots
-
Dark grey/navy – beak outlines
-
-
3.5–4.0 mm crochet hook
-
10 mm safety eyes (or embroidery)
-
Tapestry needle
-
Fiberfill stuffing
-
Stitch markers
-
Optional: plastic canvas/flat cardboard for base stability
🧵 Abbreviations (US Terms)
MR – Magic Ring
sc – Single Crochet
inc – Increase (2 sc in same stitch)
dec – Decrease (sc 2 together)
ch – Chain
sl st – Slip Stitch
st(s) – Stitch(es)
BLO/FLO – Back/Front Loop Only
🧍 Body & Head (One Piece)
With white yarn:
-
MR, 6 sc
-
inc x6 (12)
-
(sc, inc) x6 (18)
-
(2 sc, inc) x6 (24)
-
(3 sc, inc) x6 (30)
-
(4 sc, inc) x6 (36)
7–14. sc around (36)
Switch to black:
15–22. sc around (36)
23. (4 sc, dec) x6 (30)
24. (3 sc, dec) x6 (24)
25. (2 sc, dec) x6 (18)
26. (sc, dec) x6 (12)
27. dec x6 (6)
FO, close. Stuff firmly.
🖐 Wings (Make 2 – Black)
-
MR, 6 sc
-
inc x6 (12)
-
(sc, inc) x6 (18)
4–10. sc around (18) -
(2 sc, dec) x4, 2 sc (14)
-
sc around
Flatten and sew to sides.
👣 Feet (Make 2 – Orange, worked flat then joined)
Toe (make 3 per foot):
-
Ch 6, sc in 2nd ch, hdc, dc, dc, dc (5)
-
Ch 1, turn, dec, dc, dc (3)
-
Ch 1, turn, dec, dc (2)
-
Ch 1, turn, dec (1)
Make 3 toes, join side by side with sl sts. Work a round of sc around all three toes to form a triangle webbed foot.
Sew flat under body.
🧡 Beak (3-Part Construction)
Base (Orange):
-
MR, 6 sc
-
inc x6 (12)
-
sc around
-
(sc, inc) x6 (18)
5–7. sc around (18)
Stuff lightly.
Middle Layer (Orange + Grey Outlines):
-
Repeat base but smaller (12–15 sts).
-
Use surface slip stitch with dark grey to add grooves.
Top Tip (Coral/Orange):
-
MR, 6 sc
-
(sc, inc) x3 (9)
-
sc around, FO.
Sew all 3 parts together stacked vertically → attach to face.
Embroider yellow cheek dots at base.
👀 Eyes
Insert 10 mm safety eyes on the white face.
With black yarn, embroider thin eye stripe lines sweeping back.
🪶 Embroidery Details
-
Use black to embroider a slight smile line under beak if desired.
-
Add dark navy/grey outlines around beak layers for realism.
🪨 Rock Base (Optional, Grey)
-
MR, 6 sc
-
inc x6 (12)
-
(sc, inc) x6 (18)
-
(2 sc, inc) x6 (24)
-
(3 sc, inc) x6 (30)
6–10. sc around (30)
FO, stuff lightly with flat cardboard inside. Sew puffin feet securely to base.
✍️ Assembly
-
Sew feet to bottom (attach on rock base if using).
-
Attach wings slightly downward.
-
Position and sew beak. Add embroidery details.
-
Insert eyes, add cheek dots, embroider lines.
-
Adjust stuffing and shape.
🎉 Finishing Touch
Your puffin is ready to perch proudly! With its plump belly, bold beak, and sturdy feet, it makes a striking centerpiece for any collection.