Oh, let me tell you, there’s something truly magical about crafting amigurumi, especially when it’s a beloved character like Porky Pig! 🐷 The joy of bringing this iconic little pig to life with just a hook and some yarn is beyond rewarding. Amigurumi, the Japanese art of crocheting small, stuffed yarn creatures, has always fascinated me, and the appeal lies in its versatility and the sheer cuteness it offers. The process of creating an amigurumi pattern is like an exciting adventure. You start with a vision, perhaps inspired by a childhood favorite, and watch it unfold in your hands as it transforms into something tangible and huggable.
The first step in creating a Porky Pig amigurumi pattern involves gathering the right materials: the perfect shades of yarn, a trusty crochet hook, and, of course, a little bit of stuffing to give your creation its lovable shape. 🧶 The creative process is filled with moments of experimentation and delight as you sketch out and refine the pattern, ensuring each stitch captures Porky’s charm. I often find myself lost in the rhythm of crocheting, eagerly anticipating the moment when the final smile is stitched in place, and the character seems to come to life. Watching others enjoy the finished creation is the cherry on top, a testament to the handiwork and care poured into every loop.
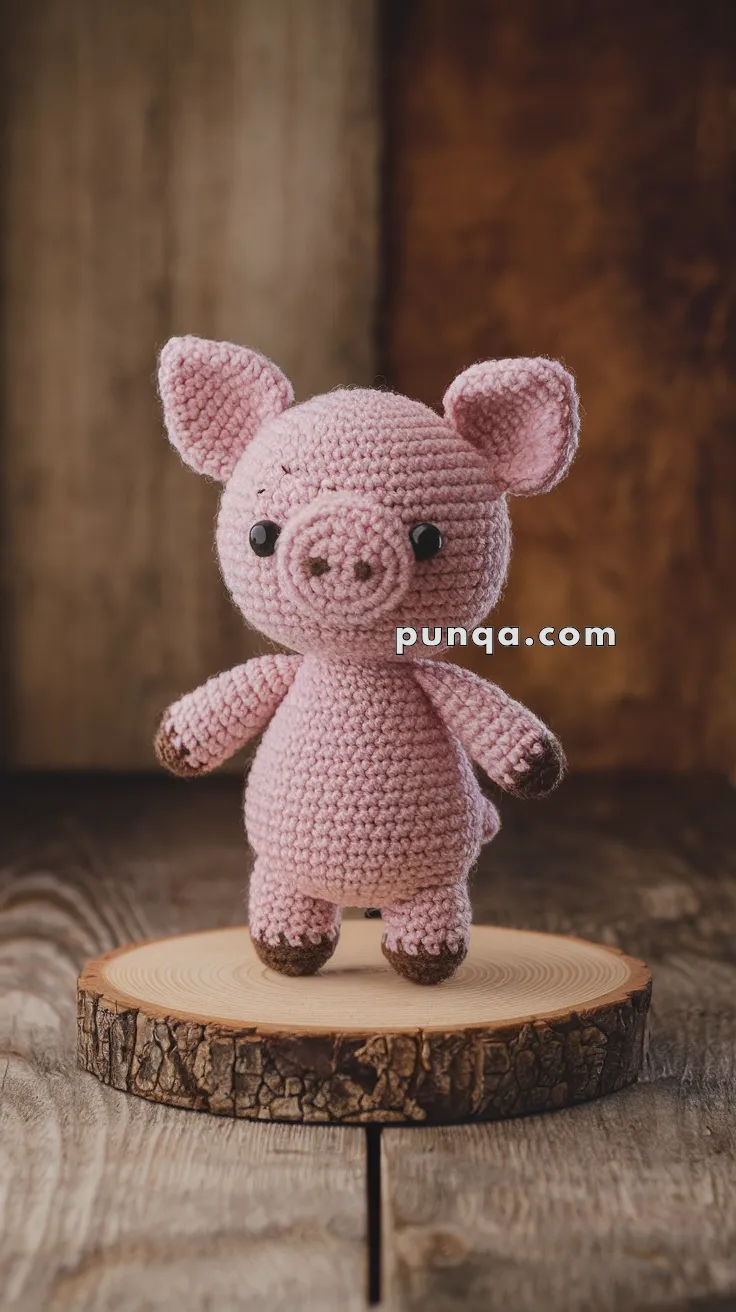
Title: Amigurumi Porky Pig
Skill Level: Intermediate
Finished Size: Approximately 7 inches tall
Materials
– Pink worsted weight yarn
– Light brown yarn for hooves
– 3.5 mm crochet hook
– 8mm safety eyes
– Fiberfill stuffing
– Yarn needle
– Stitch marker
– Scissors
Abbreviations (US Terminology)
– ch: chain
– sc: single crochet
– inc: increase (2 sc in one stitch)
– dec: decrease (single crochet two together)
– st(s): stitch(es)
– Rnd: round
Pattern Instructions
Head
1. With pink yarn, make a magic ring.
2. Rnd 1: 6 sc in magic ring. (6 sts)
3. Rnd 2: inc in each st around. (12 sts)
4. Rnd 3: (sc in next st, inc) repeat around. (18 sts)
5. Rnd 4: (sc in next 2 sts, inc) repeat around. (24 sts)
6. Rnd 5-10: sc in each st around. (24 sts)
7. Rnd 11: (sc in next 2 sts, dec) repeat around. (18 sts)
8. Insert safety eyes between Rnds 8 and 9, about 6 sts apart.
9. Rnd 12: (sc in next st, dec) repeat around. (12 sts)
10. Rnd 13: dec around. (6 sts)
11. Fasten off and weave in the end.
Body
1. With pink yarn, make a magic ring.
2. Rnd 1: 6 sc in magic ring. (6 sts)
3. Rnd 2: inc in each st around. (12 sts)
4. Rnd 3: (sc in next st, inc) repeat around. (18 sts)
5. Rnd 4-7: sc in each st around. (18 sts)
6. Rnd 8: (sc in next 2 sts, inc) repeat around. (24 sts)
7. Rnd 9-14: sc in each st around. (24 sts)
8. Rnd 15: (sc in next 2 sts, dec) repeat around. (18 sts)
9. Rnd 16: (sc in next st, dec) repeat around. (12 sts)
10. Fasten off, leaving a long tail for sewing.
Arms (make 2)
1. With light brown yarn, make a magic ring.
2. Rnd 1: 6 sc in magic ring. (6 sts)
3. Rnd 2: (sc in next st, inc) repeat around. (9 sts)
4. Switch to pink yarn.
5. Rnd 3-8: sc in each st around. (9 sts)
6. Fasten off and leave a long tail for sewing.
Legs (make 2)
1. With light brown yarn, make a magic ring.
2. Rnd 1: 6 sc in magic ring. (6 sts)
3. Rnd 2: (sc in next st, inc) repeat around. (9 sts)
4. Switch to pink yarn.
5. Rnd 3-7: sc in each st around. (9 sts)
6. Fasten off and leave a long tail for sewing.
Ears (make 2)
1. With pink yarn, ch 5.
2. Rnd 1: sc in 2nd ch from hook and in next 2 ch, 3 sc in last ch; working on opposite side, sc in next 3 ch. (9 sts)
3. Rnd 2: sc in each st around. (9 sts)
4. Fasten off, leaving a long tail for sewing.
Snout
1. With pink yarn, make a magic ring.
2. Rnd 1: 6 sc in magic ring. (6 sts)
3. Rnd 2: inc in each st around. (12 sts)
4. Rnd 3-4: sc in each st around. (12 sts)
5. Fasten off, leaving a long tail for sewing.
Assembly
1. Stuff the head and body firmly with fiberfill.
2. Sew the head to the body.
3. Attach the arms to either side of the body.
4. Sew the legs to the bottom of the body.
5. Position the ears on top of the head and sew them in place.
6. Sew the snout onto the front of the face, adding a small amount of stuffing before closing.
Finishing Touches
– Embroider nostrils on the snout with light brown yarn.
– Ensure all parts are securely attached.
– Adjust stuffing if necessary to achieve the desired shape.
Tips:
Creating this adorable Porky Pig is like bringing a little farm magic to life! 🐷 Remember to keep your stitches tight for a neat finish. Enjoy the process and happy crocheting! 🎉
🎉 Your handmade crochet creation for Title: Amigurumi Porky Pig is complete! Enjoy your one-of-a-kind amigurumi masterpiece and experiment with various yarn colors for a personal touch! 🧶✨