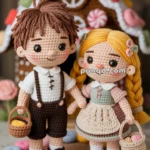
Step into the heartwarming world of storytelling with this delightful Amigurumi Pinocchio & Geppetto crochet pattern! 🧶✨ These two beloved characters come to life in yarn form, capturing the magic of a wooden puppet’s dream and the gentle wisdom of his creator. With Pinocchio’s playful charm and Geppetto’s kind expression, this duo makes a perfect gift for fairy tale lovers, nostalgic collectors, or anyone who adores crafting with character.
From Pinocchio’s tiny hat and buttoned vest to Geppetto’s spectacles and cozy apron, every detail invites you to stitch with love and imagination. Whether displayed on a shelf, tucked into a storybook-themed nursery, or used as props for a handmade puppet show, these amigurumi friends are sure to spark smiles and sweet memories. So grab your hook and let your creativity carve out a little magic—just like Geppetto did. 🪵💫👃

🤹♂️ Amigurumi Pinocchio & Geppetto Crochet Pattern
Bring the beloved wooden puppet and his kind creator to life with this comprehensive crochet pattern!
✨ Skill Level
Intermediate to Advanced — Features detailed shaping, color changes, small parts assembly, and embroidery work.
📏 Finished Sizes
- Pinocchio: Approximately 19-20 cm (7.5-7.9 inches) tall
- Geppetto: Approximately 29 cm (11.4 inches) tall
🧶 Materials Required
Yarn
100% cotton or soft acrylic yarn (sport or DK weight):
For Pinocchio:
- Beige (skin tone)
- Medium to dark brown (hair)
- Golden mustard yellow (hat and shirt)
- Bright red (shorts/overalls)
- Bright turquoise/cyan (bowtie and hat band)
- White (collar, socks, eye highlights)
- Black (shoes, eye details, eyebrows)
- Soft pink (cheeks)
For Geppetto:
- Beige (skin tone)
- Light silvery-gray (hair and mustache)
- Light blue (shirt)
- Blue-gray or dusty teal (vest)
- Dark charcoal or black (pants)
- White (shirt collar, eye details)
- Black (shoes, glasses)
- Golden brown or brass (belt buckle)
Other Supplies
- Crochet hooks: 2.0mm and 2.5mm
- Safety eyes: 10mm for Pinocchio, 12mm for Geppetto
- Fiberfill stuffing
- Stitch markers
- Embroidery thread: Black, red, pink, brown, gray
- Thin black craft wire (for glasses)
- Tapestry needle
- Small amount of clear-drying craft glue (optional, for securing glasses)
🧩 Abbreviations (US Terms)
- MR – Magic Ring
- sc – Single Crochet
- inc – Increase (2 sc in same stitch)
- dec – Invisible Decrease
- sl st – Slip Stitch
- ch – Chain
- BLO – Back Loop Only
- FLO – Front Loop Only
- st(s) – Stitch(es)
- FO – Fasten Off
🪆 PINOCCHIO PATTERN
1. Head & Face
Beige yarn, 2.0mm hook
- Rnd 1: MR, 6 sc (6)
- Rnd 2: (inc) × 6 (12)
- Rnd 3: (1 sc, inc) × 6 (18)
- Rnd 4: (2 sc, inc) × 6 (24)
- Rnd 5: (3 sc, inc) × 6 (30)
- Rnd 6: (4 sc, inc) × 6 (36)
- Rnds 7-15: sc around (36)
Eye Placement: After completing Round 11, insert 10mm safety eyes approximately 8-9 sts apart (they will sit between Rounds 11 and 12).
Nose Shaping (worked separately)
With beige yarn:
- Ch 4 (reduced for smaller, button nose)
- Rnd 1: Starting in 2nd ch from hook, sc 3, then working on opposite side of chain, sc 3 (6 sc total)
- Rnds 2-4: Working in continuous spiral, sc around (6 sc per round)
- Stuff very lightly
- Pinch into small, rounded button shape
- Sew centered between eyes at eye level, keeping it small and round
Continue with head:
- Rnd 16: (4 sc, dec) × 6 (30)
- Rnd 17: (3 sc, dec) × 6 (24)
- Rnd 18: (2 sc, dec) × 6 (18)
Stuff head firmly.
- Rnd 19: (1 sc, dec) × 6 (12)
- Rnd 20: (dec) × 6 (6)
FO, weave through remaining stitches and pull tight to close.
Ears (Make 2)
Beige yarn, 2.0mm hook
- Rnd 1: MR, 6 sc (6)
- Rnd 2: (1 sc, inc) × 3 (9)
- Rnd 3: sc around (9)
FO, leave long tail. Flatten slightly and sew to sides of head between Rounds 10-12, angled slightly outward.
2. Hair
Medium to dark brown yarn, 2.0mm hook
- Rnd 1: MR, 6 sc (6)
- Rnd 2: (inc) × 6 (12)
- Rnd 3: (1 sc, inc) × 6 (18)
- Rnd 4: (2 sc, inc) × 6 (24)
- Rnd 5: (3 sc, inc) × 6 (30)
- Rnd 6: (4 sc, inc) × 6 (36)
- Rnds 7-10: sc around (36) — extended for fuller coverage
FO, leave long tail for sewing.
Side-Swept Hair Detail
Ch 18-20, sc back along chain to create sweeping bang section. Position across forehead from left side, swooping across to right, covering most of forehead. Sew securely.
Add 2-3 additional shorter chain pieces (ch 10-12 each) for texture on top, creating dimensional, swooped appearance.
3. Body & Golden Yellow Shirt
Golden mustard yellow yarn, 2.5mm hook
- Rnd 1: MR, 6 sc (6)
- Rnd 2: (inc) × 6 (12)
- Rnd 3: (1 sc, inc) × 6 (18)
- Rnd 4: (2 sc, inc) × 6 (24)
- Rnd 5: (3 sc, inc) × 6 (30)
- Rnds 6-10: sc around (30) — reduced for more compact body
- Rnd 11: BLO sc around (30) — creates bottom edge of shirt
Continue to shorts/overalls section.
4. Red Overalls with Suspenders
Bright red yarn, 2.5mm hook
Continue from body:
- Rnd 12: sc around (30)
- Rnd 13: (3 sc, dec) × 6 (24)
- Rnds 14-20: sc around (24)
Divide for legs:
- Rnd 21: sc 12, ch 2, skip next 12 sts, join to beginning of round
First Leg
- Rnds 22-29: sc around 12 + 2 ch sts = 14 sts per round (8 rounds)
- Rnd 30: (5 sc, dec) × 2 (12)
Switch to white yarn for sock top:
- Rnds 31-33: sc around (12) — 3 rounds for visible sock
FO.
Second Leg
Attach red yarn to inside of leg opening.
- Rnds 1-8: sc around (14)
- Rnd 9: (5 sc, dec) × 2 (12)
Switch to white yarn:
- Rnds 10-12: sc around (12)
FO.
Suspender Straps (Make 2)
With red yarn:
- Ch 25
- Row 1: sc in 2nd ch from hook and across (24)
- Row 2: ch 1, turn, sc across (24)
FO, leave long tails.
Position straps from front of overalls over shoulders to back, crossing slightly in the back. Sew securely.
5. Arms with Fingers
Beige yarn, 2.0mm hook (Make 2)
- Rnd 1: MR, 6 sc (6)
- Rnd 2: (1 sc, inc) × 3 (9)
- Rnds 3-4: sc around (9)
Add thumb at Round 4:
- Ch 6, sc back down chain (5 sc), sl st to join back to hand
- Continue around rest of hand
Continue:
- Rnds 5-14: sc around (9) — creates arm length
Switch to golden yellow yarn for sleeve:
- Rnds 15-17: sc around (9)
FO, leave long tail for sewing. Stuff lightly, keeping arms flexible.
6. Shoes
Black yarn, 2.5mm hook (Make 2)
- Rnd 1: MR, 6 sc (6)
- Rnd 2: (inc) × 6 (12)
- Rnd 3: (1 sc, inc) × 6 (18)
- Rnd 4: BLO sc around (18)
- Rnds 5-7: sc around (18)
- Rnd 8: (4 sc, dec) × 3 (15) — adjusted for rounder toe
- Rnd 9: (3 sc, dec) × 3 (12)
FO, stuff lightly. Sew shoes onto bottom of white sock portions of legs.
7. Yellow Hat with Turquoise Band
Golden mustard yellow yarn, 2.5mm hook
- Rnd 1: MR, 6 sc (6)
- Rnd 2: (inc) × 6 (12)
- Rnd 3: (1 sc, inc) × 6 (18)
- Rnd 4: (2 sc, inc) × 6 (24)
- Rnd 5: (3 sc, inc) × 6 (30)
- Rnd 6: (4 sc, inc) × 6 (36)
- Rnds 7-10: sc around (36)
Switch to bright turquoise/cyan yarn:
- Rnds 11-12: sc around (36) — creates hat band
FO, weave in ends.
Red Feather
With red yarn:
- Ch 12 (longer for prominent feather)
- Row 1: sl st in 2nd ch from hook, 1 sc, 3 hdc, 4 dc, 2 tr (or dc)
FO. Sew to side of hat, angling upward and slightly backward for dramatic effect.
8. White Peter Pan Collar
White yarn, 2.0mm hook
- Ch 26 (adjust to fit around neck)
- Row 1: sc in 2nd ch from hook and across (25)
- Row 2: ch 1, turn, 2 sc in first st, sc across to last st, 2 sc in last st (27)
- Row 3: ch 1, turn, sc 3, 2 sc in next st, sc 10, 2 sc in next st, sc 10, 2 sc in next st, sc 3
Shape into rounded Peter Pan collar with two rounded front sections. Sew around neck opening, ensuring rounded points lay flat on chest.
9. Turquoise Bowtie
Bright turquoise/cyan yarn, 2.0mm hook
- Ch 12
- Rows 1-3: sc across (11), ch 1, turn
FO.
Center wrap:
- Ch 6, wrap tightly around middle of rectangle, join with sl st, FO.
Sew bowtie centered on white collar.
10. Facial Details
- Eyes: Add small white highlight dots with white embroidery thread to upper right of each safety eye
- Eyebrows: Embroider thin, black, arched eyebrows above eyes using backstitch, positioning them higher up
- Smile: Embroider wide, cheerful smile in red thread with upturned corners
- Rosy cheeks: Using bright pink yarn or thread, create large circular blush marks with satin stitches positioned low on face, below and to outer side of each eye
👨🦳 GEPPETTO PATTERN
1. Head & Face
Beige yarn, 2.5mm hook
- Rnd 1: MR, 6 sc (6)
- Rnd 2: (inc) × 6 (12)
- Rnd 3: (1 sc, inc) × 6 (18)
- Rnd 4: (2 sc, inc) × 6 (24)
- Rnd 5: (3 sc, inc) × 6 (30)
- Rnd 6: (4 sc, inc) × 6 (36)
- Rnds 7-18: sc around (36)
Eye Placement: After completing Round 13, insert 12mm safety eyes approximately 10-11 sts apart (they will sit between Rounds 13 and 14).
Nose (worked separately)
With beige yarn:
- Ch 8 (larger for bulbous nose)
- Rnd 1: Starting in 2nd ch from hook, sc 7, then working on opposite side of chain, sc 7 (14 sc total)
- Rnds 2-9: Working in continuous spiral, sc around (14 sc per round) — extended for fuller nose
Stuff firmly to create large, round, bulbous shape. Sew centered between and slightly below eyes, shaping into prominent round nose.
Continue with head:
- Rnd 19: (4 sc, dec) × 6 (30)
- Rnd 20: (3 sc, dec) × 6 (24)
- Rnd 21: (2 sc, dec) × 6 (18)
Stuff head very firmly.
- Rnd 22: (1 sc, dec) × 6 (12)
- Rnd 23: (dec) × 6 (6)
FO, close opening.
Ears (Make 2)
Beige yarn, 2.0mm hook
- Rnd 1: MR, 6 sc (6)
- Rnd 2: (1 sc, inc) × 3 (9)
- Rnd 3: (2 sc, inc) × 3 (12)
- Rnd 4: sc around (12)
FO, leave long tail. Flatten and sew to sides of head between Rounds 12-15.
2. Gray Curly Hair & Dramatic Mustache
Light silvery-gray yarn, 2.5mm hook
Hair Cap
- Rnd 1: MR, 6 sc (6)
- Rnd 2: (inc) × 6 (12)
- Rnd 3: (1 sc, inc) × 6 (18)
- Rnd 4: (2 sc, inc) × 6 (24)
- Rnd 5: (3 sc, inc) × 6 (30)
- Rnd 6: (4 sc, inc) × 6 (36)
- Rnds 7-10: sc around (36) — extended for more coverage
FO, leave tail for sewing.
Side Curls (Make 6-8)
- Ch 25-30, sc back along chain
- Row 2: 2 sc in each st across for extra fullness
Roll into tight curl, sew to sides and back of head for wavy, textured hair. Position several curls on each side and across back for full, dimensional appearance.
Large Mustache Swirls (Make 2)
- Ch 20 (much longer for dramatic effect)
- Row 1: 2 sc in 2nd ch from hook, 2 sc in each ch across
- Row 2 (optional): 2 sc in each st across for extra fullness
FO. Roll tightly into large spiral curl shape. Sew under nose on each side, extending outward dramatically. These should be prominent features!
Bushy Eyebrows
Using light gray yarn and tapestry needle, embroider extremely thick, bushy eyebrows above each eye. Use multiple passes of yarn to create volume. Make 8-10 long straight stitches per eyebrow, extending upward and outward for shaggy effect.
3. Body with Light Blue Shirt
Light blue yarn, 2.5mm hook
- Rnd 1: MR, 6 sc (6)
- Rnd 2: (inc) × 6 (12)
- Rnd 3: (1 sc, inc) × 6 (18)
- Rnd 4: (2 sc, inc) × 6 (24)
- Rnd 5: (3 sc, inc) × 6 (30)
- Rnd 6: (4 sc, inc) × 6 (36)
- Rnds 7-16: sc around (36) — creates shirt body
FO blue yarn.
Blue-Gray/Teal Vest
Attach blue-gray or dusty teal yarn:
- Rnds 17-24: sc around (36) — extended to maintain fuller body
- Rnd 25: (4 sc, dec) × 6 (30)
Continue to pants section.
4. Dark Charcoal Pants
Dark charcoal or black yarn, 2.5mm hook
Continue from vest:
- Rnds 26-33: sc around (30)
Divide for legs:
- Rnd 34: sc 15, ch 3, skip next 15 sts, join
First Leg
- Rnds 35-46: sc around 15 + 3 ch = 18 sts (12 rounds)
- Rnd 47: (4 sc, dec) × 3 (15)
Switch to black yarn for shoes:
- Rnds 48-51: sc around (15)
- Rnd 52: (3 sc, dec) × 3 (12)
FO, stuff leg firmly.
Second Leg
Attach yarn to inside leg opening. Repeat as first leg.
5. Arms with Fingers
Beige yarn, 2.5mm hook (Make 2)
- Rnd 1: MR, 6 sc (6)
- Rnd 2: (1 sc, inc) × 3 (9)
- Rnd 3: (2 sc, inc) × 3 (12)
- Rnds 4-5: sc around (12)
Add thumb at Round 5:
- Ch 6, sc back down chain, sl st to rejoin
- Continue around rest of hand
Continue:
- Rnds 6-18: sc around (12) — creates longer arm
Switch to light blue yarn for sleeve:
- Rnds 19-22: sc around (12)
FO, leave long tail. Stuff lightly. Position fingers slightly curved when attaching.
6. Wire-Frame Glasses
Recommended: Wire option
Wire Glasses
- Cut two 10cm pieces of thin black craft wire (longer for larger lenses)
- Shape each into 2cm diameter circles for lenses
- Connect circles with 1.5cm bridge piece (wire wrapped around both frames)
- Create temple pieces extending back from each lens (5-6cm each)
- Bend temple ends to hook behind ears
- Secure behind ears with small dabs of clear glue or by stitching through hair
Alternative: Crocheted Glasses
With black embroidery thread or very thin yarn:
- Make two rings: MR, 15 sc, join, FO (larger lenses)
- Ch 7 for bridge, connect rings
- Ch 20 for each temple arm
- Stiffen with fabric stiffener or insert thin wire, let dry
- Attach to head, securing behind ears
7. White Pointed Collar
White yarn, 2.0mm hook
- Ch 32 (adjust to fit around neck)
- Row 1: sc in 2nd ch from hook and across (31)
- Row 2: ch 1, turn, sc 14, ch 1, turn, sc back (creates first collar point)
- Row 3: ch 1, turn, dec, sc 10, dec (12)
- Row 4: ch 1, turn, dec, sc 8, dec (10)
FO first point. Repeat on opposite end for second collar point.
Shape into pointed shirt collar style. Sew around neckline, allowing points to extend slightly over vest edge.
8. Belt Buckle
Golden brown or brass-colored yarn, 2.0mm hook
- Ch 10
- Row 1: sc in 2nd ch from hook and across (9)
- Rows 2-3: ch 1, turn, sc across (9)
FO. Shape into rectangular buckle. Sew to center front of vest at natural waistline (slightly lower than center).
9. Facial Details
- Eyes: Add white highlight dots with embroidery thread at upper right of each eye
- Smile: Embroider gentle, kind smile with dark red or brown thread — keep it subtle and warm
- Wrinkles (optional): Add very light lines with gray thread at outer eye corners for character
🧷 ASSEMBLY INSTRUCTIONS
Pinocchio Assembly
- Sew hair cap onto head, positioning it low on forehead
- Attach side-swept hair piece across forehead from left to right
- Attach ears to sides of head
- Sew head firmly onto body at neck
- Attach arms to shoulders angled slightly forward
- Sew white Peter Pan collar around neckline, ensuring rounded sections lay flat
- Position and secure bright turquoise bowtie centered on collar
- Attach red suspender straps from front to back, crossing at back
- Place hat on head tilted slightly back, tack down with a few stitches
- Sew prominent red feather to side of hat
- Embroider all facial details: thin arched eyebrows, wide smile, large pink cheek circles
- Add white highlights to eyes
Geppetto Assembly
- Sew gray hair cap onto head
- Attach 6-8 side curls around head for full, wavy hair texture
- Sew ears to sides of head
- Position and sew large mustache swirls under nose — make them prominent!
- Embroider extremely bushy, thick eyebrows
- Attach head firmly to body
- Sew arms to shoulders at slight downward angle (45 degrees)
- Place white pointed collar around neckline and secure
- Attach golden belt buckle to vest front at natural waist
- Position wire glasses on face, secure frames behind ears (through hair or with glue)
- Embroider gentle smile and optional wrinkle details
- Add white highlights to eyes
🌟 FINISHING TOUCHES
For Both Characters:
- Weave in all yarn tails carefully, hiding inside body
- Use tapestry needle to sculpt facial features slightly if desired
- Add light pink blush to cheeks using embroidery thread or chalk pastels
- Ensure both figures can stand independently with proper stuffing distribution
- Position characters together with Pinocchio’s head slightly tilted toward Geppetto
Optional Details:
- Add light brushing or needle felting to hair for extra texture
- Apply fabric stiffener to Geppetto’s mustache for dramatic curl hold
- Add tiny stitches to define finger separations on hands
💡 DISPLAY IDEAS
Your completed Pinocchio and Geppetto duo makes a heartwarming display! Here are some ideas:
- Place them on a wooden shelf with vintage books
- Create a small workshop scene with miniature tools
- Display in a shadow box with fairy tale theme
- Gift together in a wooden box as a keepsake set
- Position on a desk as inspirational handmade art
These characters are perfect for collectors, fairy tale enthusiasts, or as a meaningful handmade gift. The attention to detail in their clothing, expressions, and accessories makes them truly special pieces that will be treasured for years to come.
📝 Pattern Notes
- Stitch counts are shown in parentheses at end of each round
- Stuff all pieces firmly but not overly tight to maintain shape
- Use stitch markers to track rounds
- Color accuracy matters: Ensure turquoise/cyan is bright, not pale blue
- Take your time with Geppetto’s mustache and eyebrows — they’re defining features!
- Size ratio is important: Pinocchio should be approximately 65-70% of Geppetto’s height
- Photos of your progress can help you adjust proportions as you work
Happy Crocheting! 🧶


Maravilhosos