Bring a slice of handmade sweetness to your crochet collection with the Amigurumi Pie, a plush project that looks like it rolled straight out of a cozy cottage kitchen! 🥧🧶 With its beautifully scalloped crust, vertical cream ridges meeting at the top, and a textured raspberry-like cherry, this little pie is bursting with charm. Soft, squishy, and oh-so-cute, it makes a delightful décor piece or a thoughtful gift for anyone who loves cozy, whimsical creations.
Perfect for crocheters who enjoy crafting food-inspired designs, this pie plush works up quickly and adds a touch of warmth wherever it’s placed. Whether styled on a shelf, tucked into a gift basket, or paired with other amigurumi treats, the Amigurumi Pie is a joyful way to crochet comfort, charm, and a sprinkle of handmade magic—one loop at a time! 🧵✨💕
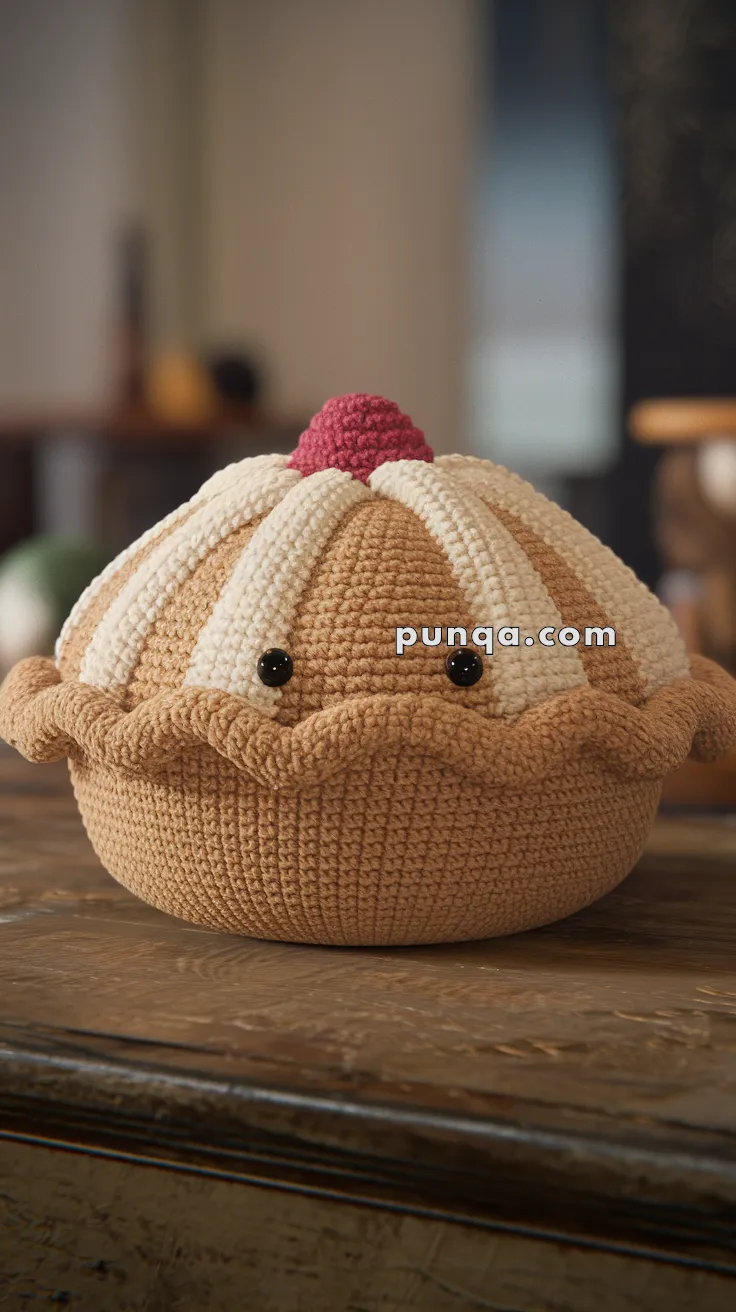
🥧 Amigurumi Pie Plush Crochet Pattern
This adorable amigurumi pie looks like it rolled straight out of a cozy cottage kitchen! With a beautifully scalloped crust, vertical cream ridges that meet at the top, and a textured raspberry-like cherry, this soft pie plush makes the sweetest décor piece or gift. The simple face gives it extra charm—perfect for shelves, nurseries, or your seasonal display.
✨ Skill Level
Beginner to Intermediate — You’ll work in continuous rounds, shape a wide bowl base, create vertical top ridges, and crochet a textured cherry.
📏 Finished Size
Approx. 8–9 in (20–23 cm) wide and 5–6 in (13–15 cm) tall, using worsted yarn + 3.5 mm hook.
🧶 Materials
-
Worsted yarn
-
Light brown / tan (pie base + crust)
-
Cream/off-white (top ridges)
-
Raspberry/dark pink (textured cherry)
-
-
3.5 mm crochet hook
-
10–12 mm black safety eyes
-
Polyfill stuffing
-
Yarn needle
-
Stitch markers
🧵 Abbreviations (US terms)
MR – Magic Ring
sc – single crochet
inc – increase (2 sc in same stitch)
dec – decrease (sc2tog)
sl st – slip stitch
ch – chain
BLO – back loop only
FLO – front loop only
FO – fasten off
🥣 Pie Base (Deep Bowl Form)
With tan yarn:
-
MR, 6 sc (6)
-
inc ×6 (12)
-
(1 sc, inc) ×6 (18)
-
(2 sc, inc) ×6 (24)
-
(3 sc, inc) ×6 (30)
-
(4 sc, inc) ×6 (36)
-
(5 sc, inc) ×6 (42)
-
(6 sc, inc) ×6 (48)
-
(7 sc, inc) ×6 (54)
-
(8 sc, inc) ×6 (60)
11–26. sc around (60)
Add eyes:
Place between R17–18, approx. 11–12 sts apart.
-
BLO: sc around (60)
-
(8 sc, dec) ×6 (54)
-
(7 sc, dec) ×6 (48)
-
(6 sc, dec) ×6 (42)
Stuff firmly -
(5 sc, dec) ×6 (36)
-
(4 sc, dec) ×6 (30)
-
(3 sc, dec) ×6 (24)
FO, close tightly.
🍥 Cream Ridges (Make 8)
These create the vertical raised stripes seen in the photo.
With cream yarn:
Ch 16
Row 1: sc in 2nd ch from hook, sc across (15)
Rows 2–7: sc across (15)
FO, leave long tail.
Assembly:
-
Pin all 8 strips evenly around the top dome.
-
Curve slightly for natural shaping.
-
Sew top ends tightly together (hidden under cherry).
-
Sew bottom ends just above crust line.
🍒 Cherry
With raspberry yarn:
-
MR, 6 sc (6)
-
inc ×6 (12)
-
(1 sc, inc) ×6 (18)
4–5. sc around (18) -
(1 sc, dec) ×6 (12)
-
dec ×6 (6)
FO, stuff lightly, close.
Lightly tug loops to create a subtle berry-like texture.
Sew cherry centered over where all cream ridges meet.
🥧 Fluted Crust
Attach tan yarn to FLO of Round 27.
Repeat around:
(sl st, ch 2, 3 dc in next stitch, ch 2, sl st in next stitch)
This produces the large, raised scallops seen in the photo.
FO and weave in ends.
😊 Face
The pie in the photo has:
✔ 2 black safety eyes
✘ No mouth
Leave expression minimal for accuracy.
✂️ Finishing
-
Shape cream ridges into soft valleys.
-
Adjust crust waves for symmetry.
-
Flatten base slightly to help the pie sit upright.
💛 Final Thoughts
This sweet little pie is one of those projects that feels comforting from the very first stitch. Each ridge, scallop, and detail comes together to create a plush that’s as cozy and charming as a real homemade dessert. Whether you use it as seasonal décor, a whimsical gift, or a delightful addition to your amigurumi collection, this pie is sure to bring smiles wherever it goes.
If you make your own version, feel free to play with colors, toppings, and textures—there are endless delicious combinations to explore. Happy crocheting, and may your hooks always bring joy to your hands and heart! 🧶✨