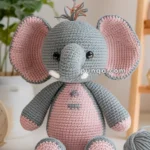
Waddle into cuteness with this Amigurumi Penguin crochet pattern! With its round belly, flappy wings, and sweet little beak, this chilly companion is ready to bring a flurry of joy to your crochet collection. Whether you’re crafting for winter decor, making a cozy gift, or simply love adorable animal designs, this pattern lets you stitch up a penguin full of charm and personality! Perfect for snuggling on snowy days or adding a playful touch to your shelf, this crochet creation brings a touch of handmade Arctic magic to every stitch. 🐧❄️
Designed for customization, this pattern invites you to play with different shades of black, white, and gray—or even go bold with fun, unexpected colors! Add embroidered details, a tiny scarf, or a miniature hat for extra flair. Craft a classic penguin with traditional hues, create a pastel version for a softer look, or even stitch up a whole colony of penguin pals for a delightful display! Whether gifted as a thoughtful keepsake, displayed as a wintery accent, or made simply for the joy of crafting, this Amigurumi Penguin is a fun and heartwarming project—perfect for bringing a touch of handmade frosty fun to every stitch! 🧶💖✨

🐧 Amigurumi Penguin – Free Crochet Pattern
This sweet and cuddly amigurumi penguin features a smooth round belly, flipper arms, bright yellow beak and feet, and adorable stitched eye patches. The shape is soft and slightly chubby – perfect as a winter gift or nursery toy!
✨ Skill Level:
Easy to Intermediate – Involves basic shaping and neat color changes for the belly and face.
📏 Finished Size:
Approx. 8–10 inches (20–25 cm) tall using DK or worsted weight yarn and a 2.5–3.5 mm hook.
🧶 Materials:
-
Yarn (Worsted or DK weight):
-
Black – body, arms, outer face
-
White – belly, face patches
-
Yellow/Gold – beak and feet
-
Brown or black – small stitch for nostrils (optional)
-
-
Crochet hook: 2.5–3.5 mm
-
10–12 mm safety eyes or black buttons
-
Tapestry needle
-
Stitch marker
-
Polyfill stuffing
🧵 Abbreviations (US Terms):
MR – Magic Ring
sc – Single Crochet
inc – Increase (2 sc in one stitch)
dec – Decrease (sc 2 together)
sl st – Slip Stitch
ch – Chain
FO – Fasten Off
🎨 Color Change Tip:
To achieve neat transitions between black and white (especially on the belly and eyes), always change color on the last yarn-over of the stitch before the new color begins.
Use the invisible color change technique:
-
Complete the last stitch before color switch up to the final yarn-over.
-
Yarn over in the new color and pull through.
-
Continue crocheting with the new color.
🧠 Head & Body (Worked as One Piece – Start With White)
-
MR, 6 sc (white)
-
inc x6 = 12
-
(1 sc, inc) x6 = 18
-
(2 sc, inc) x6 = 24
-
(3 sc, inc) x6 = 30
-
(4 sc, inc) x6 = 36
-
(5 sc, inc) x6 = 42
8–12. sc around (42) – position safety eyes between rounds 10–11 -
Begin shaping belly: switch to black on back half, continue white in front. Use stitch markers to split colors evenly.
14–18. sc around (black on back, white on front)
19–22. sc around (belly narrows at bottom) -
(5 sc, dec) x6 = 36
-
(4 sc, dec) x6 = 30
-
(3 sc, dec) x6 = 24
-
(2 sc, dec) x6 = 18
Stuff firmly. -
(1 sc, dec) x6 = 12
-
dec x6 = 6
FO, close hole, weave in tail.
👀 Eye Patches (Make 2 – White)
-
MR, 6 sc
-
(1 sc, inc) x3 = 9
-
sc around
FO and sew in place surrounding the eyes. Leave 1–2 rows between eyes. Attach eyes through these patches.
👃 Beak (Yellow)
-
MR, 6 sc
-
inc x6 = 12
-
sc around
-
dec x6 = 6
FO, lightly stuff, sew between eyes.
Optional: Embroider tiny nostrils or add a small horizontal stitch.
🦆 Feet (Make 2 – Yellow)
Toes (Make 3 per foot):
-
MR, 6 sc
-
sc around
FO and leave tail.
Join 3 toes:
-
sc around first toe, then join second, then third = ~18 sc
-
sc around all
-
dec x6 = 12
Stuff, shape into a foot base, and sew to the bottom of the body, slightly spread outward.
🖐 Flippers (Make 2 – Start Black, add white edge)
-
MR, 6 sc
-
inc x6 = 12
-
(1 sc, inc) x6 = 18
4–6. sc around -
Switch to white, sc around
-
FO, flatten, and sew to sides of body. Do not stuff.
✂️ Final Assembly
-
Sew the beak snugly between the eyes.
-
Attach eye patches evenly.
-
Sew the feet at a slight outward angle for stability.
-
Attach flippers on either side at the top of the belly.
-
Add blush or optional embroidery details.
💡 Customization Ideas
-
Add a tiny bow tie or scarf
-
Use fuzzy yarn for a baby penguin look
-
Add a Santa hat or winter scarf for holiday decor
This cozy little penguin pal is perfect for hugs, gifts, or waddling into your winter wonderland! 🐧❄️


