Float into cuteness with this Amigurumi Otter Holding Flowers crochet pattern! With its sweet little face, soft paws, and a delicate bouquet clutched close to its chest, this lovable otter is ready to melt hearts. Whether you’re crafting a thoughtful gift, adding a touch of woodland whimsy to your decor, or simply adore animal-inspired amigurumi, this pattern lets you stitch up a charming friend full of warmth and personality. It’s a delightful way to celebrate kindness, love, or just the joy of handmade cuteness. 🦦💐✨
Designed for customization, this pattern invites you to play with soft neutrals, pastel florals, or even bold, vibrant hues to make your otter truly one of a kind. Add embroidered details, a tiny bow, or even a heart-shaped flower for extra flair. Whether you’re creating a keepsake for someone special or just indulging in a cozy crochet session, this Amigurumi Otter Holding Flowers is a joyful and creative project—perfect for bringing a touch of handmade tenderness to every stitch! 🧶💖🌸
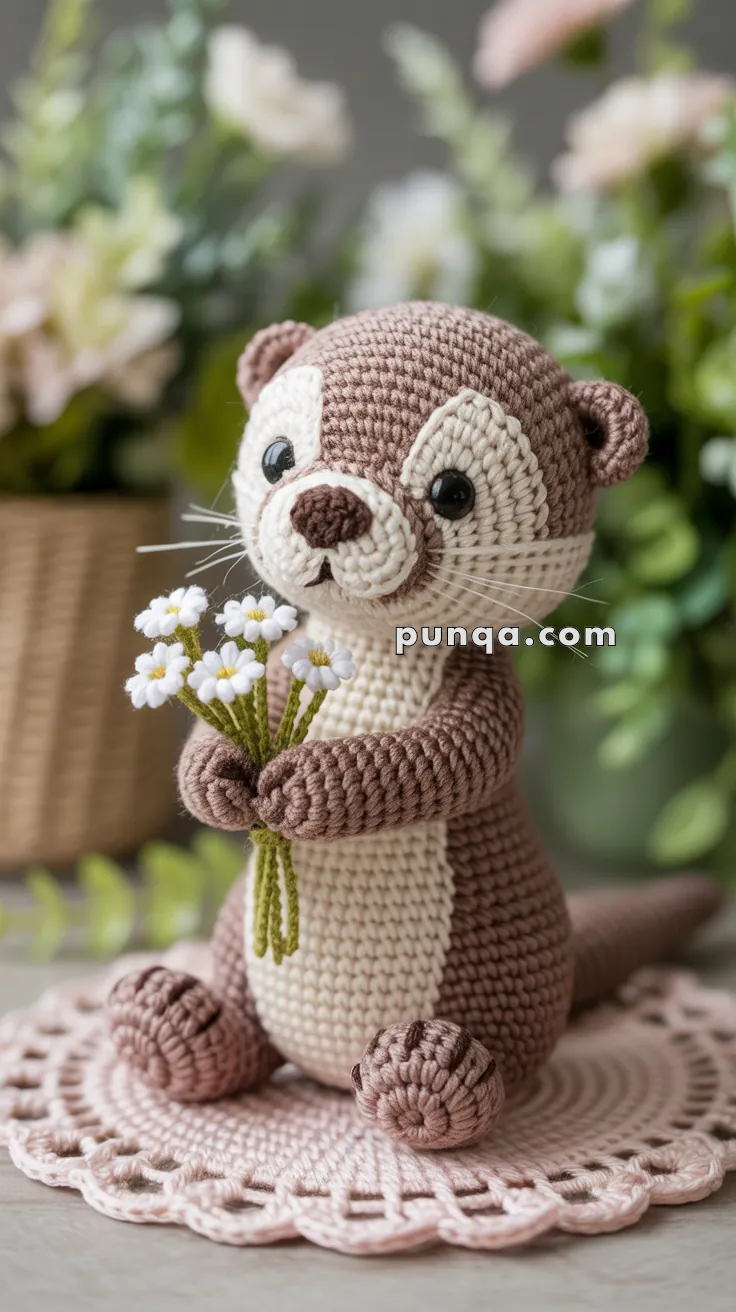
🦦 Amigurumi Otter with Flowers Crochet Pattern
Bring a little sweetness and serenity to your handmade world with this darling otter holding a tiny bouquet of daisies. With its soft brown fur, creamy muzzle and belly, long tapered tail, and gentle whiskers, this little otter looks like it’s ready to gift a flower to someone special. 🌼💛
✨ Skill Level
Intermediate – colorwork in the round (front cream / back brown), shaping, applique pads, and light embroidery.
📏 Finished Size
About 20–23 cm (8–9 in) tall with DK/light-worsted yarn and a 2.5–3.0 mm hook.
🧶 Materials
- Brown yarn (head back, body back/sides, limbs, tail) – ~60 g
- Cream/Beige yarn (large face panels, muzzle transition, chest/belly) – ~30 g
- Dark brown yarn (nose, mouth, toe lines) – small amount
- Green (stems), white (petals), yellow (centers) for daisies – a few grams each
- 8 mm safety eyes
- 2.5–3.0 mm hook, fiberfill, tapestry needle, stitch markers
- Nylon/fishing line for whiskers
- Optional thin floral wire for stems
🧵 Abbreviations (US)
MR magic ring · sc single crochet · inc 2 sc in 1 st · dec sc2tog · sl st slip stitch · ch chain · FLO/BLO front/back loop only · FO fasten off
Work in a continuous spiral unless noted.
Head – Split Face Construction (Brown + Cream)
We’ll build the head with front cream panels and back/top brown. Counts assume 36 sts around.
- Brown MR, 6 sc (6)
- inc ×6 (12)
- (sc, inc) ×6 (18)
- (2 sc, inc) ×6 (24)
- (3 sc, inc) ×6 (30)
- (4 sc, inc) ×6 (36)
Rounds 7–12: front half cream, back half brown
Place a marker at the round start (back-center). Work 18 sc in brown, attach cream, work 18 sc in cream. Carry the unused color on the wrong side and tug gently at each color-change to keep a clean vertical split.
7–12. 18 sc brown, 18 sc cream (36 total)
- (4 sc, dec) ×3 in brown → 15 brown; (4 sc, dec) ×3 in cream → 15 cream (30)
- Brown (3 sc, dec) ×3 → 12 brown; Cream (3 sc, dec) ×3 → 12 cream (24)
Insert eyes between Rnds 10–11 inside the cream area, ~7 sts apart. Stuff head firmly, keeping the face smooth.
- Around in both colors: sc (24)
- (2 sc, dec) ×6 switching colors where they fall (18)
- (sc, dec) ×6 (12)
- dec ×6 (6), FO and close.
Large Muzzle Transition (Cream)
This blends into the cream face rather than looking “stuck on.”
- MR, 6 sc
- inc ×6 (12)
- (sc, inc) ×6 (18)
- (2 sc, inc) ×6 (24)
- sc around (24)
FO, lightly stuff. Pin low on the cream face so its top edge meets the cream/brown split nicely; sew with invisible whip stitch.
Embroider a small oval nose in dark brown at the top of the muzzle and a short “Y/•—” mouth line.
Add 3–4 nylon whiskers per side by threading through the muzzle and trimming.
Ears (Make 2 – Brown)
- MR, 6 sc
- (sc, inc) ×3 (9)
- sc around (9), FO.
Flatten. Sew on the sides of the head, slightly behind the eye line and low enough to read as small rounded ears.
Body – Structural Cream Chest/Belly
We keep a wide cream panel from the chin down through the torso.
- Cream MR, 6 sc (6)
- inc ×6 (12)
- (sc, inc) ×6 (18)
- (2 sc, inc) ×6 (24)
- (3 sc, inc) ×6 (30)
6–7. sc around in cream (30)
Start two-color body: mark round start at back center.
8–16. Work 18 sc brown (back/sides), 12 sc cream (front panel) (still 30 total). Keep the vertical color edges aligned with the head’s split.
17. (3 sc, dec) ×6 across the round, keeping colors as placed (24)
18. (2 sc, dec) ×6 (18)
19. (sc, dec) ×6 (12) – stuff firmly, shaping a smooth teardrop tummy with the cream centered.
20. dec ×6 (6), FO and close.
Arms (Make 2 – Brown with Shaped Curve)
- MR, 6 sc
- (sc, inc) ×3 (9)
3–6. sc around (9) - Inner bend shaping: sc, dec, sc, dec, sc (7)
8–10. sc around (7)
FO, light stuff only in the paw. Sew angled forward so the hands meet naturally.
Hand Paw Pads (per hand – Cream)
- Palm: MR, 6 sc, inc ×6 (12), FO.
- Toes (×3): MR, 6 sc, FO.
Sew palm pad to the hand tip, then the three small circles along the edge to mimic the visible toe pads.
Legs/Feet (Make 2 – Brown with Pads)
- MR, 6 sc
- inc ×6 (12)
- (sc, inc) ×6 (18)
4–5. sc around (18) - (sc, dec) ×6 (12)
- sc around (12)
- dec ×6 (6), FO. Stuff firmly and sew to the base for a stable sit.
Foot Pads (per foot – Cream)
- Sole: MR, 6 sc; inc ×6 (12); (sc, inc) ×6 (18); FO.
- Toes (×3): MR, 6 sc, FO.
Sew the sole to the front of each foot, then the three toe pads on top. Add dark-brown short lines at the tips for definition.
Tail (Brown)
- MR, 6 sc
- (sc, inc) ×3 (9)
- (2 sc, inc) ×3 (12)
4–14. sc around (12) - (2 sc, dec) ×3 (9)
16–20. sc around (9)
FO, stuff lightly. Sew to the lower back, curving gently outward for the long tapered look.
Bouquet of Daisies (3–5)
Stems (Green): ch 12–15, sl st back; make several. Insert fine wire if desired.
Petals (White): In MR, repeat (ch 2, 2 dc, ch 2, sl st) ×5; tighten ring.
Centers (Yellow): satin stitch or French knot.
Assemble stems, sew to chest, then stitch hands over to “grasp” the bouquet.
Assembly Order
- Sew head to body, aligning the cream chest to the cream face.
- Attach legs, then tail.
- Sew curved arms so the paw pads face inward and meet over the bouquet.
- Attach ears.
- Add whiskers, nose/mouth embroidery, and any blush.
Tips for Crisp Two-Tone Edges
- Always change color on the last yarn-over of the stitch before the split.
- Keep floats tidy inside; if you prefer, carry the unused yarn up the vertical edge and twist at the color change each round to lock it.
- Place stitch markers at the two vertical boundaries (left and right edges of the cream panel) to keep the split perfectly centered.
🎀 Final Result
You now have your very own otter friend holding a sweet bouquet of daisies. Its round head, expressive face, long curved tail, and tiny whiskers make it irresistibly endearing. Perfect for gifting, decorating, or simply keeping by your side to bring a smile every day. 🌸🦦💗