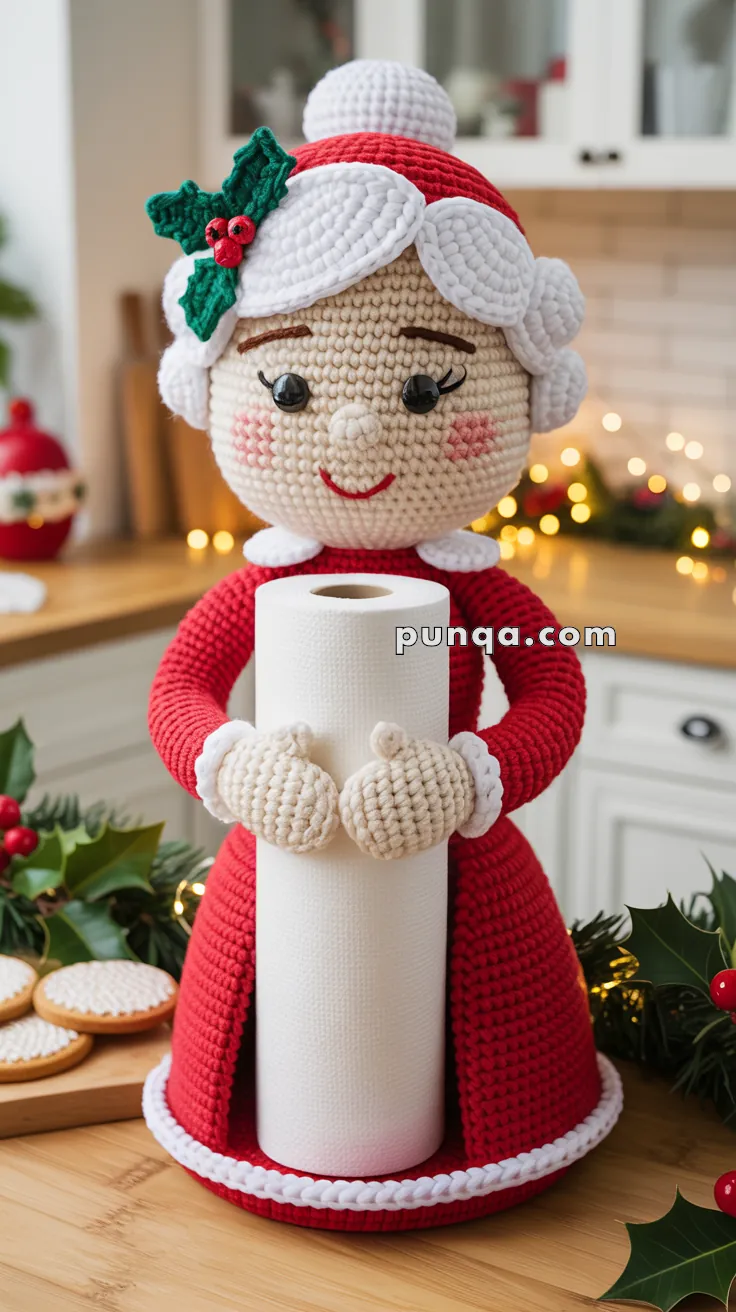
Add a touch of holiday sweetness to your home with the Amigurumi Mrs. Claus Towel Roll Holder, a festive crochet project that’s as practical as it is heartwarming! 🎅🧶 With her fluffy white bun, scalloped curls, holly decoration, festive red dress, and cozy mittens, Mrs. Claus is ready to lend a helping hand in the kitchen or bathroom while spreading seasonal cheer. She’s the perfect companion to Santa and a delightful way to dress up your space for the holidays.
Ideal for crocheters who love playful details and joyful décor, this pattern invites you to explore soft textures, classic Christmas colors, and charming character work. Whether you’re crafting for yourself, gifting to a holiday host, or adding to your handmade collection, the Amigurumi Mrs. Claus Towel Roll Holder brings warmth, whimsy, and a sprinkle of North Pole magic—one loop at a time! 🧵❄️
🎀 Amigurumi Mrs. Claus Towel Roll Holder Crochet Pattern
This cheerful holiday towel holder features a rounded smiling face, soft sculpted white curls gathered into a bun, a holly hair accent, a clearly defined neck and collar, and a long hollow red dress that hides and supports a standard paper towel roll. Her gently curved arms and plump mittens hold the roll in front, combining festive decoration with everyday function.
✨ Skill Level
Intermediate — includes shaping, structural construction, and detailed assembly.
📏 Finished Size
Approximately 35–40 cm (14–16 in) tall
Fits a standard paper towel roll
🧶 Materials
Super bulky chenille / plush yarn
- Red — dress and sleeves
- White — hair, bun, curls, trim, collar
- Beige — face and mittens
- Green — holly leaves
- Red — holly berries and lips
Other supplies
- 4.5–5.0 mm crochet hook
- 12–14 mm safety eyes
- Polyester stuffing
- Floral wire (about 60 cm / 24 in total)
- Yarn needle and scissors
- Optional weighted pouch for base stability
🧵 Abbreviations (US Terms)
MR — magic ring
sc — single crochet
inc — increase
dec — decrease
ch — chain
sl st — slip stitch
FO — fasten off
👩 Head (Beige)
R1: MR 6
R2: inc ×6 (12)
R3: (1 sc, inc) ×6 (18)
R4: (2 sc, inc) ×6 (24)
R5: (3 sc, inc) ×6 (30)
R6: (4 sc, inc) ×6 (36)
R7–15: sc around (36)
Insert safety eyes between R10–11.
R16: (4 sc, dec) ×6 (30)
R17: (3 sc, dec) ×6 (24)
R18: (2 sc, dec) ×6 (18)
Stuff firmly.
R19: (1 sc, dec) ×6 (12)
R20: dec ×6 (6)
FO and close.
👃 Nose
R1: MR 6
R2: inc ×6 (12)
R3–4: sc around
Lightly stuff and sew centered between the eyes. Embroider eyebrows, eyelashes, and a curved smile. Add soft pink blush to cheeks.
🧣 Neck (White)
R1: MR 6
R2–6: sc around (6)
Stuff lightly. Sew between head and torso opening to create a visible neck.
💇 Hair Cap (White)
R1: MR 6
R2: inc ×6 (12)
R3: (1 sc, inc) ×6 (18)
R4: (2 sc, inc) ×6 (24)
R5: (3 sc, inc) ×6 (30)
R6: (4 sc, inc) ×6 (36)
R7–11: sc around
Sew snugly onto the head.
🍥 Bun
R1: MR 6
R2: inc ×6 (12)
R3: (1 sc, inc) ×6 (18)
R4: (2 sc, inc) ×6 (24)
R5–7: sc around
Stuff firmly and sew to the crown.
🌊 Scalloped Side Curls (Make 4–6)
Ch 14
Work 2 sc in each chain to form soft curls.
Sew along both sides of the face.
🎄 Holly Decoration
Leaves (Make 2)
Ch 7
Work sc, hdc, dc, dc, hdc, sc
Berries (Make 3)
MR 6, sl st close
Cluster berries between leaves and sew beside the bun.
👗 Hollow Dress & Torso (Red)
Work from bottom upward to form a cone.
Ch 72, join.
R1–3: sc around (72)
Switch to white.
R4–5: sc around (72)
Switch to red.
R6: sc around (72)
R7: (10 sc, dec) ×6 (66)
R8: sc around
R9: (9 sc, dec) ×6 (60)
R10: sc around
R11: (8 sc, dec) ×6 (54)
R12: sc around
R13: (7 sc, dec) ×6 (48)
R14: sc around
R15: (6 sc, dec) ×6 (42)
R16: sc around
R17: (5 sc, dec) ×6 (36)
R18: sc around
R19: (4 sc, dec) ×6 (30)
R20: sc around
R21: (3 sc, dec) ×6 (24)
R22–28: sc around (24)
Switch to white.
R29–30: sc around (24)
FO. Keep interior hollow.
🤍 Collar (White)
Ch 30
Row 1: sc across
Row 2: sc across
Lightly gather and sew around neckline to form a soft folded collar.
🧤 Arms (Make 2)
With red:
R1: MR 6
R2: inc ×6 (12)
R3–12: sc around
Switch to white:
R13–14: sc around
Insert wire and stuff lightly.
🤲 Mittens (Make 2)
R1: MR 6
R2: inc ×6 (12)
R3: (1 sc, inc) ×6 (18)
R4–6: sc around
R7: (1 sc, dec) ×6 (12)
Stuff firmly.
Thumb
MR 4
R2: inc ×4 (8)
R3: sc around
R4: dec ×4
Attach to mitten and sew mittens to arms.
🛠 Assembly
Attach hair cap, bun, curls, and holly to the head.
Sew nose and embroider facial details.
Sew the neck between head and torso.
Attach arms at shoulder level and bend forward.
Position mittens to meet in front.
Insert the paper towel roll through the hollow dress.
Add optional weight inside the base if desired.
🌟 Finishing
Adjust curls and collar neatly. Shape the arms so the mittens cradle the roll securely. The finished figure stands upright with a smooth neck transition, balanced base, and cheerful holiday expression, creating a festive and functional kitchen accent.