🐭 Blue & Pink Mouse Crochet Pattern
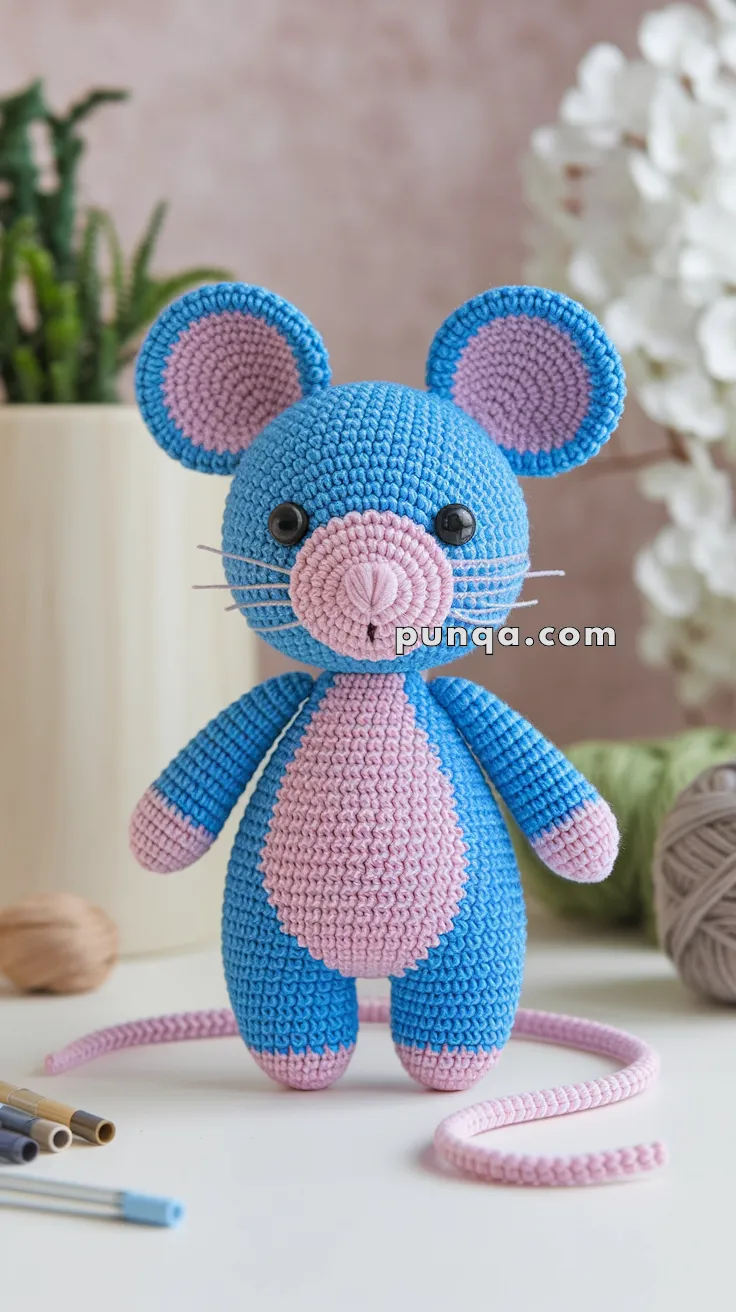
Soft, bright, and full of charm — this little mouse stands out with a round, sculpted muzzle, long belly patch, big pink paws, and cheerful ears. The proportions are balanced for the cute, huggable look shown in the photo.
✨ Skill Level
Beginner → Intermediate – basic shaping, color work, light embroidery.
📏 Finished Size
Approx. 25 cm (10 in) tall using DK cotton and 2.5 mm hook.
🧶 Materials & Yarn Amounts
-
Bright Blue – 45 g (body, head, outer ears, limbs)
-
Soft Pink – 40 g (inner ears, muzzle, belly, paws, tail)
-
Lilac / light gray – scrap (for whiskers)
-
2.5 mm crochet hook
-
10–12 mm safety eyes
-
Black embroidery thread (for nose & smile)
-
Nylon line or fishing wire (whiskers)
-
Polyfill ≈ 35 g
-
Tapestry needle • Scissors • Stitch markers
🧵 Abbreviations (US)
MR – magic ring
sc – single crochet
inc – increase
dec – decrease
ch – chain
sl st – slip stitch
FO – fasten off
🪡 Instructions
🩵 Head (Blue)
1 MR 6 sc
2 inc ×6 (12)
3 (1 sc, inc) ×6 (18)
4 (2 sc, inc) ×6 (24)
5 (3 sc, inc) ×6 (30)
6 (4 sc, inc) ×6 (36)
7 – 15 sc around (36)
16 (4 sc, dec) ×6 (30)
17 (3 sc, dec) ×6 (24)
➤ Insert eyes between R10–R11 ≈ 8 sts apart.
18 (2 sc, dec) ×6 (18)
Stuff firmly.
19 (1 sc, dec) ×6 (12)
20 dec ×6 (6) FO and close.
💗 Sculpted Muzzle (Pink) – 3-D Version
1 MR 6 sc
2 inc ×6 (12)
3 (1 sc, inc) ×6 (18)
4 (2 sc, inc) ×6 (24)
5 (3 sc, inc) ×6 (30)
6 (4 sc, inc) ×6 (36)
7 – 9 sc around (36)
10 (4 sc, dec) ×6 (30)
11 (3 sc, dec) ×6 (24)
Stuff firmly to make it round and plump. FO leaving long tail.
Sew centered below eyes so it projects strongly forward like a ball.
Nose & Mouth:
Embroider a small triangular nose at the top of the muzzle (using pink yarn or black thread outline).
Add a short vertical stitch below and tiny “V” smile beneath.
🩷 Ears (2 pcs)
Inner (Pink) MR 6 sc → inc ×6 (12) → (1 sc, inc) ×6 (18) → (2 sc, inc) ×6 (24) → (3 sc, inc) ×6 (30) FO.
Outer (Blue) repeat, do not FO.
Place wrong sides together, sc around both (≈ 36 sts). FO leaving tail to sew.
Attach high on head, angled slightly forward. (Insert pipe cleaner if needed for support.)
🩵 Body (Blue + Pink Patch)
1 MR 6 sc
2 inc ×6 (12)
3 (1 sc, inc) ×6 (18)
4 (2 sc, inc) ×6 (24)
5 (3 sc, inc) ×6 (30)
6 (4 sc, inc) ×6 (36)
7 – 14 sc around (36)
15 (4 sc, dec) ×6 (30)
16 (3 sc, dec) ×6 (24)
17 (2 sc, dec) ×6 (18)
Stuff firmly and FO leaving long tail for joining.
Long Oval Belly Patch (Pink)
Ch 18.
Row 1 sc in 2nd ch from hook, sc 15, 3 sc in last st; rotate and work other side sc 15, 2 sc in last (36).
Row 2 inc first st, sc 15, inc ×3, sc 15, inc ×2 (42).
Row 3 sc around evenly. FO and sew from upper chest to almost bottom edge.
🩷 Arms (2 pcs)
Pink – MR 6 sc → inc ×6 (12) → R3-8 sc around (12) (≈ 6 rnds pink).
Switch to Blue R9-16 sc around (12).
17 (1 sc, dec) ×4 (8). Stuff lightly and flatten top. FO and sew to shoulders.
🩷 Legs (2 pcs)
Pink – MR 6 sc → inc ×6 (12) → R3-8 sc around (12).
Switch to Blue R9-14 sc around (12).
Stuff firmly and FO. Sew so mouse stands evenly.
🩷 Tail
Ch 35-40. Starting in 2nd ch from hook sl st back for slim tail.
Or for thicker tail MR 4 sc and work spiral ≈ 30 rows. FO and attach center back.
🩷 Whiskers
Cut 6 nylon threads ≈ 8 cm. Insert 3 each side of nose; secure inside head with tiny glue dot or knot. Trim evenly.
🧷 Assembly Order
1️⃣ Sew muzzle first to front of head.
2️⃣ Add nose and mouth.
3️⃣ Attach head to body securely.
4️⃣ Sew belly patch centered front.
5️⃣ Attach arms and legs symmetrically.
6️⃣ Sew ears and insert whiskers.
🌸 Finishing Touches
• Add tiny white felt dots to eyes for sparkle.
• Optional bow tie or scarf.
• Wire in tail for poseability.
🎀 Final Thought
Your pastel mouse now matches the photo perfectly — plump nose, long belly, big pink paws, and sweet expression. Soft colors and round proportions make it an instant favorite for gifts, nursery shelves, or just to keep you smiling.
✨ Happy Crocheting! 🐭💗