Bring a touch of Disney magic to your bookshelf with this Amigurumi Minnie Mouse Bookend crochet pattern! Inspired by the beloved character, this adorable design captures Minnie’s signature bow, cheerful expression, and classic polka-dot style in every stitch. Whether you’re crafting for Disney fans, adding a playful accent to your reading nook, or simply enjoy making character-inspired amigurumi designs, this pattern lets you stitch up a delightful Minnie Mouse bookend bursting with personality! Perfect for keeping your favorite stories in place, this crochet creation brings a touch of handmade charm to every shelf. 📚✨
Designed for customization, this pattern allows you to experiment with different shades of red, pink, or even pastel hues to match your decor. Add embroidered details, tiny accessories like a miniature book or Mickey-inspired embellishments, or even create a full set of Disney-inspired amigurumi for a magical display! Whether gifted as a thoughtful keepsake, displayed as a charming accent, or made simply for the joy of crafting, this Amigurumi Minnie Mouse Bookend is a fun and creative project—perfect for bringing a touch of handmade Disney magic to every stitch! 🧶💖✨
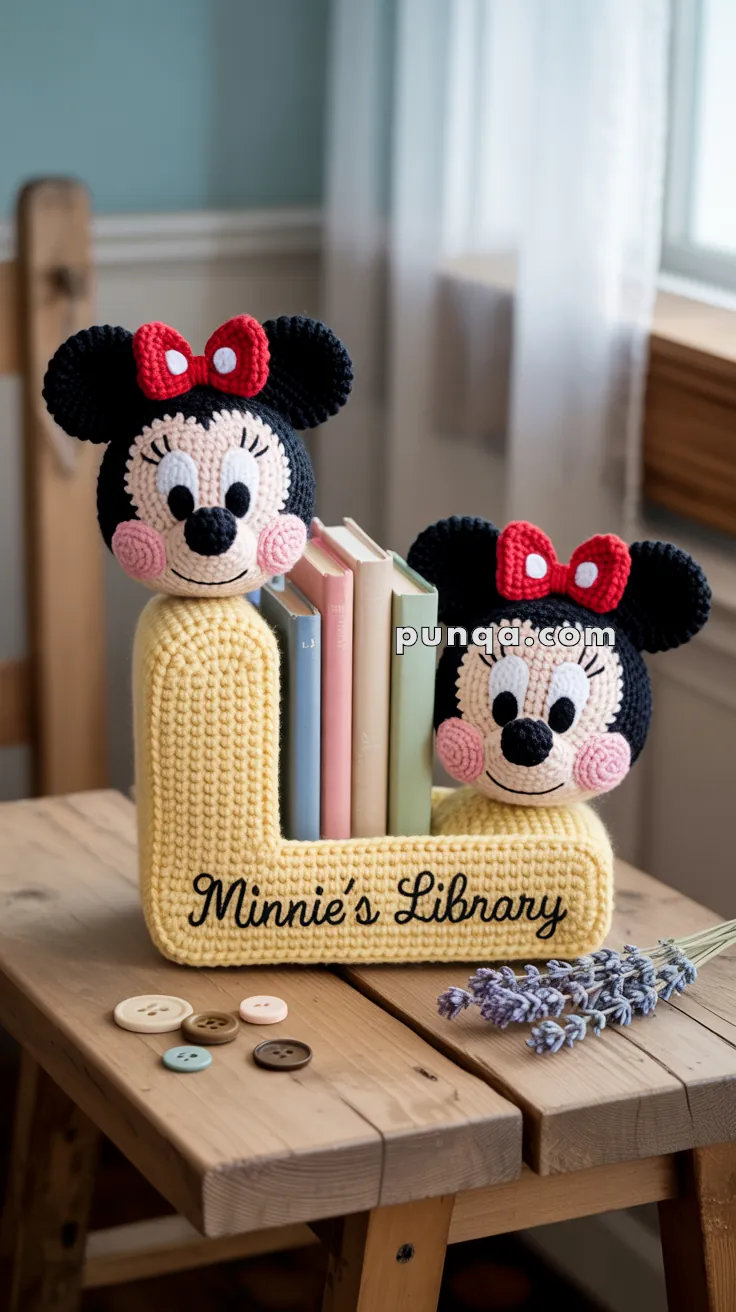
🎀 Amigurumi Minnie Mouse Bookend Crochet Pattern
Create a charming and functional Minnie Mouse–themed bookend, perfect for a child’s bookshelf or Disney-inspired reading corner. With a sturdy L-shaped base and plush Minnie heads on both sides, this design is equal parts cute and practical.
✨ Skill Level
Intermediate – Involves color changes, shaping, and structural reinforcement.
📏 Finished Size
Approx. 8″ tall x 8″ wide x 4″ deep
🧶 Materials
- Worsted weight yarn:
- Color A: Yellow (base)
- Color B: Black (ears, top head)
- Color C: Skin-tone (face)
- Color D: Red (bow)
- Color E: White (eyes, bow dots)
- Color F: Pink (cheeks)
- Color G: Black embroidery thread or yarn (eyelashes, smile)
- Crochet hook: 3.5–4.0 mm
- Polyfill stuffing
- Plastic canvas or cardboard for stiffening base
- Heavy filler (e.g., dried beans, pebbles in sealed pouch)
- Tapestry needle, stitch markers, scissors
🧵 Abbreviations (US Terms)
- MR – Magic Ring
- sc – single crochet
- inc – increase
- dec – decrease
- sl st – slip stitch
- st(s) – stitch(es)
- BLO/FLO – back/front loop only
🔸 Part 1: Minnie’s Head (Make 2)
With Color C (skin-tone):
- MR, 6 sc (6)
- inc x6 (12)
- [sc, inc] x6 (18)
- [2 sc, inc] x6 (24)
- [3 sc, inc] x6 (30)
- [4 sc, inc] x6 (36)
7–11. sc in each (36)
✳️ Color Change to Black (Top of Head):
On Round 12:
- At the last yarn-over of the final sc, drop Color C and yarn over with Color B (black) to complete the stitch. Continue the round in black.
12–18. sc in each (36)
19. [4 sc, dec] x6 (30)
20. [3 sc, dec] x6 (24)
21. [2 sc, dec] x6 (18)
22. [sc, dec] x6 (12)
23. dec x6 (6)
Fasten off. Stuff firmly.
🎨 Tip for Smooth Color Transition:
- Pull Color B through the final stitch of Color C for a seamless shift.
- Use split single crochet (SSC) for the last 2 stitches before switching colors to reduce color jog.
🔹 Part 2: Ears (Make 4) – Black
- MR, 6 sc (6)
- inc x6 (12)
- [sc, inc] x6 (18)
- sc in each (18)
Fasten off, flatten, sew 2 ears per head.
🔸 Part 3: Bow (Red with White Dots)
With Color D:
- Chain 13
- Row 1: sc in 2nd ch from hook and across (12)
3–6. sc in each row, ch 1, turn
Fasten off and wrap center with red yarn to cinch. Add small embroidered white dots with Color E.
🔹 Part 4: Eyes, Nose & Cheeks
- Eyes (Make 2 per head):
- White ovals, then black pupil circles
- Nose: small black oval
- Cheeks: crochet or embroider pink circles
Attach face details as shown, then embroider eyelashes and smile with black thread.
🔸 Part 5: L-Shaped Base
Bottom Panel:
- Chain 21 (adjust to book width)
- Row 1–12: sc in each st across (20 sts)
Fasten off.
Vertical Panel:
- Chain 21
- Row 1–18: sc in each st across
This makes the upright panel that books will lean against.
Assembly:
- Sew both pieces at a 90° angle to form an L-shape.
- Insert plastic canvas between layers for structure.
- Add a small bean bag or weighted pouch at the base before closing.
Optional: Use surface slip stitching or embroidery to write “Minnie’s Library” or the child’s name.
🔸 Final Assembly
Decorate with optional crocheted flowers or buttons for flair.
Attach one Minnie head to the top of each vertical panel using strong stitching.
Ensure the base is firm and weighted enough to support book pressure.
🎉 Finishing Touches & Display
Place your completed Minnie Mouse bookend on a shelf or reading nook and fill it with your favorite storybooks or journals! This charming and sturdy piece adds a dash of Disney magic to any room — whether it’s a child’s bedroom, a classroom corner, or your own crochet library. Feel free to personalize it with different yarn colors or add a matching Mickey to complete the set!
Happy crocheting — and happy reading! 📚