Welcome to the monstrously fun world of amigurumi! 👁️✨ Today, I’m excited to share my free crochet pattern for an Amigurumi Mike Wazowski—a quirky and lovable creation perfect for Pixar fans, animation enthusiasts, or anyone who enjoys crafting expressive and playful plush designs! 🧶 Whether you love stitching up iconic characters, experimenting with bold colors, or simply want to add a mischievous Mike Wazowski to your handmade lineup, this pattern will guide you through crafting a beautifully sculpted plush with his signature big eye, cheeky grin, and tiny horns! 👾
This design embraces vibrant greens, rounded shaping, and thoughtful details to bring a fun and nostalgic presence to your crochet projects! 🧶✨ I’ve carefully outlined each step to ensure your Amigurumi Mike Wazowski turns out just right—ready to bring some monster magic to your collection or become a treasured handmade gift! 🎁 So grab your hooks, pick out bright greens, crisp whites, and deep blacks, and let’s stitch up a fantastic Mike Wazowski! 👁️
👁️ Amigurumi Mike Wazowski Crochet Pattern
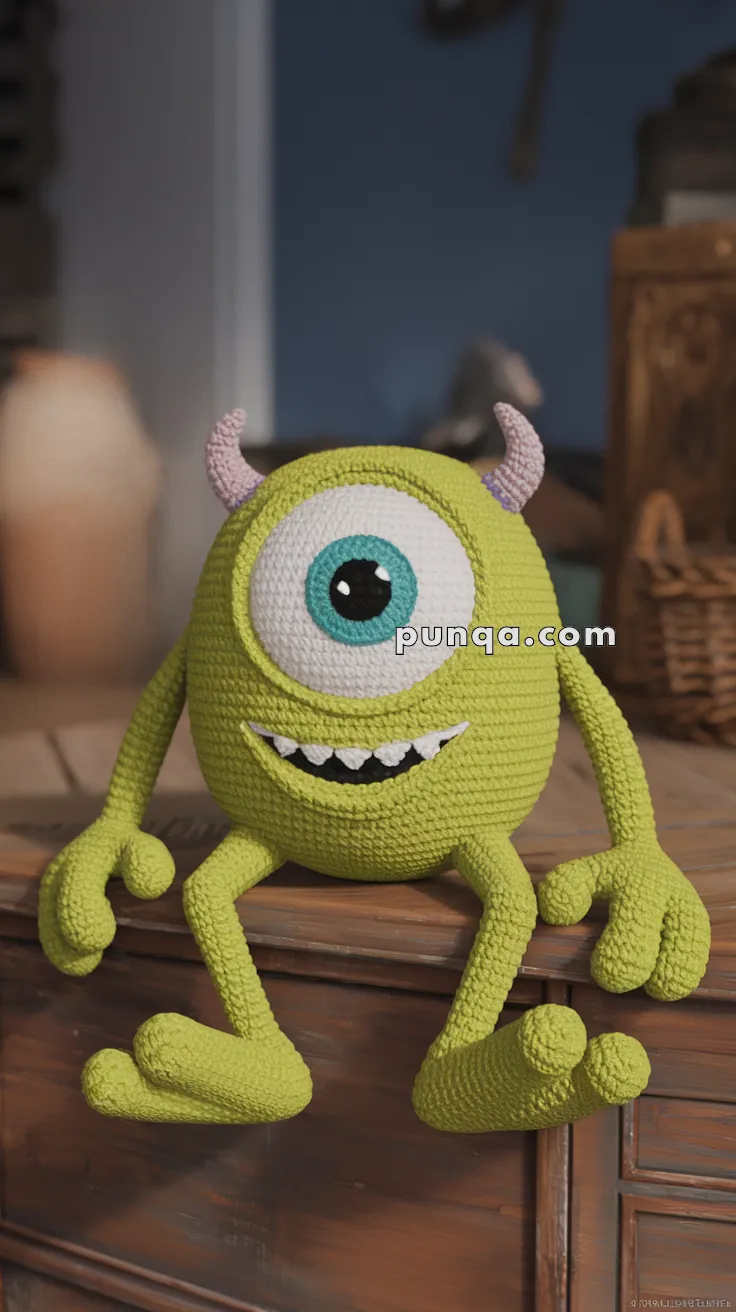
Bring the iconic one-eyed monster to life with this carefully shaped amigurumi Mike Wazowski. From his oversized single eye and mischievous grin to his long dangling limbs and distinctive two-toe feet, every detail in this pattern is designed to match the reference photo as closely as possible.
This pattern creates a soft, round, seated Mike with expressive features and cartoon-accurate anatomy.
✨ Skill Level
Intermediate
(Shaping, layered facial parts, finger construction, and assembly)
📏 Finished Size
Approx. 23–25 cm (9–10 inches) tall when seated
Using DK yarn and a 2.5–3.0 mm hook
🧶 Materials
Yarn (DK / light worsted):
-
Lime green – body, arms, legs, hands, feet
-
White – eye base, teeth
-
Black – pupil, mouth
-
Turquoise – iris
-
Light lavender – horns
Supplies:
-
2.5–3.0 mm crochet hook
-
Polyester fiberfill
-
Yarn needle
-
Stitch marker
-
Embroidery needle
-
Optional 10–12 mm safety eye (for pupil)
🧵 Abbreviations (US Terms)
MR – magic ring
sc – single crochet
inc – increase
dec – decrease
sl st – slip stitch
ch – chain
FO – fasten off
( ) = stitch count
🍏 BODY (Green – worked in one piece)
R1: MR 6 (6)
R2: inc x6 (12)
R3: (1 sc, inc) x6 (18)
R4: (2 sc, inc) x6 (24)
R5: (3 sc, inc) x6 (30)
R6: (4 sc, inc) x6 (36)
R7: (5 sc, inc) x6 (42)
R8: (6 sc, inc) x6 (48)
R9–R20: sc around (48)
R21: (6 sc, dec) x6 (42)
R22: (5 sc, dec) x6 (36)
R23: (4 sc, dec) x6 (30)
R24: (3 sc, dec) x6 (24)
R25: (2 sc, dec) x6 (18)
Stuff firmly.
R26: (1 sc, dec) x6 (12)
R27: dec x6 (6)
FO and close.
The body should form a smooth round sphere.
👁️ LARGE EYE (Layered)
White Eye Base
R1: MR 6
R2: inc x6 (12)
R3: (1 sc, inc) x6 (18)
R4: (2 sc, inc) x6 (24)
R5: (3 sc, inc) x6 (30)
R6: (4 sc, inc) x6 (36)
FO, leave a long tail.
Iris (Turquoise)
R1: MR 6
R2: inc x6 (12)
FO.
Pupil (Black)
R1: MR 6
FO.
Layer pupil onto iris, then onto the white base.
Embroider two small white highlights.
Sew the completed eye centered on the front of the body.
😁 MOUTH & TEETH
Mouth (Black)
Ch 14
Row 1: sc in 2nd ch from hook and across (13)
Row 2: sc across (13)
FO.
Curve into a smile and sew below the eye.
Teeth (Make 6–7)
Each tooth:
Ch 3, sl st into first chain to form a small triangle.
Attach evenly along the top edge of the mouth.
🦄 HORNS (Make 2 – Lavender)
R1: MR 4 (4)
R2: (1 sc, inc) x2 (6)
R3–R6: sc around (6)
Lightly stuff.
FO.
Attach slightly behind the top of the head, angled outward.
🖐 ARMS WITH THREE-FINGER HANDS (Make 2)
Arm Tube
R1: MR 6 (6)
R2: (1 sc, inc) x3 (9)
R3–R16: sc around (9)
Lightly stuff the arm only (do not stuff the hand).
Hand – 3 Rounded Fingers
Divide the remaining stitches into 3 groups of 3 stitches.
Finger 1:
Attach yarn to first 3 sts
R1–R4: sc around (3)
dec x2
FO
Finger 2:
Attach yarn to next 3 sts
Repeat Finger 1
Finger 3:
Attach yarn to last 3 sts
Repeat Finger 1
Hands should look like chunky mitts with three stubby fingers.
Attach arms to the sides of the body just below eye level so they hang naturally.
🦵 LEGS & 🦶 TWO-TOE FEET (Make 2)
Leg
R1: MR 6 (6)
R2: (1 sc, inc) x3 (9)
R3–R15: sc around (9)
Lightly stuff.
Foot Base
R16: (2 sc, inc) x3 (12)
R17: (3 sc, inc) x3 (15)
R18: (4 sc, inc) x3 (18)
R19–R20: sc around (18)
Stuff firmly.
Split into two toes (9 stitches each).
Toe 1:
Attach yarn to first 9 sts
R1–R3: sc around (9)
dec evenly
FO
Toe 2:
Attach yarn to remaining 9 sts
Repeat Toe 1
Feet should be wide and rounded, with toes angled slightly outward.
🧷 ASSEMBLY
-
Sew the eye centered on the body
-
Attach the mouth and teeth
-
Sew on the horns
-
Attach arms to mid-sides of the body
-
Attach legs to the lower front of the body
-
Adjust toes so Mike sits comfortably
✨ FINAL SHAPING
-
Smooth stuffing for a round body
-
Shape fingers into gentle curves
-
Center the eye carefully
-
Curve the smile slightly upward
-
Angle legs forward for a seated pose
💚 Finished Mike
Your completed Mike Wazowski should have:
-
A perfectly round green body
-
One oversized layered eye
-
A wide curved mouth with chunky teeth
-
Long thin arms
-
Three rounded fingers on each hand
-
Long dangling legs
-
Two large rounded toes on each foot
-
A playful seated pose
💬 Closing Note
This Amigurumi Mike Wazowski is a fun and expressive crochet project that captures the charm of the iconic one-eyed monster. With his big eye, cheerful grin, and long limbs, he makes a wonderful display piece or gift for animation fans and amigurumi lovers alike.
Happy stitching and enjoy bringing this lovable monster to life! 👁️💚🧶