Bring a touch of adorable charm to your crochet collection with this Amigurumi Llama pattern! Whether you’re crafting for playful decor, heartfelt gifts, or simply love making cute animal amigurumi, this free pattern lets you stitch up a delightful llama full of personality. With its fluffy texture, sweet expression, and signature long ears, this crochet llama is perfect for nurseries, cozy displays, or even as a fun desk companion. Whether perched on a shelf or gifted to a fellow crochet enthusiast, this amigurumi creation is sure to bring smiles—one stitch at a time! 🦙✨
Designed for customization, this pattern allows you to experiment with different yarn textures, embroidered details, or even tiny accessories like a colorful saddle or pom-pom decorations for extra charm. Craft a classic neutral-toned llama, create a pastel version for a whimsical touch, or even stitch up a whole herd of llamas in various sizes! Whether displayed as a lovable accent, gifted as a thoughtful handmade keepsake, or made simply for the joy of crochet, this Amigurumi Llama is a fun and heartwarming project—perfect for bringing a touch of cozy cuteness to every stitch! 🧶💛
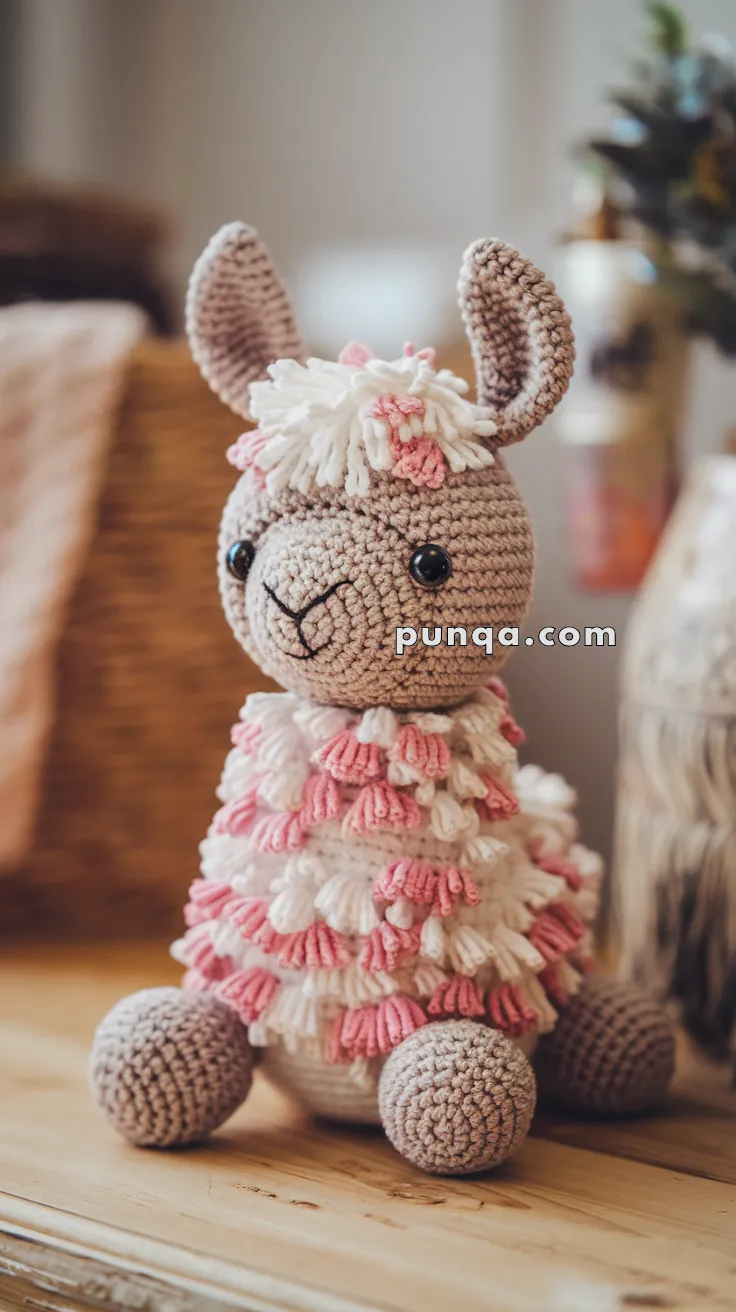
🦙 Amigurumi Llama Crochet Pattern
This cozy and cuddly Amigurumi Llama features a fluffy loop-stitched coat, soft pastel tones, and a sweet embroidered smile that gives it loads of personality. With cute upright ears and pom-pom-style tufts, this llama is perfect for nursery decor, handmade gifts, or adding to your crochet critter collection.
✨ Skill Level
Intermediate – Requires loop stitches, basic shaping, and some assembly.
📏 Finished Size
Approx. 10–12 inches (25–30 cm) tall using worsted weight yarn and a 3.0–3.5 mm crochet hook.
🧶 Materials
Yarn (Worsted or DK):
-
Light Brown or Taupe – for head, ears, legs
-
Cream/White – base body
-
Light Pink – accent loops
-
Black embroidery thread – face details
Tools:
-
Crochet hook: 3.0–3.5 mm
-
Safety eyes (8 mm)
-
Stitch marker
-
Tapestry needle
-
Polyfill stuffing
-
Scissors
🧵 Abbreviations (US Terms)
MR – Magic Ring
sc – Single Crochet
inc – Increase (2 sc in 1 st)
dec – Decrease (sc 2 together)
sl st – Slip Stitch
ch – Chain
LOOP ST – Loop Stitch (yarn wrapped over finger to form a loop)
FO – Fasten Off
🐑 Head (Taupe)
-
MR, 6 sc
-
inc x6 (12)
-
(1 sc, inc) x6 (18)
-
(2 sc, inc) x6 (24)
-
(3 sc, inc) x6 (30)
6–13. sc around (30) -
(3 sc, dec) x6 (24)
-
(2 sc, dec) x6 (18)
– Place safety eyes between Rounds 8–9, approx. 6 sts apart
– Embroider nose and smile in black yarn
– Stuff head firmly -
(1 sc, dec) x6 (12)
-
dec x6 (6)
FO, close and weave in tail.
👂 Ears (Make 2, Taupe)
-
MR, 6 sc
-
(1 sc, inc) x3 (9)
3–5. sc around (9) -
(1 sc, dec) x3 (6)
-
sc around (6)
FO, fold flat, sew both ends together, and attach to top of head.
🦙 Body (White/Cream with Loops)
Start with regular sc base:
-
MR, 6 sc
-
inc x6 (12)
-
(1 sc, inc) x6 (18)
-
(2 sc, inc) x6 (24)
-
(3 sc, inc) x6 (30)
6–8. sc around (30)
Switch to LOOP ST:
9–24. [LOOP ST in each st] around (30)
– Alternate cream and pink every few rows for color variation
– Stuff firmly as you go
-
(3 sc, dec) x6 (24)
-
(2 sc, dec) x6 (18)
-
(1 sc, dec) x6 (12)
-
dec x6 (6)
FO and close.
🐾 Legs (Make 4, Taupe)
-
MR, 6 sc
-
inc x6 (12)
3–6. sc around (12) -
(1 sc, dec) x4 (8)
-
sc around (8)
FO, stuff lightly. Sew evenly at the base of body.
🧶 Neck Fluff (Optional)
To make the forehead and neck tufts:
-
Cut strands of white and pink yarn (approx. 2.5 inches long)
-
Fold each strand and attach using a latch hook method (as you would for fringe)
-
Trim to desired puff shape and length
✂️ Assembly
-
Attach head to top of body securely
-
Sew ears on top of head, slightly tilted
-
Attach all four legs evenly at the base
-
Add yarn fringe/tufts on top of the head and neck for fluffy look
-
Weave in all loose ends neatly
💡 Customization Ideas
-
Use rainbow loops for a party llama!
-
Add tassels or a mini blanket to its back
-
Embroider sleepy eyes for a cozy vibe
This fluffy Amigurumi Llama is full of charm, softness, and stitchy love. Perfect as a nursery buddy or whimsical shelf pal, it’s a feel-good project for all llama lovers! 🧶🦙💕