Oh, the joy of crafting something as delicate and charming as an amigurumi lily of the valley! 🌿 Creating these petite crochet beauties is a truly delightful experience, combining the simple pleasures of working with yarn and the satisfaction of bringing a small piece of nature to life. One of the things I love most about making amigurumi is the opportunity to infuse each piece with personality and charm. There’s something magical about watching the yarn transform into soft, little blooms that can brighten anyone’s day. Plus, the lily of the valley, with its graceful, drooping flowers, is such a lovely subject to recreate in yarn form.
When diving into the process of crafting an amigurumi lily of the valley, I start by selecting the perfect shades of green and white yarn to mimic the elegance of these plants. 🌼 It’s all about choosing the right materials and, of course, having a crochet hook that feels just right in my hand. As I stitch each petal and leaf, there’s a rhythmic serenity that sets in, making the crafting process almost meditative. The pattern usually involves a series of simple stitches, which makes it an approachable project even for beginners. Watching the yarn slowly turn into a tiny, adorable lily of the valley is like witnessing a bit of magic unfold with every loop and pull.
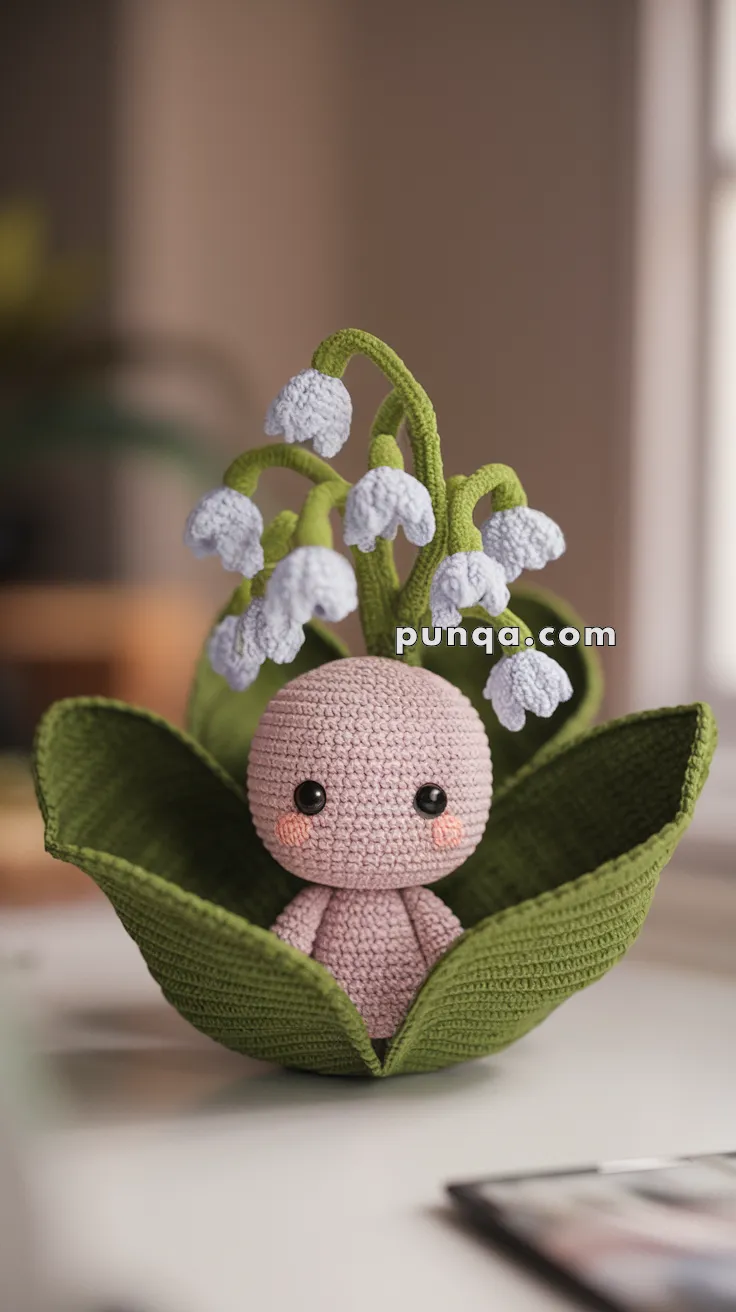
🌸 Lily of the Valley Baby Amigurumi Crochet Pattern
Bring a touch of forest magic into your home with this adorable Lily of the Valley Baby — a tiny nature spirit nestled inside cupped green leaves and surrounded by soft bell flowers. 🌿✨ Perfect for spring displays, fairy gardens, or heartfelt handmade gifts.
✨ Skill Level
Intermediate – includes shaping, assembling floral details, and working with light structure (optional wire for stems).
📏 Finished Size
Approximately 17–20 cm (6.5–8 in) tall when made with DK cotton yarn and a 2.5 mm crochet hook.
🧶 Materials Needed
-
DK or Sport weight cotton yarn:
-
Light pink or peach – for baby’s body (approx. 20 g)
-
Light beige or blush – optional for face tone (if using contrast)
-
Green – for leaves and stems (approx. 35 g)
-
Pale lilac or off-white – for flowers (approx. 15 g)
-
-
2.5 mm crochet hook
-
6 mm safety eyes (or embroider)
-
Fiberfill stuffing
-
Yarn needle
-
Stitch marker
-
Scissors
-
Thin floral wire (optional, for flexible stems)
-
Blush or soft pastel for cheeks
🧵 Abbreviations (US Terms)
MR – Magic Ring
sc – Single Crochet
inc – Increase (2 sc in one stitch)
dec – Decrease (sc2tog)
ch – Chain
sl st – Slip Stitch
FLO – Front Loop Only
BLO – Back Loop Only
FO – Fasten Off
🧒 Baby Body
Head (Light Pink)
R1: MR, 6 sc (6)
R2: inc ×6 (12)
R3: (sc, inc) ×6 (18)
R4: (2 sc, inc) ×6 (24)
R5: (3 sc, inc) ×6 (30)
R6: (4 sc, inc) ×6 (36)
R7: (5 sc, inc) ×6 (42)
R8–15: sc around (42)
Insert safety eyes between R9–10, about 7 stitches apart.
R16: (5 sc, dec) ×6 (36)
R17: (4 sc, dec) ×6 (30)
R18: (3 sc, dec) ×6 (24)
Stuff firmly.
R19: (2 sc, dec) ×6 (18)
R20: (sc, dec) ×6 (12)
R21: dec ×6 (6)
FO and close.
Add blush under each eye for the rosy-cheek look.
Body (Light Pink)
R1: MR, 6 sc (6)
R2: inc ×6 (12)
R3: (sc, inc) ×6 (18)
R4: (2 sc, inc) ×6 (24)
R5–6: sc around (24)
R7: (3 sc, dec) ×4 (20)
R8–9: sc around (20)
R10: (3 sc, dec) ×4 (16)
R11: (2 sc, dec) ×4 (12)
Stuff firmly and FO, leaving a tail to sew to the head.
Arms (Make 2 – Light Pink)
R1: MR, 6 sc (6)
R2–5: sc around (6)
Do not stuff.
FO and sew to body sides.
🍃 Leaf Cradle (Make 3 – Green)
Work in rows (not rounds).
Row 1: ch 2, sc in 2nd ch (1)
Row 2: ch 1, turn, 2 sc (2)
Row 3: ch 1, turn, inc, sc (3)
Row 4: ch 1, turn, 4 sc (4)
Row 5: ch 1, turn, inc, 3 sc (5)
Row 6–8: ch 1, turn, 6 sc (6)
Row 9: ch 1, turn, dec, 2 sc, dec (4)
Row 10: ch 1, turn, dec ×2 (2)
FO and weave ends.
Make two more leaves, then crochet one round of sc evenly around each leaf to reinforce the edges.
Optionally make the leaves double-layered (two per side) for stiffness.
Block lightly to curve outward, then sew together at the bottom tips to form a bowl shape.
🌸 Lily of the Valley Flowers (Make 6–8 – White or Pale Lilac)
R1: MR, 6 sc (6)
R2: inc ×6 (12)
R3–4: sc around (12)
R5: (sc, dec) ×4 (8)
R6: In each stitch: (sl st, 3 dc, sl st) — repeat around to form scalloped bell edge.
Lightly stuff and FO, leaving a long tail for sewing.
🌱 Flower Stems (Make 3)
Use green yarn.
R1: MR, 5 sc (5)
R2–25: sc around (5)
Insert floral wire before closing.
Bend into gentle arches.
Attach 2–3 flowers per stem, spacing them evenly.
Secure with stitches or a small dot of glue at the joins.
🌿 Flower Cluster & Assembly
-
Sew stems together in a small fan-like group.
-
Attach to the back of the baby’s head.
-
Position flowers so they gently cascade over the head and shoulders.
-
Sew the baby securely into the leaf cradle.
-
Optionally add a small bit of stuffing inside the leaves to support the shape.
💖 Finishing Touches
-
Add a soft pink blush to the cheeks with pastel or thread.
-
Shape stems and leaves with light wire bends for a lifelike curve.
-
Secure any ends neatly and trim excess.
-
For extra durability, lightly spray the leaves with fabric stiffener and reshape while drying.
🌼 Display Idea
Place your Lily of the Valley Baby on a small wooden base or inside a glass dome for an enchanting fairy-garden look. It’s a lovely handmade symbol of purity, kindness, and renewal — perfect for springtime magic. 🌸💫