Bring the delicate beauty of lilies to your crochet collection with this Amigurumi Lily pattern! Inspired by the graceful elegance of real lily flowers, this charming design captures their soft petals, slender stems, and timeless appeal in every stitch. With its intricate details and natural charm, this crochet lily is perfect for adding a floral touch to your handmade projects. Whether you’re crafting for flower lovers, creating a decorative accent, or simply enjoy making botanical-inspired amigurumi designs, this pattern lets you stitch up a lovely lily bursting with charm! 🌿✨
Designed for customization, this pattern allows you to experiment with different shades of white, pink, or even vibrant hues for a playful twist. Add embroidered details, tiny accessories like a miniature ribbon or vase, or even create a full set of flower-inspired amigurumi for a delightful display! Whether gifted as a thoughtful keepsake, displayed as a calming accent, or made simply for the joy of crafting, this Amigurumi Lily is a fun and creative project—perfect for bringing a touch of handmade floral magic to every stitch! 🧶💖✨
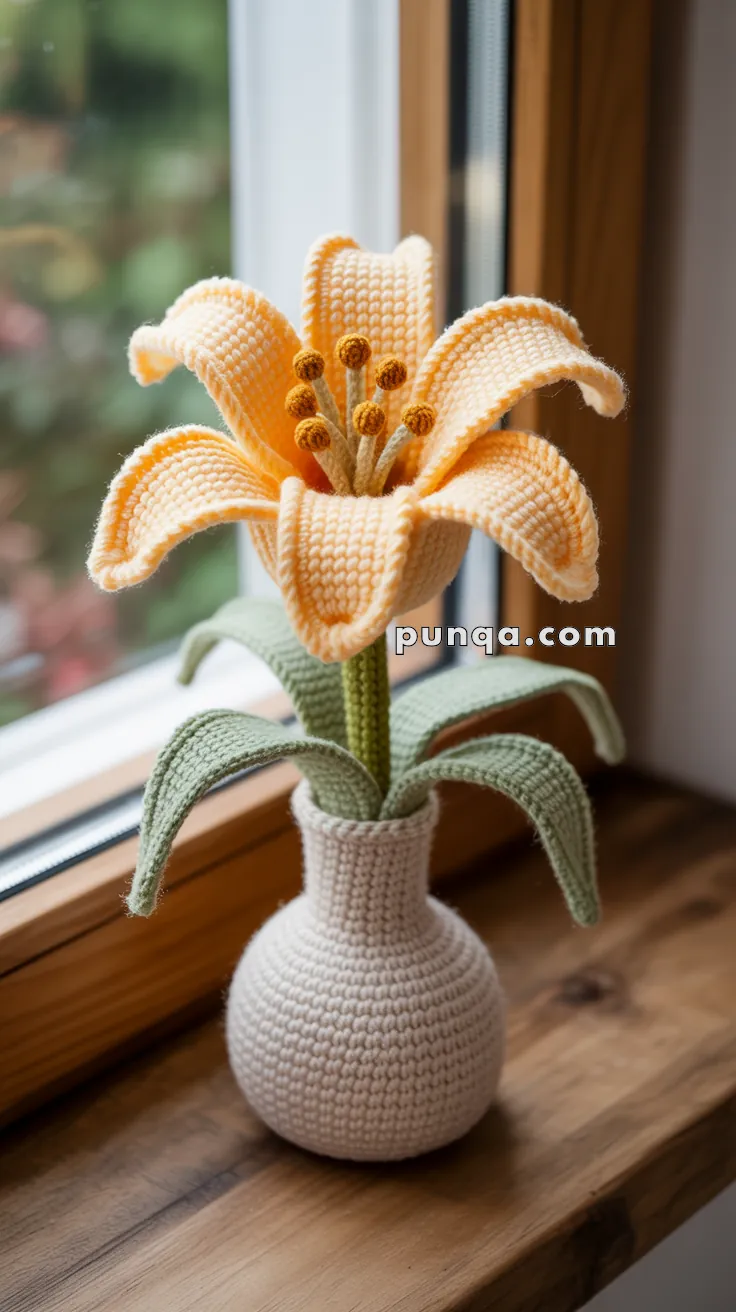
🌼 Amigurumi Lily with Vase Crochet Pattern
Add lasting floral beauty to your space with this elegant amigurumi lily and vase set! With graceful curled petals, detailed stamens, and soft flowing leaves, this realistic bloom stands proudly in its crocheted vase. A perfect handmade decor piece for any table or windowsill!
✨ Skill Level
Intermediate – Involves shaping, wire reinforcement, floral construction, and working in the round.
📏 Finished Size
- Lily height (with stem): approx. 10–12″ (25–30 cm)
- Vase: approx. 5″ (13 cm) tall
🧶 Materials
- Yarn (DK or Worsted weight):
- Color A: Soft peach or light orange (petals)
- Color B: Yellow or mustard (stamens)
- Color C: Pale green (stem and leaves)
- Color D: Cream or beige (vase)
- Crochet hook: 2.5 mm or 3.0 mm
- Floral wire or pipe cleaners
- Polyfill stuffing
- Tapestry needle
- Hot glue (optional for assembly reinforcement)
- Stitch marker
- Scissors
🧵 Abbreviations (US Terms)
MR – Magic Ring
sc – Single Crochet
inc – Increase
dec – Decrease
ch – Chain
sl st – Slip Stitch
hdc – Half Double Crochet
dc – Double Crochet
FO – Fasten Off
🌸 Lily Petals (Make 6 – Color A)
- Ch 21
- Row 1: sc in 2nd ch, hdc, dc in next 14, hdc, sc, ch 1, turn
- Row 2: sc, hdc, dc in next 14, hdc, sc
- Row 3: sc around entire petal for clean edge
FO, leave long tail for sewing.
Optionally insert thin wire while edging for shaping.
Petal Curl: Lightly curl petal edges backward with your fingers or use wire shaping.
🌾 Stamens (Make 6 – Color B)
Stalk:
- Ch 10
- sc in 2nd ch and across (9)
- FO and glue around floral wire or pipe cleaner
Head:
- MR, 6 sc
- (1 sc, inc) x3 (9)
- sc around (9)
- dec x3 (6), FO
Lightly stuff and sew to end of stalk.
🪴 Lily Stem (Color C)
- MR, 6 sc
- sc in each st until stem is approx. 6–7” tall
Insert floral wire or pipe cleaner while crocheting
FO and sew petals and stamens to top opening
🍃 Leaves (Make 3–5 – Color C)
- Ch 31
- Row 1: sc in 2nd ch, hdc, dc x24, hdc, sc
- Row 2: turn, repeat same stitches on opposite side
- Optional edging row with sl st or crab stitch
Insert wire if desired for shaping
FO, leave tail for sewing to stem base
🏺 Vase (Color D)
Base:
- MR, 6 sc
- inc x6 (12)
- (1 sc, inc) x6 (18)
- (2 sc, inc) x6 (24)
- (3 sc, inc) x6 (30)
- (4 sc, inc) x6 (36)
- (5 sc, inc) x6 (42)
- (6 sc, inc) x6 (48)
9–15. sc around (48)
Neck:
16. (6 sc, dec) x6 (42)
17. (5 sc, dec) x6 (36)
18. (4 sc, dec) x6 (30)
19–24. sc around (30)
25. (3 sc, dec) x6 (24)
26–28. sc around (24)
FO and stuff lightly. Insert weighted base or cardboard circle if desired.
🪡 Assembly
- Sew or glue all 6 petals around top of stem evenly spaced
- Attach stamens inside flower center
- Shape petals by curling and fanning out naturally
- Attach leaves to bottom of stem
- Insert stem securely into vase – use hot glue if needed
- Optional: stitch vase opening slightly closed around stem
💡 Tips & Customization
- Add speckles or surface embroidery to petals for realism
- Use floral tape over wire if skipping crochet stems
- Make multiple lilies in different colors for a bouquet
- Add fragrance sachet inside vase for scented decor!
This amigurumi lily in vase is a forever bloom you’ll treasure! Graceful and sophisticated, it’s the perfect handmade accent for spring, gifts, or as a peaceful window companion. 🌼🧶💐