Warm up your winter crafting with the Amigurumi Let It Snow Cocoa Mug—a cozy little creation that’s bursting with seasonal charm! This adorable mug features a frothy swirl of whipped cream, cheerful embroidered details, and a festive message that invites snowflakes and smiles. Whether you’re decorating your space, gifting handmade joy, or adding a playful touch to your holiday market stall, this project is a delightful way to celebrate the magic of winter.
Perfect for confident beginners and seasoned crocheters alike, this pattern is a sweet blend of whimsy and warmth. You can customize your mug with marshmallows, cherries, or even a peppermint twist to match your holiday vibe. It’s a quick make with big personality—ideal for ornaments, shelf décor, or just a little pick-me-up on chilly days. So grab your yarn and let it snow… one stitch at a time! ☕❄️🧶
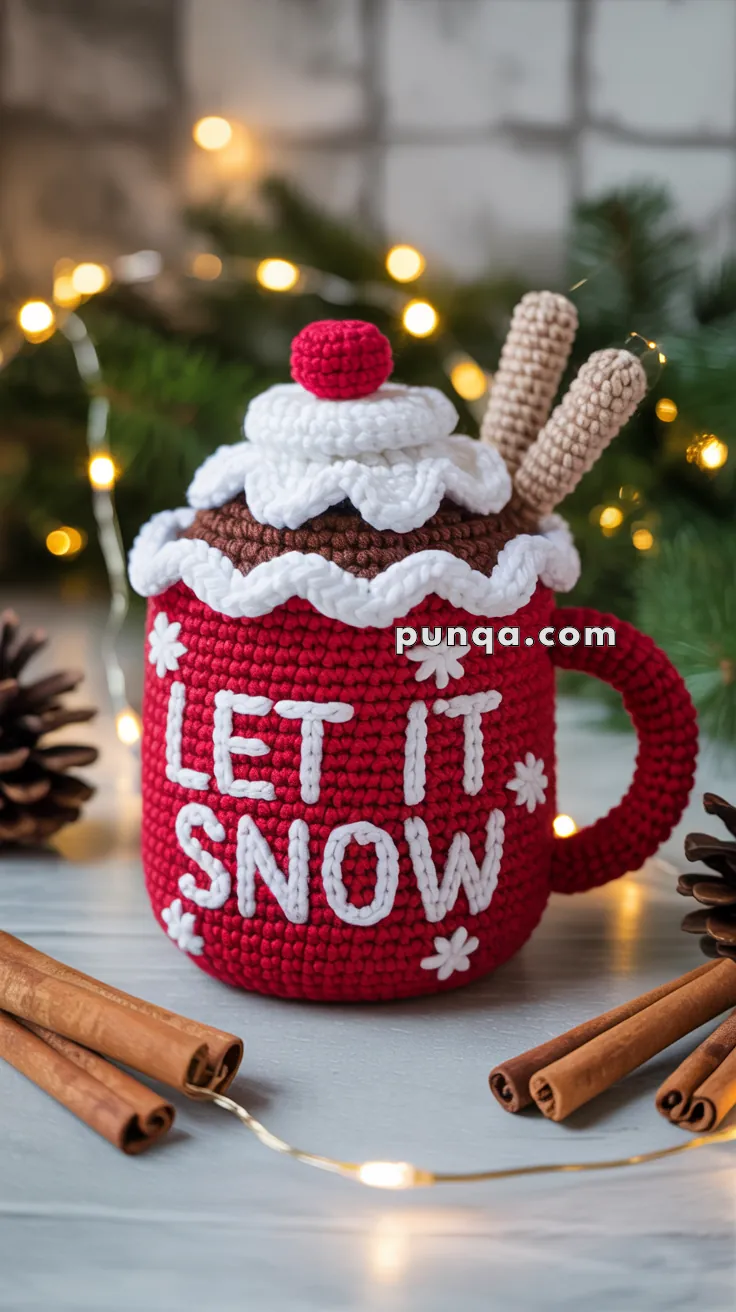
☕🎄Amigurumi “Let It Snow” Cocoa Mug Crochet Pattern
Nothing says cozy Christmas like a steaming cup of cocoa topped with whipped cream and cinnamon sticks! This adorable crochet mug amigurumi doubles as a festive decoration or a holiday gift. With its embroidered “LET IT SNOW” lettering, fluffy whipped topping, and cheerful cherry, it will surely spread Christmas spirit.
✨ Skill Level
Intermediate – Requires basic amigurumi knowledge and color changes, plus simple embroidery.
📏 Finished Size
Approx. 18–20 cm (7–8″) tall when made with worsted-weight cotton and a 3.0 mm hook.
🧶 Materials
- Red yarn (main mug)
- Brown yarn (cocoa top)
- White yarn (whipped cream & embroidery)
- Black yarn (optional details)
- Beige yarn (cinnamon sticks)
- Small amount of red yarn (cherry)
- Crochet hook: 3.0 mm
- Yarn needle
- Scissors
- Fiberfill stuffing
- Stitch marker
🧵 Abbreviations (US Terms)
- MR – Magic Ring
- ch – Chain
- sc – Single Crochet
- inc – Increase (2 sc in same st)
- dec – Decrease (sc 2 together)
- sl st – Slip Stitch
- BLO – Back Loop Only
- FLO – Front Loop Only
☕ Pattern Instructions
1. Mug Base (Red)
- MR, 6 sc into ring. (6)
- inc in each st. (12)
- sc, inc around. (18)
- 2 sc, inc around. (24)
- 3 sc, inc around. (30)
- 4 sc, inc around. (36)
- 5 sc, inc around. (42)
- 6 sc, inc around. (48)
👉 Continue increasing until base reaches about 9–10 cm in diameter.
- Work 1 round in BLO to create the mug’s edge.
- Continue sc in the round (no increases) for 18–20 rounds to build mug height.
- Fasten off, weave in ends.
2. Cocoa Top (Brown)
- MR, 6 sc. (6)
- inc around. (12)
- sc, inc around. (18)
- 2 sc, inc around. (24)
- 3 sc, inc around. (30)
- Continue increasing until circle fits snugly inside the mug rim.
- Work 4–5 rounds even to give cocoa some depth.
- Do not stuff, sew onto inside rim of mug.
3. Whipped Cream Top (White)
Worked in ruffles for a fluffy look.
- MR, 6 sc. (6)
- inc around. (12)
- ch 3, sl st in same st, sc in next st → repeat around for scalloped edges.
- Continue rounds with increases + scallops until whipped cream fits on cocoa top.
- Sew on top.
4. Mug Handle (Red)
- ch 25 (or desired length).
- sc in each chain back. (24)
- Work 3 rows.
- Curve into a handle shape and sew onto mug’s side.
5. Cinnamon Sticks (Beige, make 2)
- ch 10, join to form ring.
- sc around (10) for 10–12 rounds.
- Stuff lightly, sew into whipped cream at an angle.
6. Cherry (Red)
- MR, 6 sc. (6)
- inc in each st. (12)
- sc around 2 rounds.
- dec around. (6)
- Fasten off, stuff lightly, sew on top.
7. Embroidery (“LET IT SNOW”)
- Using white yarn, embroider block letters onto the front of the mug.
- Add small embroidered snowflakes between words for a festive touch.
🎄 Assembly
- Stuff mug firmly with fiberfill.
- Sew cocoa top securely to mug rim.
- Attach whipped cream, then add cherry and cinnamon sticks.
- Embroider words and snowflakes last for a clean finish.
✨ Final Touches
- Lightly block mug handle so it keeps its curve.
- Add glitter thread for a sparkly holiday effect.
- Use as a table centerpiece, mantle decoration, or a Christmas gift!
💖 Closing Thoughts
This crochet “Let It Snow” cocoa mug amigurumi captures all the warmth of a holiday cocoa night. With just a few colors of yarn and some creativity, you’ll have a handmade piece that spreads Christmas cheer year after year.


I am going to make some of these