Add a touch of garden charm to your crochet collection with this Amigurumi Ladybug pattern! Inspired by the beloved little beetle, this adorable design captures the round shape, bright red shell, and signature black spots in every stitch. Whether you’re crafting for nature lovers, adding a whimsical accent to your decor, or simply enjoy making insect-inspired amigurumi designs, this pattern lets you stitch up a delightful ladybug bursting with personality! Perfect for brightening up any space, this crochet creation brings a touch of handmade nature magic to your collection. 🐞✨
Designed for customization, this pattern allows you to experiment with different shades of red, embroidered details, or even tiny accessories like a miniature flower or leaf for extra charm. Craft a classic ladybug with bold hues, create a pastel version for a softer aesthetic, or even stitch up a full set of garden-inspired amigurumi for a cheerful display! Whether gifted as a quirky keepsake, displayed as a charming accent, or made simply for the joy of crafting, this Amigurumi Ladybug is a fun and creative project—perfect for bringing a touch of handmade garden magic to every stitch! 🧶💖✨
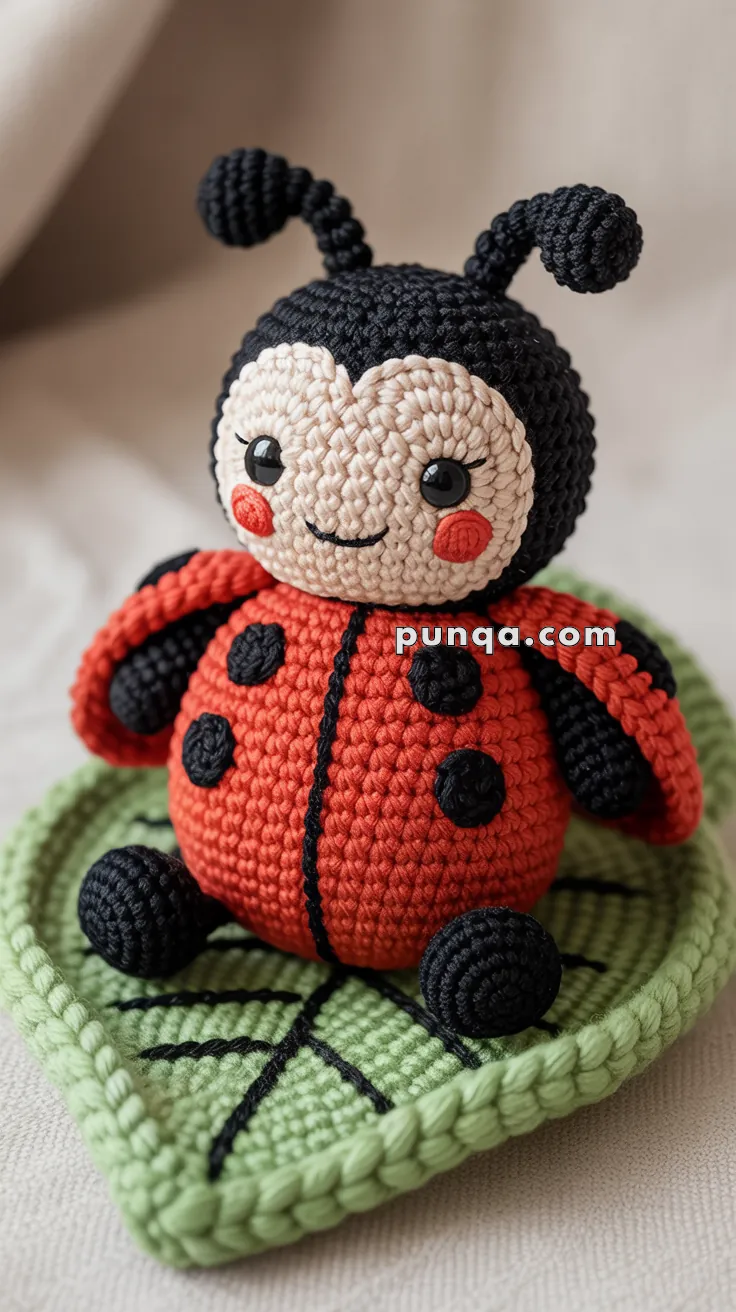
🐞 Amigurumi Ladybug on Leaf Crochet Pattern
Add a touch of garden magic to your home with this sweet ladybug resting on her favorite leaf! With her rosy cheeks, playful antennae, and six shiny black spots, she’s the perfect decoration for springtime or a thoughtful handmade gift. The heart-shaped leaf base makes it look like she’s right in her natural habitat. 🌿
✨ Skill Level
Intermediate
Includes appliqué shaping, bobble stitches, embroidery details, structural assembly, and padded base construction.
📏 Finished Size
Ladybug: approx. 9–10 cm (3.5–4 in) tall
Leaf base: approx. 11 × 11 cm (4.5 × 4.5 in)
Total height assembled: approx. 10–11 cm
Made with DK cotton and a 3.0 mm hook.
🧶 Materials & Yarn Amount
Red DK cotton – approx. 22 g
Black DK cotton – approx. 12 g
Beige/cream DK cotton – approx. 8 g
Light green DK cotton – approx. 25 g
6 mm black safety eyes
Polyester fiberfill
3.0 mm crochet hook
Tapestry needle
Stitch marker
Scissors
🧵 Abbreviations (US Terms)
MR – magic ring
sc – single crochet
inc – increase
dec – invisible decrease
bob – 5 dc bobble stitch
sl st – slip stitch
ch – chain
FO – fasten off
Work in continuous rounds unless noted.
🐞 Ladybug
Head (Black)
MR, 6 sc (6)
inc x6 (12)
(1 sc, inc) x6 (18)
(2 sc, inc) x6 (24)
Rounds 5–8: sc around (24)
Insert safety eyes between R6–7, 6 stitches apart.
(2 sc, dec) x6 (18)
(1 sc, dec) x6 (12)
Stuff firmly
dec x6 (6)
FO and close.
The head should be smooth and round.
Face Panel (Beige – Heart Shape)
MR, 6 sc (6)
inc x6 (12)
(1 sc, inc) x6 (18)
Round 4:
sc 7, inc, sc 2, inc, sc 7 (20)
Round 5: sc around (20)
FO leaving long tail.
Lightly flatten and shape the top edge into two rounded bumps to form a soft heart silhouette. Sew onto the front of the head, framing the eyes symmetrically.
Body (Red – Rounded and Compact)
MR, 6 sc (6)
inc x6 (12)
(1 sc, inc) x6 (18)
(2 sc, inc) x6 (24)
(3 sc, inc) x6 (30)
(4 sc, inc) x6 (36)
Rounds 7–12: sc around (36)
(4 sc, dec) x6 (30)
(3 sc, dec) x6 (24)
(2 sc, dec) x6 (18)
Stuff firmly for a rounded dome
(1 sc, dec) x6 (12)
dec x6 (6)
FO and close.
The body should appear slightly wider than tall and nicely plump.
Center Wing Line
Using black yarn, embroider a clean vertical line from top center to bottom of body. Keep it straight and slightly recessed.
Raised Wing Spots (Make 6 – Black)
Attach black yarn at desired spot location.
bob stitch, sl st in same stitch, FO.
Create three spots on each side of the center line, evenly spaced and slightly raised.
Antennae (Make 2 – Black)
Stem:
MR, 4 sc (4)
Rounds 2–5: sc around (4)
Tip:
inc x4 (8)
Round 7: sc around (8)
dec x4 (4)
Lightly stuff the tip only.
FO.
Attach angled slightly outward and forward.
Arms (Make 2 – Black)
MR, 6 sc (6)
Rounds 2–4: sc around (6)
Stuff lightly
FO.
Sew high on the body so they curve gently forward.
Legs (Make 2 – Black)
MR, 6 sc (6)
Rounds 2–4: sc around (6)
Stuff firmly
FO.
Attach toward the lower front so the ladybug sits upright.
Cheeks (Make 2 – Red)
MR, 6 sc
sl st to join
FO.
Flatten slightly and sew below eyes on face panel.
Facial Embroidery
• Small curved smile centered beneath eyes
• Short curved eyelashes
• Optional tiny white highlight stitch in eyes
🍃 Leaf Base (Padded Square)
Leaf Panels (Make 2 – Light Green)
Ch 16
Row 1: sc in 2nd ch and across (15)
Rows 2–14: ch 1, turn, sc across (15)
FO.
Make a second identical panel.
Join and Border
Place panels together.
sc evenly around through both layers.
Work 3 sc in each corner.
Before closing final side, insert a thin layer of stuffing or felt to create a padded, structured look.
sl st to join.
FO.
The leaf should feel sturdy and slightly cushioned.
Veins
With black yarn, embroider:
• One bold vertical center vein
• Three diagonal veins on each side
Keep stitches slightly thick and visible.
Assembly
Sew head securely to body.
Attach arms and legs symmetrically.
Sew finished ladybug firmly to center of leaf.
The piece should sit balanced, flat, and stable.
🌟 Final Touch
This charming ladybug features a plump rounded body, softly shaped face panel, dimensional wing spots, and a thick padded leaf base that frames the design beautifully.
Its clean structure and expressive details make it perfect as seasonal décor, nursery accent, or a heartfelt handmade gift. 🐞🌿