Dive into a splash of color with this Amigurumi Kingfisher crochet pattern! Inspired by the dazzling plumage and sleek silhouette of one of nature’s most striking birds, this vibrant design is perfect for bird lovers, nature enthusiasts, or anyone who enjoys stitching up something truly eye-catching. With its bold turquoise and golden hues, expressive beak, and graceful wings, this kingfisher brings a touch of wild beauty to your handmade collection—ready to perch proudly wherever you place it. 🧶🐦💙
Designed for detail and flair, this pattern invites you to explore colorwork, sculpted shaping, and fun extras like a tiny fish, movable wings, or even a branch to rest on. Customize your kingfisher with realistic markings or whimsical touches to reflect your own style. Whether perched on a shelf, nestled in a gift basket, or starring in a handmade nature scene, this Kingfisher Amigurumi is a joyful and satisfying project—perfect for stitching up a little handmade wonder, one loop at a time! 💖✨🌿
🐦 Amigurumi Kingfisher Crochet Pattern
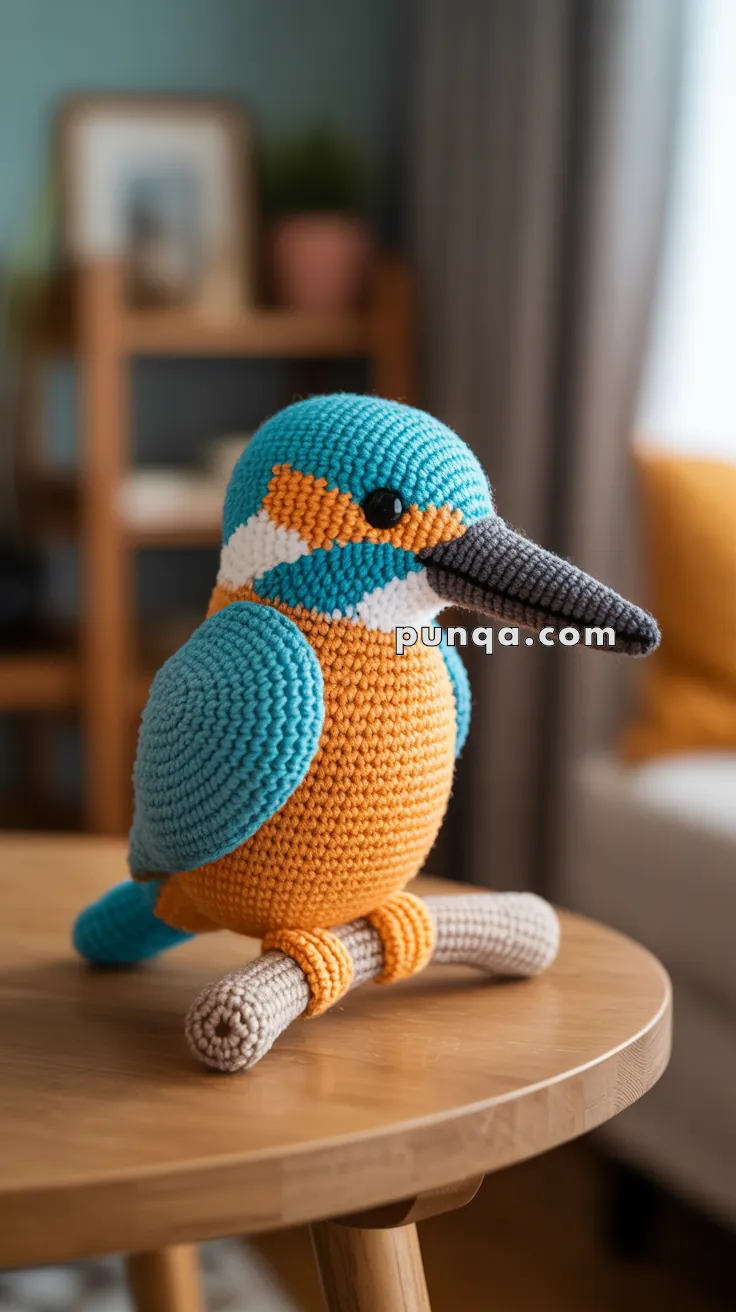
Capture the beauty of the kingfisher with this stunning amigurumi bird design! Featuring a vibrant blue back, orange belly, white accents, and a striking long beak, this kingfisher sits proudly on a crocheted branch. This pattern is written in US terms and includes instructions for clean color changes.
✨ Skill Level
Intermediate – Color changes, shaping, and branch assembly.
📏 Finished Size
Approx. 20–22 cm (8–9 in) long including beak and tail using worsted/DK yarn and a 3.0 mm hook.
🧶 Materials
Yarn (DK or Worsted):
- Turquoise Blue – head, back, wings, tail
- Orange – belly and foot cuffs
- White – neck stripe
- Dark Grey – beak
- Light Beige – branch
Other:
- 3.0–3.25 mm hook
- 10–12 mm safety eyes
- Polyfill stuffing
- Tapestry needle
- Stitch marker
- Optional: pipe cleaner or wire for branch core
🧵 Abbreviations (US Terms)
MR – magic ring
sc – single crochet
inc – increase
dec – decrease
sl st – slip stitch
ch – chain
FO – fasten off
BLO – back loop only
🐦 Body (Worked bottom-up – Orange → White → Blue)
Start with orange (belly):
R1: MR, 6 sc (6)
R2: inc ×6 (12)
R3: (sc, inc) ×6 (18)
R4: (2 sc, inc) ×6 (24)
R5: (3 sc, inc) ×6 (30)
R6: (4 sc, inc) ×6 (36)
R7–10: sc around (36)
Switch to white:
R11–12: sc around (36)
Switch to blue:
R13–17: sc around (36)
R18: (4 sc, dec) ×6 (30)
R19: (3 sc, dec) ×6 (24)
R20: (2 sc, dec) ×6 (18)
👉 Stuff firmly
R21: (sc, dec) ×6 (12)
R22: dec ×6 (6)
FO, close.
🐦 Head (Blue with Orange Face Stripe)
With blue:
R1: MR, 6 sc (6)
R2: inc ×6 (12)
R3: (sc, inc) ×6 (18)
R4: (2 sc, inc) ×6 (24)
R5: (3 sc, inc) ×6 (30)
R6: (4 sc, inc) ×6 (36)
R7–9: sc around (36)
Switch to orange:
R10–11: sc around (36)
Switch back to blue:
R12–14: sc around (36)
Insert eyes between R8–9 (wide spacing).
R15: (4 sc, dec) ×6 (30)
R16: (3 sc, dec) ×6 (24)
R17: (2 sc, dec) ×6 (18)
👉 Stuff firmly
R18: (sc, dec) ×6 (12)
R19: dec ×6 (6)
FO.
🪶 Beak (Long & Straight)
With dark grey:
R1: MR, 6 sc (6)
R2: (2 sc, inc) ×2 (8)
R3–5: sc around (8)
R6: (3 sc, inc) ×2 (10)
R7–10: sc around (10)
R11: (4 sc, inc) ×2 (12)
R12–16: sc around (12)
Stuff lightly, flatten slightly, FO with long tail.
🪽 Wings (Make 2 – Curved & Folded)
With blue:
R1: MR, 6 sc (6)
R2: inc ×6 (12)
R3: (sc, inc) ×6 (18)
R4: (2 sc, inc) ×6 (24)
R5–10: sc around (24)
R11: (2 sc, dec) ×6 (18)
R12: (sc, dec) ×6 (12)
R13–14: sc around (12)
Flatten, lightly stuff, FO.
🐦 Tail (Compact Oval)
With blue:
R1: MR, 6 sc (6)
R2: inc ×6 (12)
R3: (sc, inc) ×6 (18)
R4–6: sc around (18)
R7: (sc, dec) ×6 (12)
R8: dec ×6 (6)
FO.
🐾 Foot Rings (Make 2 – Orange Cuffs)
With orange:
Ch 12, join into ring
R1–2: sc around (12)
FO.
🌿 Branch
With beige:
R1: MR, 6 sc (6)
R2: inc ×6 (12)
R3–28: sc around (12)
Insert wire if desired. Stuff firmly. FO.
🧩 Assembly
1️⃣ Sew head onto body, aligning orange stripe forward
2️⃣ Attach beak centered below eyes
3️⃣ Sew wings to sides, slightly folded forward
4️⃣ Attach tail at back base
5️⃣ Slide orange cuffs onto branch
6️⃣ Sew body onto branch so bird sits horizontally
7️⃣ Adjust posture so feet grip branch
🌟 Final Touches
Your kingfisher is now complete — a bold splash of color perched peacefully on its branch. With its rounded silhouette, striking blue wings, warm orange belly, and long elegant beak, this little bird looks ready to dive into a storybook riverbank.
Whether displayed on a shelf, nestled among plants, or gifted to a nature lover, this handmade kingfisher brings calm woodland charm wherever it lands. 🐦🌿✨
Happy crocheting! 🧶💙