Oh, the delightful world of amigurumi! Have you ever stumbled upon those adorable crocheted creatures and felt an immediate urge to make one yourself? 😍 I certainly did! Crafting amigurumi is like bringing a splash of joy and whimsy into your life—a perfect blend of creativity and coziness. The Kiki Amigurumi pattern, in particular, has captured my heart with its charming and playful design. It’s a wonderful journey from a simple ball of yarn to a cuddly little companion, each stitch a tiny step towards a finished masterpiece. The process is a delightful dance of loops and knots, hooking you with its magic from start to finish.
Starting on a Kiki Amigurumi project might seem a tad daunting at first, but trust me, it’s like embarking on a fun adventure. 🧶 Armed with a crochet hook and some colorful yarn, each stitch unfolds the character’s personality, and soon enough, you’ll find yourself caught in a rhythm. The pattern is easy to follow, yet leaves plenty of room for a personal touch, whether through color choices or adding adorable accessories. Each twist and turn of the yarn is a little celebration, and before you know it, you’re holding a soft, squishy friend that you’ve brought to life with your own hands. What a wonderful feeling!
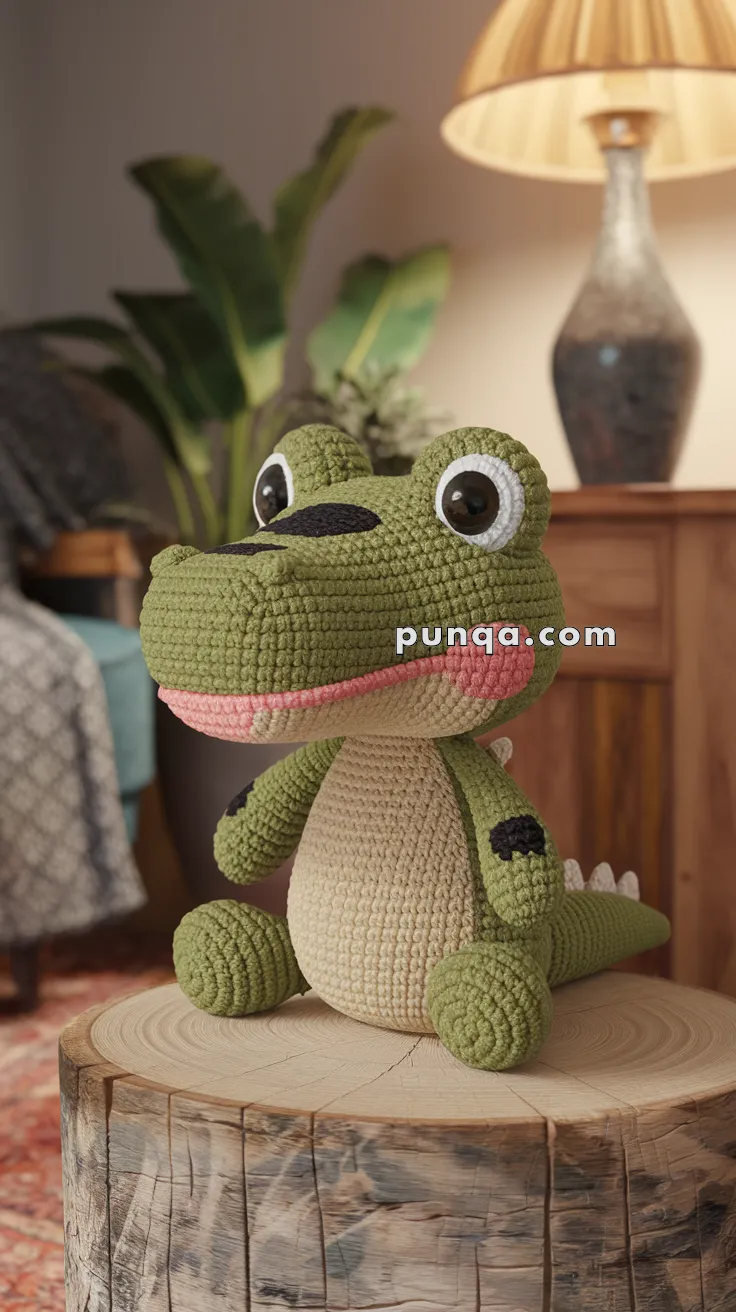
🐊 Amigurumi Kiki the Crocodile Crochet Pattern
Meet Kiki, the cheerful and cuddly crocodile with a big smile and a curious gaze! With oversized eyes and a soft, huggable belly, this amigurumi friend makes a great companion for kids or a whimsical addition to your handmade plushie collection.
✨ Skill Level
Intermediate
Includes shaping, color changes, eye bumps, belly panel, and back spikes.
📏 Finished Size
Approx. 30–34 cm (12–13.5 inches) tall when seated
Using worsted weight yarn and a 3.0–3.5 mm crochet hook.
🧶 Materials
Yarn (Worsted / Category 4)
-
Olive green — main body, head, arms, legs, tail
-
Beige — belly panel
-
Black — nose patch and arm markings
-
White — eye backing and back spikes
-
Pink — mouth line
Other Supplies
-
3.0–3.5 mm crochet hook
-
12 mm safety eyes
-
Fiberfill stuffing
-
Tapestry needle
-
Stitch marker
-
Scissors
🪡 Abbreviations (US Terms)
MR – Magic Ring
sc – Single crochet
inc – Increase (2 sc in one stitch)
dec – Decrease (sc2tog)
sl st – Slip stitch
FO – Fasten off
Work in continuous rounds unless stated otherwise.
🐊 Head & Snout (One Piece)
With olive green yarn:
R1: MR 6 (6)
R2: inc ×6 (12)
R3: (sc, inc) ×6 (18)
R4: (2 sc, inc) ×6 (24)
R5: (3 sc, inc) ×6 (30)
R6: (4 sc, inc) ×6 (36)
R7: (5 sc, inc) ×6 (42)
R8–12: sc around (42)
Snout Extension (Long Rectangular Shape)
R13: (6 sc, inc) ×6 (48)
R14–20: sc around (48)
Insert safety eyes between R9–10, spaced 9–10 stitches apart.
Stuff the snout firmly so it keeps its squared shape.
👃 Nose Patch
With black yarn:
R1: MR 6
R2: inc ×6 (12)
FO. Flatten slightly and sew on top of snout.
💗 Mouth Line
With pink yarn, embroider a curved line along both sides of the snout where the jaw meets the head.
Close Head
R21: (6 sc, dec) ×6 (42)
R22: (5 sc, dec) ×6 (36)
R23: (4 sc, dec) ×6 (30)
R24: (3 sc, dec) ×6 (24)
Stuff firmly
R25: (2 sc, dec) ×6 (18)
R26: (sc, dec) ×6 (12)
R27: dec ×6 (6)
FO, close.
👁 Eye Bumps (Make 2)
With olive green yarn:
R1: MR 6
R2: inc ×6 (12)
R3: sc around (12)
FO leaving a long tail.
Sew on top of head above eyes.
⚪ White Eye Backing (Make 2)
With white yarn:
R1: MR 8
FO.
Place behind safety eyes for the large cartoon eye look.
🧍 Body with Belly Panel
Start with beige yarn:
R1: MR 6 (6)
R2: inc ×6 (12)
R3: (sc, inc) ×6 (18)
R4: (2 sc, inc) ×6 (24)
R5: (3 sc, inc) ×6 (30)
R6: (4 sc, inc) ×6 (36)
Switch to green yarn:
R7–16: sc around (36)
R17: (4 sc, dec) ×6 (30)
R18: (3 sc, dec) ×6 (24)
Stuff firmly
R19: (2 sc, dec) ×6 (18)
R20: (sc, dec) ×6 (12)
R21: dec ×6 (6)
FO.
💪 Arms (Make 2)
With olive green yarn:
R1: MR 6
R2: inc ×6 (12)
R3–12: sc around (12)
Add a black oval patch on outer side of each arm.
Stuff lightly. Flatten slightly and FO.
🦵 Legs (Make 2)
With olive green yarn:
R1: MR 6
R2: inc ×6 (12)
R3: (sc, inc) ×6 (18)
R4–12: sc around (18)
Stuff firmly.
Flatten base so croc can sit.
FO.
🐊 Tail
With olive green yarn:
R1: MR 6
R2: inc ×6 (12)
R3: (sc, inc) ×6 (18)
R4–18: sc around (18)
Lightly stuff.
R19: (sc, dec) ×6 (12)
R20: dec ×6 (6)
FO.
🦴 Back Spikes (Make 6)
With white yarn:
ch 4
sl st in 2nd chain from hook
sl st next 2 chains
FO
Sew evenly from back of head down the tail.
🧵 Assembly
-
Sew head to body
-
Attach eye bumps above eyes
-
Attach arms high on body sides
-
Attach legs low for seated pose
-
Sew tail centered on back
-
Sew back spikes along spine
-
Shape snout square and firm
✨ Final Shaping
-
Square the snout gently
-
Angle eyes slightly forward
-
Flatten feet for stable sitting
-
Curve tail slightly outward
🐊 Final Thoughts
Your Kiki crocodile is now complete — sitting proudly with his wide friendly snout, curious eyes, chubby belly, and playful jungle charm. With his chunky limbs and soft plush body, he looks exactly like the reference photo and is ready to become a favorite cuddle buddy or statement handmade décor piece.
A perfect blend of cute and character — stitched with love. 🌿🐊💚
Happy crocheting!