Hop into organization with this Amigurumi Kangaroo Remote Holder crochet pattern! Inspired by the adorable and practical nature of kangaroos, this charming design features a cozy pouch perfect for storing your remotes, small gadgets, or even crafting supplies. With its long ears, sweet expression, and sturdy build, this crochet kangaroo is both a delightful decor piece and a functional storage solution. Whether you’re crafting for animal lovers, adding a playful touch to your home, or simply enjoy making creative amigurumi designs, this pattern lets you stitch up a lovable kangaroo bursting with personality! 🦘✨
Designed for customization, this pattern allows you to experiment with different shades of brown, embroidered details, or even tiny accessories like a miniature joey or decorative scarf for extra charm. Craft a classic kangaroo with natural tones, create a pastel version for a whimsical aesthetic, or even stitch up a full set of animal-inspired amigurumi for a fun collection! Whether gifted as a cherished keepsake, displayed as a practical accent, or made simply for the joy of crafting, this Amigurumi Kangaroo Remote Holder is a creative and engaging project—perfect for bringing a touch of handmade charm to every stitch! 🧶💖
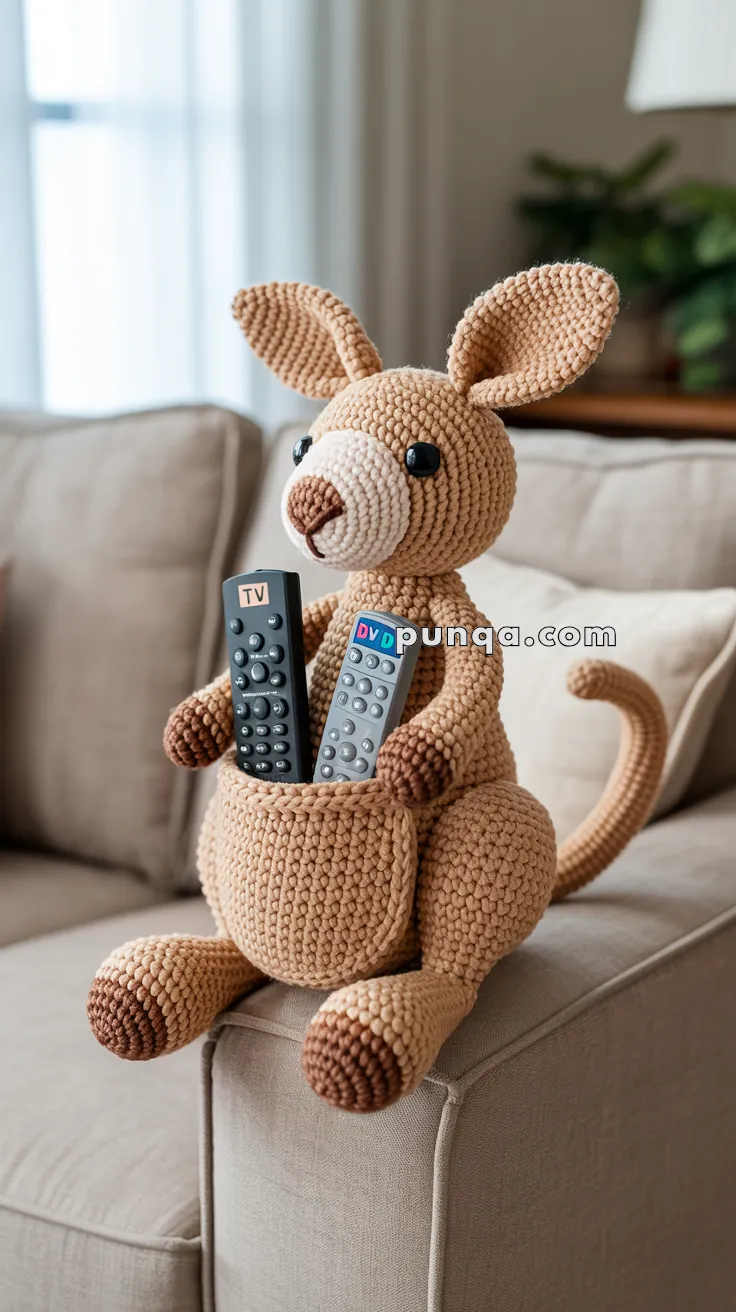
🦘Amigurumi Kangaroo Remote Holder Crochet Pattern
Transform your living room with this adorable and functional kangaroo remote holder! This charming amigurumi creation features a spacious pouch perfect for storing TV remotes, keeping your space organized while adding a touch of whimsy to your décor.
📋 Pattern Information
Skill Level: Intermediate
Finished Size: Approximately 12-13 inches (30-33 cm) tall
Time to Complete: 8-12 hours
🧶 Materials Needed
Yarn Requirements
- Color A (Main Body – Light Tan/Beige): 350-400 yards (320-365 meters)
- Color B (Dark Brown – Paws & Feet): 80-100 yards (73-91 meters)
- Color C (Cream/Off-White – Snout): 20-30 yards (18-27 meters)
Total Yarn Needed: Approximately 450-530 yards (410-485 meters)
Recommended: Medium weight yarn (4/worsted) such as Red Heart Super Saver, Lion Brand Vanna’s Choice, or velvet/chenille yarn for extra softness
Other Supplies
- Crochet Hook: 3.5 mm (E/4) for tight, dense stitches
- Safety Eyes: 12-15 mm (black)
- Fiberfill Stuffing: Approximately 10-12 oz (280-340g)
- Tapestry Needle: For sewing and weaving ends
- Stitch Markers
- Optional: Cardboard circle (4 inches diameter) for pouch base stability
- Optional: Felt or fabric for pouch lining
📖 Abbreviations (US Terms)
- MR – Magic Ring
- sc – Single Crochet
- inc – Increase (2 sc in one stitch)
- dec – Decrease (single crochet 2 together)
- sl st – Slip Stitch
- ch – Chain
- st(s) – Stitch(es)
- FO – Fasten Off
- BLO – Back Loop Only
- FLO – Front Loop Only
🎨 Color Change Technique
When changing colors (for paws, feet, and snout):
- Work the last stitch of the current color until 2 loops remain on hook
- Drop the old color
- Yarn over with the new color and pull through both loops
- Continue with new color
This creates a clean color transition without gaps.
🧠 Head (Color A)
Round 1: MR, 6 sc (6)
Round 2: inc x6 (12)
Round 3: (1 sc, inc) x6 (18)
Round 4: (2 sc, inc) x6 (24)
Round 5: (3 sc, inc) x6 (30)
Round 6: (4 sc, inc) x6 (36)
Round 7: (5 sc, inc) x6 (42)
Round 8: (6 sc, inc) x6 (48)
Rounds 9-18: sc around (48) — 10 rounds even
Insert safety eyes between Rounds 12-13, approximately 8-9 stitches apart
Round 19: (6 sc, dec) x6 (42)
Round 20: (5 sc, dec) x6 (36)
Round 21: (4 sc, dec) x6 (30)
Round 22: (3 sc, dec) x6 (24)
Stuff head firmly
Round 23: (2 sc, dec) x6 (18)
Round 24: (1 sc, dec) x6 (12)
Round 25: dec x6 (6)
FO, leaving long tail. Weave through remaining stitches and pull tight to close.
🐽 Snout (Color C)
Round 1: MR, 6 sc (6)
Round 2: inc x6 (12)
Round 3: (1 sc, inc) x6 (18)
Round 4: (2 sc, inc) x6 (24)
Round 5: (3 sc, inc) x6 (30)
Rounds 6-7: sc around (30) — 2 rounds even
Round 8: (3 sc, dec) x6 (24)
Round 9: (2 sc, dec) x6 (18)
Stuff lightly with a rounded, plump shape
Round 10: (1 sc, dec) x6 (12)
Round 11: dec x6 (6)
FO, leaving long tail for sewing. Close opening and sew to front of head, centered below eyes. The snout should be prominent and rounded.
👃 Nose (Color B)
Ch 5
Row 1: Starting in 2nd ch from hook, sc in next 4 ch (4)
Row 2: ch 1, turn, sc in next 4 st (4)
Row 3: ch 1, turn, sc in next 4 st (4)
Row 4: ch 1, turn, sc in next 4 st (4)
FO, leaving long tail. Sew to center top of snout.
Optional: Embroider a vertical line down from nose with dark brown or black yarn for definition.
👂 Ears (Make 2 – Color A)
Round 1: MR, 6 sc (6)
Round 2: inc x6 (12)
Round 3: (1 sc, inc) x6 (18)
Round 4: (2 sc, inc) x6 (24)
Rounds 5-10: sc around (24) — 6 rounds even
Do not stuff. Flatten ear and sl st across the opening to close.
FO, leaving long tail. Sew to top sides of head, angled slightly outward and upright.
🦘 Body & Pouch (Color A)
Round 1: MR, 6 sc (6)
Round 2: inc x6 (12)
Round 3: (1 sc, inc) x6 (18)
Round 4: (2 sc, inc) x6 (24)
Round 5: (3 sc, inc) x6 (30)
Round 6: (4 sc, inc) x6 (36)
Round 7: (5 sc, inc) x6 (42)
Round 8: (6 sc, inc) x6 (48)
Rounds 9-28: sc around (48) — 20 rounds even
This creates a rounded, compact pouch body. Do NOT stuff completely—leave hollow for remote storage.
Pouch Opening Definition
Round 29: BLO sc around (48)
Rounds 30-31: sc around (48) — 2 rounds even
Round 32: (6 sc, dec) x6 (42)
Round 33: sc around (42)
Round 34: (5 sc, dec) x6 (36)
FO, leaving long tail for attaching head.
Note: The BLO round creates a defined ridge for the pouch opening. Insert cardboard circle at base (inside Round 9-10 area) to help maintain shape. Add light stuffing around sides while keeping center hollow.
🤲 Arms (Make 2)
Paw (Color B)
Round 1: MR, 6 sc (6)
Round 2: inc x6 (12)
Round 3: (1 sc, inc) x6 (18)
Rounds 4-5: sc around (18) — 2 rounds even
Change to Color A
Round 6: (1 sc, dec) x6 (12)
Rounds 7-16: sc around (12) — 10 rounds even
Stuff lightly, leaving last 2 rounds unstuffed.
Flatten opening and sl st across to close. FO, leaving long tail.
Sew arms to upper sides of pouch body (around Round 24-26), angled slightly forward as if holding remotes.
🦵 Legs (Make 2)
Foot (Color B)
Round 1: MR, 8 sc (8)
Round 2: inc x8 (16)
Round 3: (1 sc, inc) x8 (24)
Rounds 4-6: sc around (24) — 3 rounds even
Change to Color A
Round 7: (2 sc, dec) x6 (18)
Rounds 8-22: sc around (18) — 15 rounds even
Stuff firmly, especially the foot portion.
FO, leaving long tail. Sew legs to bottom front sides of pouch body at an angle, positioned to help kangaroo stand upright and balance forward.
🦘 Tail (Color A)
Round 1: MR, 8 sc (8)
Round 2: (1 sc, inc) x4 (12)
Round 3: (1 sc, inc) x6 (18)
Rounds 4-6: sc around (18) — 3 rounds even
Round 7: (1 sc, dec) x6 (12)
Rounds 8-24: sc around (12) — 17 rounds even
Round 25: (1 sc, dec) x4 (8)
Rounds 26-28: sc around (8) — 3 rounds even
Stuff moderately, shaping into a gentle curve as you go.
FO, leaving long tail. Sew to back lower portion of body, positioned to provide balance when kangaroo is standing.
🧷 Assembly Instructions
Step 1: Prepare the Pouch
- Insert cardboard circle at base (inside bottom) for stability
- Add light stuffing around interior walls while keeping center hollow for remotes
- Optional: Cut and sew felt or fabric lining inside pouch for a polished finish
Step 2: Attach the Legs
- Sew legs to bottom front sides of pouch at an angle
- Position them forward and slightly outward to provide stability
- The legs should angle forward to help the kangaroo lean back slightly
Step 3: Attach the Tail
- Sew tail to back lower portion of body
- Curve it outward and downward to create a tripod support with the legs
- The tail should be positioned so the kangaroo can stand independently in a stable, leaning-back pose
Step 4: Test Stability
- Before attaching the head, test that the body stands upright
- Adjust leg and tail positioning as needed for balance
- The kangaroo should lean back slightly on its tail
Step 5: Attach the Head
- Position head centered on top opening of pouch body
- Sew securely all around, making sure it’s firmly attached
- Angle head slightly forward for a realistic pose
Step 6: Attach Ears
- Sew ears to top sides of head
- Position them upright and angled slightly outward
- Ensure they’re symmetrical
Step 7: Attach Arms
- Sew arms to upper front sides of pouch (around Round 24-26)
- Angle them slightly forward and toward center
- Position as if ready to hold remotes
Step 8: Final Touches
- Weave in all remaining yarn ends
- Shape and adjust positioning as needed
- Test pouch with remotes to ensure proper fit
💡 Tips & Variations
Tension Tips
- Work with tight, even tension to create dense stitches with no gaps
- The tighter your stitches, the more professional the finished piece will look
- If your fabric seems loose, drop down to a 3.25 mm hook
Stability Tips
- Use a weighted base (small bag of poly pellets) in bottom of pouch for extra stability
- Reinforce leg-to-body and tail-to-body connections with extra stitching
- Shape tail to provide tripod support with legs—this is critical for standing
- Position legs at an angle (not straight down) to create proper weight distribution
- The kangaroo should lean back slightly on its tail when standing
Customization Ideas
- Add a Baby Joey: Crochet a miniature kangaroo (1/3 scale) to peek out of pouch
- Personalize: Add embroidered name or monogram
- Gift Version: Create in recipient’s favorite colors
- Seasonal: Add small accessories (Santa hat, bow tie, etc.)
- Extra Storage: Add small pockets on sides for phone or glasses
Yarn Substitutions
- Velvet/Chenille yarn: Creates ultra-soft, plush texture (may need to go up one hook size)
- Cotton yarn: More structured, machine washable
- Acrylic: Budget-friendly and durable
Safety Considerations
- Use embroidered eyes instead of safety eyes for children under 3
- Ensure all parts are securely attached
- Supervise young children during use
📸 Finishing & Care
Blocking (Optional)
- Lightly steam or wet block to even out stitches
- Shape while damp and allow to dry completely
Cleaning
- Spot clean with damp cloth
- For deeper cleaning, hand wash in cool water with mild detergent
- Air dry completely, reshaping as needed
- Do not machine wash if cardboard insert is used
🎉 You Did It!
Congratulations on completing your amigurumi kangaroo remote holder! This functional piece of décor is sure to bring smiles while keeping your living space tidy.
Happy crocheting! 🧶🦘✨