Welcome to the gentle and enchanting world of amigurumi! 🪼✨ Today, I’m excited to share my free crochet pattern for a Jellyfish Baby—a soft and flowing sea creature perfect for ocean lovers, nursery décor, or anyone who enjoys crafting whimsical handmade companions! 🌊 Whether you love stitching up aquatic-inspired designs, enjoy working with delicate, textured shapes, or simply want to add a dreamy jellyfish to your collection, this pattern will guide you through creating a beautifully detailed jelly with graceful tentacles and a cozy, plush body! 💙
This design embraces smooth curves, soft draping textures, and soothing ocean hues to bring an elegant underwater charm to life! 🧶🐚 I’ve carefully outlined each step to ensure your Jellyfish Baby turns out just right—ready to float into your display or become a cherished handmade gift! 🎁 So grab your hooks, pick out calming blues, purples, and pastels, and let’s stitch up a mesmerizing sea companion! ✨
🪼 Amigurumi Jellyfish Baby Crochet Pattern
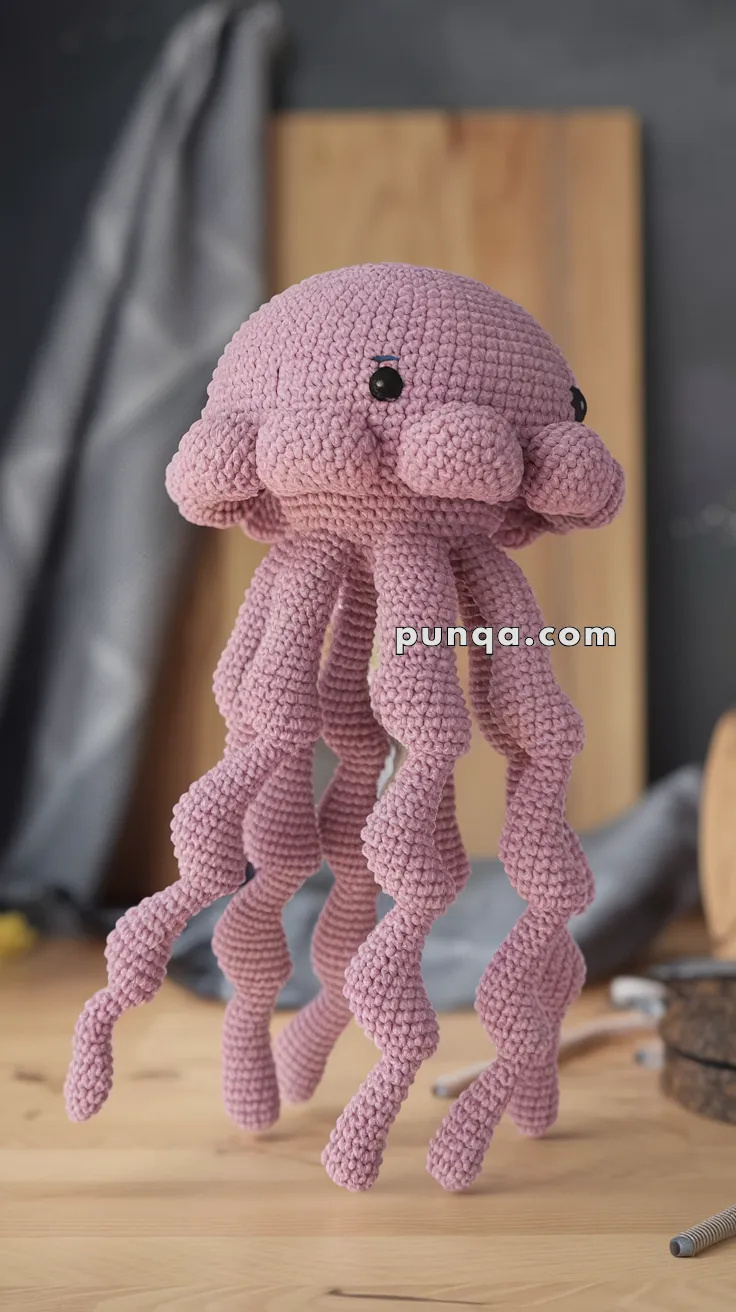
This jellyfish baby features a clean, sculpted bell, soft side lobes, and six gently curved tentacles that hang naturally as if floating underwater. Its minimalist face and flowing shape give it a calm, modern look—perfect for ocean décor, nurseries, or sensory-friendly plush collections.
✨ Skill Level
Beginner–Intermediate
(Simple shaping, tubular limbs)
📏 Finished Size
Approx. 30 cm / 12 in from bell top to tentacle tips
(using worsted or velvet yarn with a 3.5–4 mm hook)
🧶 Materials
-
Mauve / dusty pink yarn (worsted or velvet)
-
90–110 g total
-
-
Crochet hook: 3.5–4 mm
-
Safety eyes: 8–10 mm (black)
-
Polyester fiberfill
-
Tapestry needle
-
Stitch marker
-
Scissors
🪡 Abbreviations (US Terms)
MR – Magic Ring
sc – Single Crochet
inc – Increase
dec – Decrease
FO – Fasten Off
🧠 Bell (Head)
Worked in continuous rounds.
R1: MR 6
R2: inc ×6 (12)
R3: (sc, inc) ×6 (18)
R4: (2 sc, inc) ×6 (24)
R5: (3 sc, inc) ×6 (30)
R6: (4 sc, inc) ×6 (36)
R7: (5 sc, inc) ×6 (42)
R8–R14: sc around (42)
👉 Insert safety eyes between Rounds 10–11, spaced 7–8 sts apart, positioned slightly toward the sides.
R15: (5 sc, dec) ×6 (36)
R16: (4 sc, dec) ×6 (30)
R17: (3 sc, dec) ×6 (24)
Stuff firmly, keeping a smooth dome shape.
R18: (2 sc, dec) ×6 (18)
R19: (sc, dec) ×6 (12)
R20: dec ×6 (6)
FO and close neatly.
🫧 Side Lobes (Make 2)
These are large rounded cheek-like lobes, clearly visible in the photo.
R1: MR 6
R2: inc ×6 (12)
R3: sc around (12)
R4: (2 sc, dec) ×3 (9)
Lightly stuff, flatten slightly into an oval.
FO with long tail.
Sew one to each side of the bell, centered slightly below eye level.
🐙 Tentacles (Make 6)
Tubular, lightly stuffed, gently curved
R1: MR 6
R2: inc ×6 (12)
R3–R22: sc around (12)
👉 For natural bends:
-
Lightly stuff only the top ⅔
-
Leave lower section soft so it curves naturally
R23: (2 sc, dec) ×3 (9)
R24: sc around (9)
R25: dec ×4 (5)
FO, close round.
Make 6 total, varying length slightly if desired (±2 rounds).
🧵 Tentacle Attachment
-
Sew all 6 tentacles close together under the center of the bell
-
They should hang downward, overlapping slightly
-
Do NOT space them around the edge
✂️ Final Finishing
-
Shape tentacles gently with fingers
-
Ensure side lobes sit flush and rounded
-
No ruffles, no mouth, no extra details
-
Weave in all ends securely
Gently drifting and always smiling, this Jellyfish Baby is the sweetest creature under the sea! 🪼💖