Welcome to the quirky and nostalgic world of retro cartoon amigurumi! 🕵️♂️✨ Today, I’m delighted to share my FREE crochet pattern for an Amigurumi Inspector Gadget—a playful tribute to the bumbling yet endearing detective from the classic animated series. Whether you’re crafting a gift for an 80s cartoon fan, creating a fun throwback display, or simply love this gadget-packed inspector, this design features his iconic trench coat, extendable limbs, and signature hat ready for his next mission.
This design blends retro charm and playful details, with step-by-step instructions for Gadget’s lanky body, oversized hands, and optional accessories like a crochet Gadget Binoculars or Penny communicator watch. Choose neutral tans and browns for his classic look, or experiment with metallic yarn for his robotic gadgets! 🎩 So grab your hooks, channel your inner detective, and let’s crochet an inspector who’s always almost saving the day. “Go-Go Gadget Crochet!” 🧶💡
🕵️♂️ Amigurumi Inspector Gadget Crochet Pattern
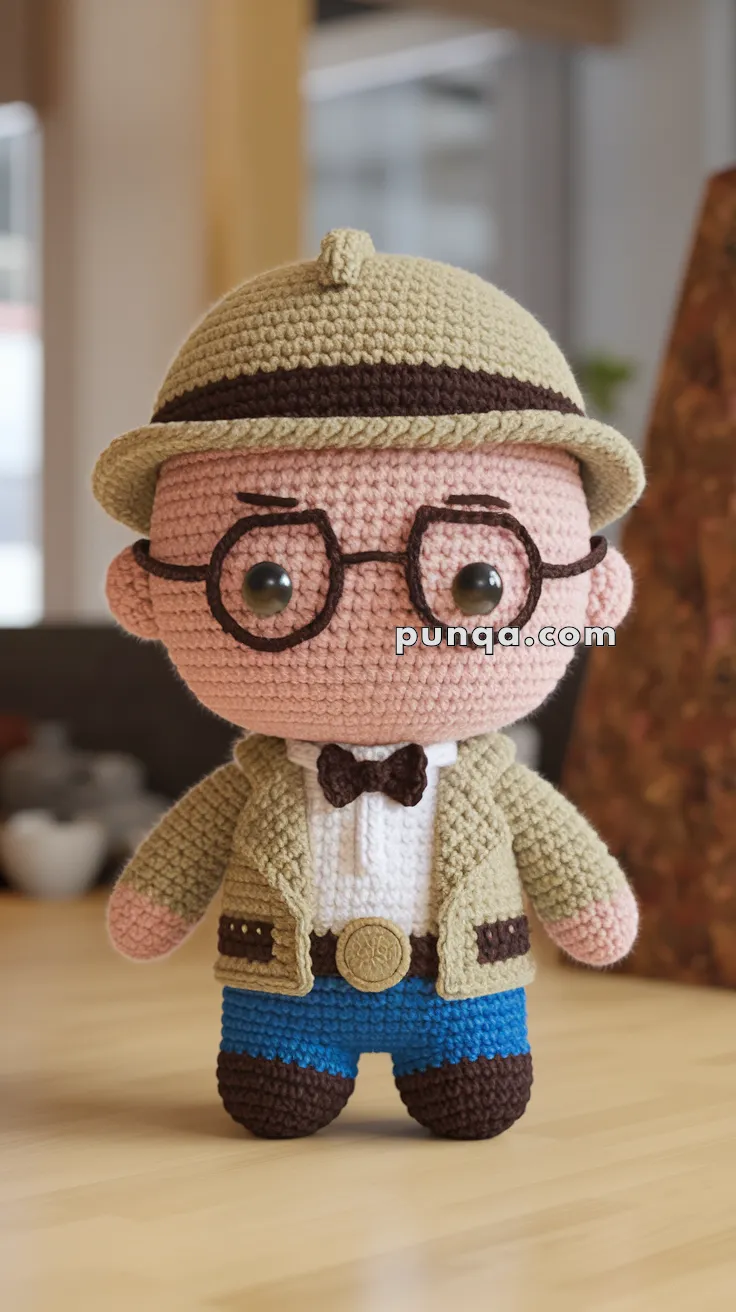
Bring the beloved detective to life with this amigurumi version of Inspector Gadget! Complete with a safari hat, glasses, bow tie, and classic jacket ensemble, this little adventurer is ready to solve mysteries—one stitch at a time.
✨ Skill Level
Intermediate – Includes color changes, clothes worked separately or as part of the body, and embroidered or crocheted accessories like glasses and hat.
📏 Finished Size
Approx. 9–11 inches (23–28 cm) tall using DK or worsted weight yarn and a 2.5–3.5 mm hook.
🧶 Materials
-
Yarn (DK or Worsted weight):
-
Skin: Light Peach
-
Jacket & Hat: Khaki/Beige
-
Pants: Blue
-
Shoes, Belt & Glasses: Dark Brown
-
Shirt: White
-
Bow Tie & Hair: Brown
-
-
Crochet hook: 2.5–3.5 mm
-
10–12 mm safety eyes
-
Tapestry needle
-
Stitch marker
-
Polyfill stuffing
-
Thin black yarn or embroidery thread (for eyebrows and detailing)
🧵 Abbreviations (US Terms)
MR – Magic Ring
sc – Single Crochet
inc – Increase
dec – Decrease
sl st – Slip Stitch
ch – Chain
FO – Fasten Off
🧑 Head
Use Light Peach:
-
MR, 6 sc (6)
-
inc x6 (12)
-
(1 sc, inc) x6 (18)
-
(2 sc, inc) x6 (24)
-
(3 sc, inc) x6 (30)
-
(4 sc, inc) x6 (36)
-
(5 sc, inc) x6 (42)
8–18. sc around (42)
Insert safety eyes between Rounds 12–13, approx. 10 sts apart.
Embroider eyebrows and attach glasses (instructions below). -
(5 sc, dec) x6 (36)
-
(4 sc, dec) x6 (30)
-
(3 sc, dec) x6 (24)
-
(2 sc, dec) x6 (18)
Stuff head firmly. -
(1 sc, dec) x6 (12)
-
dec x6 (6)
FO and close.
🎩 Hat
Use Khaki:
-
MR, 6 sc (6)
-
inc x6 (12)
-
(1 sc, inc) x6 (18)
-
(2 sc, inc) x6 (24)
-
(3 sc, inc) x6 (30)
-
(4 sc, inc) x6 (36)
7–10. sc around (36)
Switch to Dark Brown: -
sc around (36)
Switch back to Khaki: -
(5 sc, inc) x6 (42)
-
(6 sc, inc) x6 (48)
-
sl st around (48)
FO, leave long tail to sew to head. Add a tiny knob on top:
MR, 6 sc – FO and sew.
👓 Glasses (Make 2 Circles and a Bridge)
Use Dark Brown:
Lenses (Make 2):
-
ch 10, sl st to first ch to form a ring.
-
sc around (approx. 15–18 sc), sl st to close.
Bridge: -
ch 5, attach to other lens with sl st.
Sew or glue carefully around the safety eyes.
👔 Body & Clothes
Start with Brown (Shoes):
-
MR, 6 sc (6)
-
inc x6 (12)
-
(1 sc, inc) x6 (18)
4–5. sc around (18)
Switch to Blue (Pants):
6–10. sc around (18)
Switch to White (Shirt):
11–14. sc around (18)
Switch to Khaki (Jacket):
15–22. sc around (18)
Stuff firmly as you go. -
(1 sc, dec) x6 (12)
-
dec x6 (6)
FO and sew under head.
🧥 Jacket Flap & Belt
Flap Panels (Make 2):
ch 8, sc in each ch (7), turn and work 3 rows. FO and sew to each front side.
Pockets & Belt Details:
Use Brown:
-
ch 4, sc 3 rows for each pocket. Sew on.
-
ch enough for belt band, sew around waist. Add small gold or beige round buckle in center.
🎀 Bow Tie
Use Dark Brown:
ch 6, sl st to form ring. Work in circle:
-
(2 sc, inc) x2
-
sc around for 2 rows
FO, pinch center and wrap yarn tightly to form bow shape. Sew at neckline.
👖 Arms (Make 2)
Start with Light Peach (hands):
-
MR, 6 sc (6)
-
inc x6 (12)
3–4. sc around (12)
Switch to Khaki (sleeves):
5–10. sc around (12)
Stuff lightly, FO, and sew to body sides.
🥿 Legs (Make 2)
Start with Brown (boots):
-
MR, 6 sc (6)
-
inc x6 (12)
3–5. sc around (12)
Switch to Blue (pants):
6–9. sc around (12)
Stuff and sew to body base.
✂️ Final Touches
-
Attach hat firmly to head.
-
Embroider shirt details or use surface slip stitches.
-
Pin and sew limbs in place.
-
Adjust accessories to lie flat and evenly.
💡 Customization Ideas
-
Add small gadgets using pipe cleaners or wire inside arms
-
Make a trench coat variation with longer flaps
-
Create themed versions (detective, adventurer, explorer)
Gadget’s got style and smarts—and now, thanks to your crochet skills, he’s ready for yarn-filled missions around your home! 🔍🧵


Thank you very much 🙏