Oh, the joy of crafting amigurumi! There’s something magical about creating these adorable, little crochet creatures that brings out the happiness in me. One project I’ve absolutely fallen in love with is the amigurumi igloo. Just imagine a tiny, cozy igloo, made entirely out of yarn, where little amigurumi animals can live or play. It combines all the charm of the classic snow structure with the whimsy of crochet. The process of crocheting an igloo is not only fun but also a wonderful exercise in creativity and patience, as each stitch brings the igloo closer to life. ☃️✨
Creating an amigurumi igloo pattern is like embarking on a delightful adventure of yarn and imagination. It all starts with selecting soft, snowy-white yarn to mimic the ice and snow of a real igloo. Constructing the rounded dome shape is a playful challenge, with each row of stitches forming the perfect snowy arch. It’s rewarding to see the structure take shape, layer by layer. Adding little details like a small entrance or even attaching it to a base representing snow or ice gives it an extra touch of realism. Truly, making an amigurumi igloo is as heartwarming as it is enjoyable, especially when you see the finished piece bringing smiles to everyone who sees it! 🧶❄️
❄️ Amigurumi Igloo Crochet Pattern
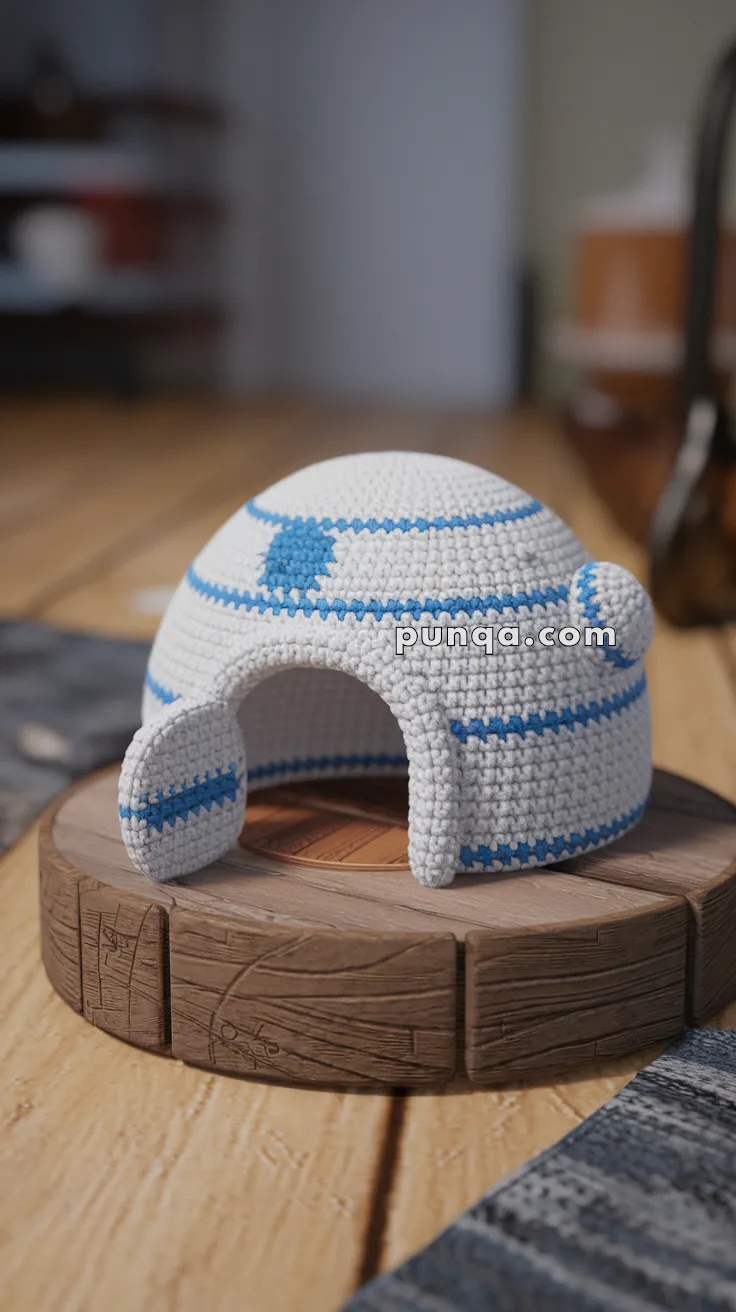
Create a cozy arctic hideaway with this adorable amigurumi igloo! Perfect for winter dioramas, stuffed animal homes, or seasonal decor, this dome-shaped soft sculpture features icy blue accents and an inviting tunnel entrance.
✨ Skill Level
Beginner to Intermediate – Uses simple shaping and color changes.
📏 Finished Size
Approx. 15–18 cm (6–7 inches) wide and 10–12 cm (4–5 inches) tall using worsted weight yarn and a 3.5 mm hook.
🧶 Materials
-
Yarn (Worsted weight):
-
White (Main igloo body)
-
Blue (Accent stripes and patchwork)
-
-
Other Supplies:
-
3.5 mm crochet hook
-
Tapestry needle
-
Stitch marker
-
Scissors
-
Cardboard/plastic canvas (optional, for base stability)
-
Stitching thread for sewing entrance to dome
-
🧵 Abbreviations (US Terms)
-
MR – Magic Ring
-
sc – Single Crochet
-
inc – Increase
-
dec – Decrease
-
ch – Chain
-
sl st – Slip Stitch
-
BLO – Back Loop Only
-
FO – Fasten Off
🏠 Dome Structure (Main Body – White)
Work in rounds:
-
MR, 6 sc
-
inc x6 (12)
-
(1 sc, inc) x6 (18)
-
(2 sc, inc) x6 (24)
-
(3 sc, inc) x6 (30)
-
(4 sc, inc) x6 (36)
-
(5 sc, inc) x6 (42)
-
(6 sc, inc) x6 (48)
9–18. sc around (48) – add blue stripes in desired rows -
(6 sc, dec) x6 (42)
-
(5 sc, dec) x6 (36)
-
sc around (36)
FO, leaving front open (about 12–15 stitches wide)
Optional: Shape entrance hole by skipping stitches on Rounds 19–21.
🚪 Entrance Tunnel (White)
Worked flat and joined into a cylinder:
-
Ch 20
2–5. sc across (20)
FO and sew short sides together to make a ring
Sew bottom edge of tunnel to base opening of igloo, shaping like an arch
Optional Side Flaps:
Ch 6, work 5 rows of sc
Sew to both sides of the tunnel for a rounded effect
🔷 Optional Blue Patch & Details
Use blue yarn to:
-
Cross-stitch or surface slip stitch bricks/ice blocks
-
Add a small “snowflake” or patch to the roof area
-
Work decorative horizontal stripes between rounds (e.g. Rounds 9 & 17)
🧷 Assembly Tips
-
If using as a toy, keep dome soft and stitch securely
-
If for display, insert a cardboard circle inside bottom to keep it flat
-
Add fake snow or pom-poms around for a wintery base!
💡 Customization Ideas
-
Add a mini penguin or polar bear plushie inside!
-
Use glow-in-the-dark yarn for nighttime magic
-
Turn into an ornament by adding a hanging loop
This frosty little igloo brings handmade coziness to your winter scenes—perfect for cuddly creatures to stay warm inside! ☃️🏠🧶