Welcome to the fast-paced and energetic world of amigurumi! 🏒✨ Today, I’m excited to share my free crochet pattern for an Amigurumi Ice Hockey Player—a dynamic and spirited companion perfect for sports enthusiasts, winter lovers, or anyone who enjoys crafting lively, athletic-inspired figures! ❄️ Whether you love stitching action-packed designs, creating expressive characters with personality, or simply want to add a bold hockey player to your handmade lineup, this pattern will guide you through crafting a beautifully detailed plush athlete complete with a team jersey, sleek skates, and a ready-to-shoot hockey stick! 🏆
This design blends strong shaping, vibrant colors, and playful textures to bring the excitement of the rink to your crochet projects! 🧶🥅 I’ve carefully outlined each step to ensure your Amigurumi Ice Hockey Player turns out just right—perfect for display, gifting to fellow hockey fans, or adding a sporty spark to your collection! So grab your hooks, pick out your favorite team colors, and let’s stitch up a fierce and fun-loving hockey champion! ✨
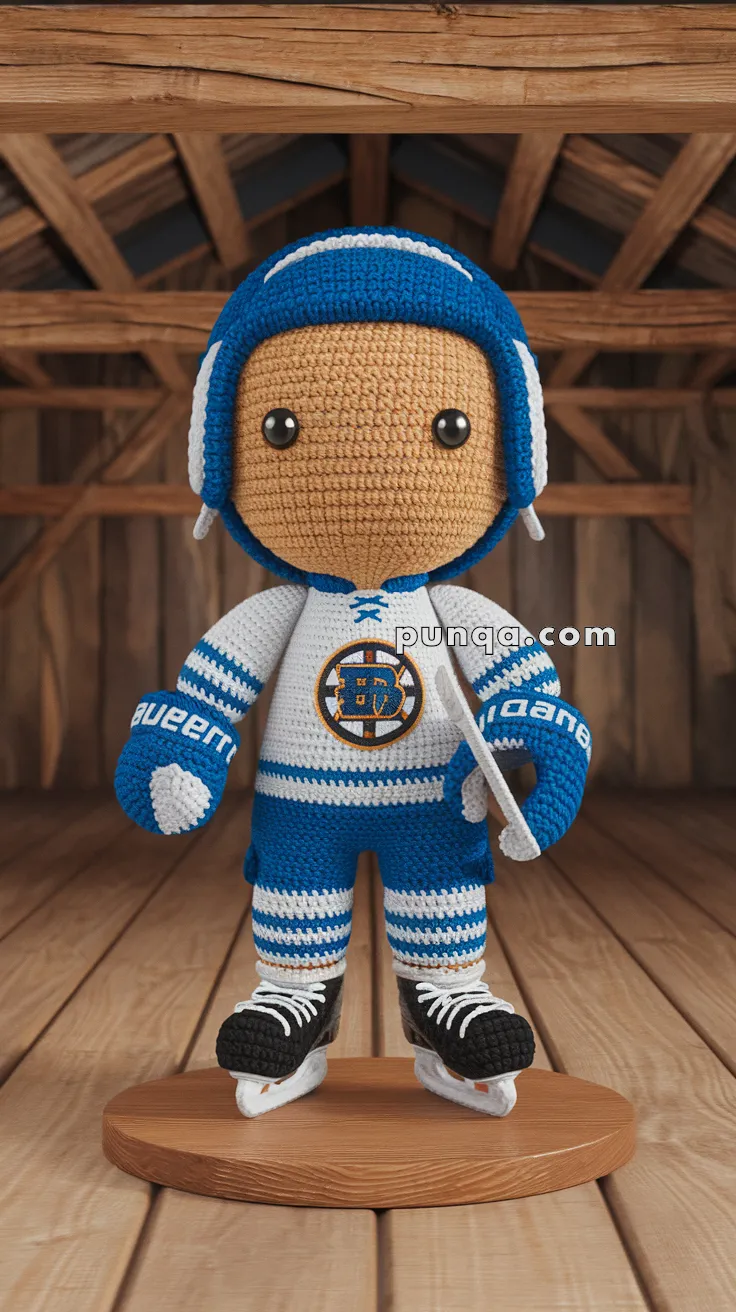
🏒 Amigurumi Ice Hockey Player – Free Crochet Pattern
This fierce and sporty amigurumi hockey player is all geared up and ready for the rink! Featuring detailed skates, a helmet, gloves, and a logoed jersey, this project is perfect for hockey fans of all ages.
🧶 Skill Level
Intermediate – Includes color changes, shaping, and small accessories (like gloves and skates).
📏 Finished Size
Approximately 28–30 cm (11–12 in) tall when using worsted yarn and 3.5 mm hook.
✂️ Materials Needed
-
Yarn (Worsted weight):
-
3.5 mm crochet hook
-
Safety eyes (10 mm)
-
Polyester stuffing
-
Tapestry needle
-
Stitch markers
-
Optional: felt circle for jersey logo, paint pen or embroidery for details
-
White pipe cleaners or stiff wire for stick and skate blades
📚 Abbreviations (US Terms)
-
MR – Magic Ring
-
sc – Single Crochet
-
inc – Increase
-
dec – Decrease
-
ch – Chain
-
sl st – Slip Stitch
-
BLO – Back Loop Only
-
FO – Fasten Off
🧑🦲 Head
Skin tone
-
MR, 6 sc
-
inc x6 (12)
-
(1 sc, inc) x6 (18)
-
(2 sc, inc) x6 (24)
-
(3 sc, inc) x6 (30)
-
(4 sc, inc) x6 (36)
-
(5 sc, inc) x6 (42)
8–16. sc around (42) -
(5 sc, dec) x6 (36)
-
(4 sc, dec) x6 (30)
-
(3 sc, dec) x6 (24)
-
(2 sc, dec) x6 (18)
-
(1 sc, dec) x6 (12)
– Stuff and FO
Attach safety eyes between Rounds 10–11, 7 stitches apart. Embroider eyebrows and smile.
🧢 Helmet
Blue
-
MR, 6 sc
-
inc x6 (12)
-
(1 sc, inc) x6 (18)
-
(2 sc, inc) x6 (24)
-
(3 sc, inc) x6 (30)
-
(4 sc, inc) x6 (36)
-
(5 sc, inc) x6 (42)
8–12. sc around (42) -
sc across front 21 sts only (forming cap front)
14–16. sc across back loops of last row (forming side flaps)
FO and sew to head.
Optional: Add surface slip stitches in white to replicate helmet detailing.
👕 Body & Jersey
Start at neck with skin tone, switch to jersey white
-
MR, 6 sc
-
inc x6 (12)
-
sc around (12)
-
Switch to white
-
inc x6 (18)
-
(2 sc, inc) x6 (24)
7–12. sc around (24) -
Switch to blue, sc around
-
(2 sc, dec) x6 (18)
-
dec x9 (9)
– Stuff and FO
Optional Logo: Embroider or sew on felt circle and details after stuffing.
🧤 Arms (Make 2)
Start at skin tone (hands), switch to blue
-
MR, 6 sc
-
inc x6 (12)
3–4. sc around (12) -
dec x2, 8 sc (10) – shape thumb
-
Switch to blue
7–14. sc around (10)
– Stuff lightly and FO
– Embroider “Bauer” or use white paint/pen on the blue part.
🩳 Shorts & Legs (Make 2)
Start with white for socks
-
MR, 6 sc
-
inc x6 (12)
-
(1 sc, inc) x6 (18)
4–6. sc around (18) -
Switch to blue
8–13. sc around (18)
– FO first leg, repeat second leg but don’t fasten off.
Join legs with 3 ch between and continue body:
-
sc around both legs and ch space (42)
15–17. sc around (42)
– Stuff legs firmly
👟 Skates (Make 2)
Start with black
-
MR, 6 sc
-
inc x6 (12)
-
(1 sc, inc) x6 (18)
4–6. sc around (18) -
(3 sc, dec) x3 (15)
-
Switch to grey, BLO, sc around
-
Flatten and sl st closed
– FO and sew to bottom of legs
Embroider white laces on front with surface chain stitches.
🏒 Stick (Optional Accessory)
-
Ch 30 with white yarn
-
Row 1: sc back (29)
-
Fold over and sew pipe cleaner inside
-
Add grey yarn wrapped around end tip for blade
🧵 Assembly
-
Sew head onto body
-
Attach arms to side of torso
-
Attach skates to bottom of legs
-
Sew helmet on head
-
Add stick and optionally pose hands with thread/yarn to hold it in place
✅ Final Touches
-
Embroider team logo or initials
-
Add gloss to eyes or details with fabric paint
-
Display on a small wooden base or hockey-themed background!
I hope you had fun crafting this spirited amigurumi ice hockey player! 🏒 Whether you’re gifting it to a hockey fan or adding it to your own collection, this little champion is sure to score big smiles. 😊