Welcome to the sweet and playful world of amigurumi! 🍦✨ Today, I’m excited to share my free crochet pattern for an Amigurumi Ice Cream Keychain—a delightful and compact creation perfect for dessert lovers, summer vibes, or anyone who enjoys crafting adorable and portable plush designs! 🧶 Whether you love stitching up tiny treats, experimenting with textured scoops, or simply want to add a cheerful ice cream cone to your handmade lineup, this pattern will guide you through crafting a beautifully sculpted plush with a crisp waffle cone, fluffy scoops, and a touch of sugary charm! 🍨
This design embraces pastel hues, soft textures, and intricate shaping to bring a fun and joyful presence to your crochet projects! 🧶✨ I’ve carefully outlined each step to ensure your Amigurumi Ice Cream Keychain turns out just right—ready to clip onto your bag, keys, or become a treasured handmade gift! 🎁 So grab your hooks, pick out delicious hues, and let’s stitch up a fantastic ice cream keychain! 🍦

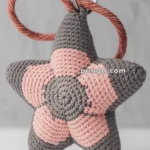
🍓 Amigurumi Ice Cream Keychain Crochet Pattern
Add a scoop of cuteness to your day with this adorable Ice Cream Cone keychain! Perfectly sized for your keys, backpack, or as a charming handmade gift, this sweet treat features a smiling scoop, scalloped ruffle, and optional whipped topping.
✨ Skill Level
Beginner to Intermediate – Includes basic shaping, scalloped edge, and embroidery.
📏 Finished Size
Approx. 3.5–4 in (9–10 cm) tall using cotton DK yarn and a 2.0–2.5 mm hook.
🧶 Materials
- Yarn (Cotton DK or similar):
- Light tan (cone)
- Pink (ice cream)
- White (whipped topping)
- Green (leaf detail)
- Black (eyes or embroidery)
- Crochet hook: 2.0–2.5 mm
- 6 mm safety eyes or black thread for embroidery
- Polyfill stuffing
- Tapestry needle
- Keyring & jump ring
- Stitch marker
🧵 Abbreviations (US Terms)
- MR – Magic Ring
- sc – Single Crochet
- inc – Increase
- dec – Decrease
- sl st – Slip Stitch
- ch – Chain
- FO – Fasten Off
🍦 Cone (Light Tan)
- MR, 6 sc
- inc x6 (12)
- (1 sc, inc) x6 (18)
- (2 sc, inc) x6 (24)
5–10. sc around (24) - (2 sc, dec) x6 (18)
- (1 sc, dec) x6 (12)
- sc around (12)
Stuff firmly
FO and set aside
🍓 Scoop (Pink)
- MR, 6 sc
- inc x6 (12)
- (1 sc, inc) x6 (18)
- (2 sc, inc) x6 (24)
- (3 sc, inc) x6 (30)
6–8. sc around (30)
Insert safety eyes between Rnds 6–7 (approx. 7 sts apart)
Stuff - (3 sc, dec) x6 (24)
- (2 sc, dec) x6 (18)
- (1 sc, dec) x6 (12)
FO, leave a tail for sewing
🍥 Ruffle Edge (Pink)
Attach yarn to bottom of scoop, working into FLO of Rnd 5:
- (ch 2, 2 dc in same st, ch 2, sl st in next st) repeat around
FO and weave in ends
🍚 Whipped Topping (White)
- MR, 6 sc
- sc in each
- Ch 2, make a small picot, sl st to base
FO and sew to top of scoop
🌱 Leaf (Green)
- Ch 5, sl st in 2nd ch, sc, hdc, dc, FO
Sew next to topping
🖤 Face
- Attach safety eyes or embroider small ovals
- Stitch a tiny smile with black thread (optional)
🔑 Keychain Loop
- Thread yarn through top center and tie securely
- Attach to jump ring and keyring
✂️ Finishing Touches
- Shape scoop and cone gently
- Add a tiny drop of fabric glue to secure keyring if needed
- Weave in all ends neatly
This cheerful cone is a quick and fun project to brighten up your accessories. Great for market prep, stocking stuffers, or spreading handmade joy! 🍦💕