Welcome to the adorable and adventurous world of amigurumi! 🐾✨ Today, I’m excited to share my free crochet pattern for an Amigurumi Husky—a playful and loyal creation perfect for dog lovers, winter-themed décor, or anyone who enjoys crafting expressive and lifelike plush designs! ❄️ Whether you love stitching up majestic animals, creating textured and detailed figures, or simply want to add a lovable husky to your handmade lineup, this pattern will guide you through crafting a beautifully sculpted plush with fluffy fur, striking eyes, and a wagging tail! 💖
This design embraces soft textures, bold contrasts, and charming details to bring a spirited and heartwarming presence to your crochet projects! 🧶✨ I’ve carefully outlined each step to ensure your Amigurumi Husky turns out just right—ready to brighten up your space or become a treasured handmade gift! 🎁 So grab your hooks, pick out snowy whites, cool grays, or deep blacks, and let’s stitch up an adorable husky pup! 🐶
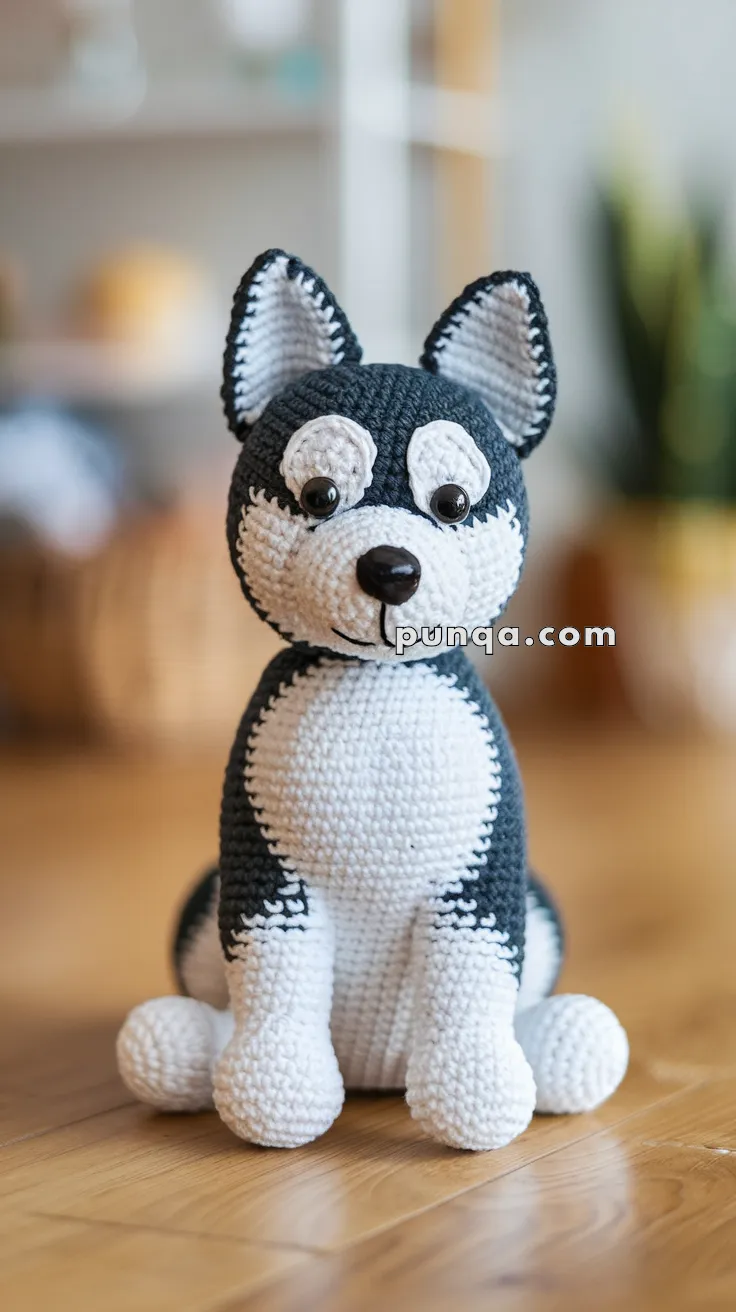
🐾 Amigurumi Husky – Free Crochet Pattern
Bring the snowy charm of the Arctic into your home with this adorable amigurumi husky! With its big bright eyes, soft snout, and pointy ears, this pup is loyal, cuddly, and irresistibly cute.
✨ Skill Level
Intermediate – Includes color changes, shaping, and sewing parts together.
📏 Finished Size
Approximately 10–12 inches (25–30 cm) tall using DK or worsted weight yarn and a 2.5–3.5 mm hook.
🧶 Materials
-
Worsted weight yarn:
-
Dark gray or black (main body)
-
White (face, belly, paws, accents)
-
Brown or black (nose)
-
-
2.5–3.5 mm crochet hook
-
10–12 mm safety eyes
-
Black embroidery thread (mouth and eyelids)
-
Yarn needle
-
Stitch marker
-
Polyfill stuffing
-
Optional: blush or fabric paint for cheeks
🧵 Abbreviations (US Terms)
MR – Magic Ring
sc – Single Crochet
inc – Increase
dec – Decrease
sl st – Slip Stitch
ch – Chain
FO – Fasten Off
BLO – Back Loop Only
FLO – Front Loop Only
🐶 Head (Start with white, then change to gray/black)
-
MR, 6 sc (6)
-
inc x6 (12)
-
(1 sc, inc) x6 (18)
-
(2 sc, inc) x6 (24)
-
(3 sc, inc) x6 (30)
-
(4 sc, inc) x6 (36)
-
sc around (36)
8–12. sc around (36) – Change to gray after Round 10 -
(4 sc, dec) x6 (30)
-
(3 sc, dec) x6 (24)
-
(2 sc, dec) x6 (18)
Insert safety eyes between Rounds 9–10, approx. 5–6 stitches apart.
Stuff firmly. -
(1 sc, dec) x6 (12)
-
dec x6 (6)
FO and close.
🐕 Body (Start with white)
-
MR, 6 sc (6)
-
inc x6 (12)
-
(1 sc, inc) x6 (18)
-
(2 sc, inc) x6 (24)
-
(3 sc, inc) x6 (30)
6–9. sc around (30)
10–20. Change to gray, sc around (30) -
(3 sc, dec) x6 (24)
-
(2 sc, dec) x6 (18)
Stuff firmly. -
(1 sc, dec) x6 (12)
-
dec x6 (6)
FO and close.
🐾 Front Legs (make 2, start with white)
-
MR, 6 sc (6)
-
inc x6 (12)
3–5. sc around (12) -
Change to gray, sc around (12)
7–12. sc around (12)
Stuff lightly. FO.
🐾 Back Legs (make 2, start with white)
-
MR, 6 sc (6)
-
inc x6 (12)
3–5. sc around (12) -
Change to gray, (2 sc, dec) x3 (9)
7–10. sc around (9)
Stuff lightly. FO.
🦴 Belly Patch (with white)
Ch 10
Row 1: sc in 2nd ch from hook and across (9)
Row 2–6: sc across (9)
FO, sew to front center of body vertically.
🐕 Muzzle (with white)
-
MR, 6 sc (6)
-
inc x6 (12)
-
(1 sc, inc) x6 (18)
4–5. sc around (18)
Stuff and attach small embroidered or crocheted nose on top.
FO and sew under the eyes.
🐶 Ears (make 2, with gray and inner ear pink/white)
Inner Ear:
-
MR, 6 sc (6)
-
inc x6 (12)
-
sc around (12)
FO.
Outer Ear (gray):
-
MR, 6 sc (6)
-
inc x6 (12)
-
sc around (12)
Sew the inner to the outer and pinch bottom together. Attach to head.
🐾 Tail (gray)
-
MR, 6 sc (6)
-
(1 sc, inc) x3 (9)
3–10. sc around (9)
Stuff and sew to back of body.
✨ Assembly Instructions
-
Sew head to body.
-
Sew legs to body: front legs to the sides near the bottom, back legs slightly angled backward.
-
Attach muzzle, ears, and tail.
-
Embroider mouth and eyelids if desired.
💡 Customization Tips
-
Add a tongue with pink yarn for cuteness
-
Make in other husky color combos (gray/white, black/white, copper/white)
-
Use fluffy yarn for extra realism
Your little husky is now ready to sit loyally on your desk, shelf, or in a gift box! 🐺💙