Welcome to the adorable and woodland-inspired world of amigurumi! 🦔✨ Today, I’m excited to share my free crochet pattern for an Amigurumi Hedgehog Keychain—a tiny and charming creation perfect for nature lovers, cozy accessories, or anyone who enjoys crafting expressive and miniature plush designs! 🧶 Whether you love stitching up cute animals, creating textured and lifelike figures, or simply want to add a lovable hedgehog to your handmade lineup, this pattern will guide you through crafting a beautifully sculpted plush with soft spikes, tiny paws, and a touch of forest magic! 🍃
This design embraces rounded shapes, earthy tones, and delightful details to bring a sweet and whimsical presence to your crochet projects! 🧶✨ I’ve carefully outlined each step to ensure your Amigurumi Hedgehog Keychain turns out just right—ready to brighten up your keys, bags, or become a treasured handmade gift! 🎁 So grab your hooks, pick out warm browns, soft creams, or playful grays, and let’s stitch up an adorable hedgehog! 🦔
🦔 Amigurumi Hedgehog Keychain Crochet Pattern
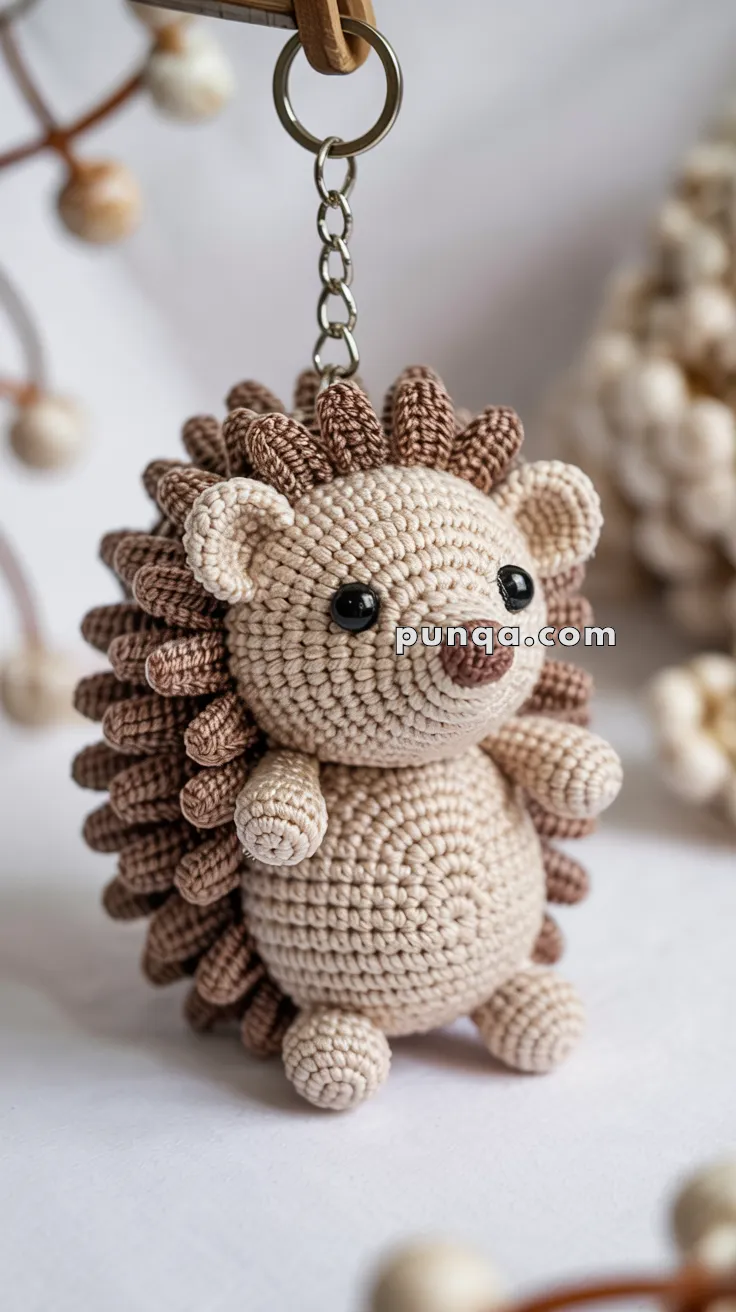
This tiny hedgehog keychain is as cute as it is practical! With its chubby head, stubby arms and legs, and rows of textured spines, it’s the perfect project for gift-making, market prep, or just to carry a little woodland friend with you everywhere.
✨ Skill Level
Easy to Intermediate – involves making small parts, sewing, and creating multiple looped spikes.
📏 Finished Size
Approx. 3.5–4 in (9–10 cm) tall with sport/worsted cotton yarn and a 2.5–3 mm hook.
🧶 Materials
- Beige cotton yarn – head, body, limbs, ears
- Light brown yarn – majority of spines
- Dark brown yarn – accent spines
- Brown yarn – nose & smile
- 6 mm safety eyes
- Crochet hook 2.5–3.0 mm
- Polyester stuffing
- Keychain ring + jump ring
- Yarn needle
- Stitch marker
🪡 Abbreviations (US Terms)
MR – Magic Ring
sc – single crochet
inc – increase
dec – decrease
sl st – slip stitch
FO – fasten off
🧵 PATTERN
🐣 Head (Beige)
R1: MR, 6 sc
R2: inc ×6 → 12
R3: (sc, inc) ×6 → 18
R4: (2 sc, inc) ×6 → 24
R5: (3 sc, inc) ×6 → 30
R6: (4 sc, inc) ×6 → 36
R7–11: sc around (36)
👉 Insert safety eyes between R8–9, spaced 7–8 stitches apart.
R12: (4 sc, dec) ×6 → 30
R13: (3 sc, dec) ×6 → 24
R14: (2 sc, dec) ×6 → 18
Stuff well.
R15: (sc, dec) ×6 → 12
FO and close.
🐽 Nose (Brown)
R1: MR, 4 sc
R2: inc ×4 → 8
R3: sc around (8)
FO, lightly stuff.
Sew centered between the eyes, protruding outward.
👂 Ears (Make 2 – Beige)
R1: MR, 6 sc
R2: (sc, inc) ×3 → 9
R3: sc around (9)
FO, flatten into semicircle.
👉 Sew ears to the sides of the head at Rounds 9–10, positioned just behind the eyes and angled slightly outward (≈45°).
🧍 Body (Beige)
R1: MR, 6 sc
R2: inc ×6 → 12
R3: (sc, inc) ×6 → 18
R4: (2 sc, inc) ×6 → 24
R5–7: sc around (24)
R8: (2 sc, dec) ×6 → 18
R9: (sc, dec) ×6 → 12
Stuff well.
FO, leave tail for sewing.
🖐 Arms (Make 2 – Beige)
R1: MR, 6 sc
R2: sc around (6)
R3: dec ×3 → 3
FO, no stuffing.
Short, stubby arms as shown in the photo.
🦶 Legs (Make 2 – Beige)
R1: MR, 6 sc
R2: (sc, inc) ×3 → 9
R3: sc around (9)
FO, stuff lightly.
Place at the bottom front for the cute, chunky look.
🦔 3D Spines / Quills (Light & Dark Brown)
These spines must be plump, cylindrical, and sewn densely to match the photo.
Make 45–55 spines total.
One Spine
R1: MR, 5 sc
R2–4: sc around (5)
FO, leave a long tail.
Do not stuff.
Coverage Area (Important)
- Spines cover the entire back of the head starting just behind the ears
- They continue down the entire back of the body
- They stop right above the legs
- No spines on:
- face
- ears
- chest
- belly
- arms
- legs
Spine Attachment (Photo-accurate technique)
- Thread tail with needle.
- Insert needle through the base of the spine tube.
- Pass needle through one stitch on the body.
- Pull snug so spine stands straight and vertical.
- Weave the tail through 2–3 nearby stitches for secure locking, then trim.
- Work in tight rows/spirals, placing spines:
- every stitch for max density
- or every other stitch for medium density
This creates the full, rounded “hedgehog ball of spikes” shape from the photo.
🧷 Assembly
1️⃣ Attach Head to Body
Sew head centrally on top of body.
2️⃣ Attach Arms
Sew just below head, angled slightly forward.
3️⃣ Attach Legs
Sew evenly spaced at bottom front.
4️⃣ Attach Ears
Place as described above (R9–10, angled outward).
5️⃣ Add Spines
Cover back of head and body completely and densely.
6️⃣ Embroider Smile (Required for photo accuracy)
Using brown yarn, embroider a small curved smile about 3–4 stitches wide centered below the nose.
🔑 Keychain Attachment
Sew a strong yarn loop on top of the head.
Attach jump ring + keyring.
Reinforce the loop by weaving yarn through several stitches.
🥰 Final Words
Your Amigurumi Hedgehog Keychain is finished! With its chubby little body, looped spines, and sweet face, it looks exactly like the one in the photo. This pocket-sized woodland pal is sure to win hearts everywhere. 🌿🦔✨