Welcome to the eerie and fascinating world of spooky amigurumi! 🎃👻 Today, I’m thrilled to share my free crochet pattern for a legendary figure—the Headless Horseman! 🏇 Whether you’re a fan of ghostly folklore, love crafting hauntingly unique characters, or simply want a chillingly fun project, this pattern will guide you through bringing your very own spectral rider to life—complete with a mysterious, headless silhouette and a flowing cape! 🖤✨
This pattern is designed for crocheters of all skill levels, using classic stitches and detailed instructions to create a hauntingly charming figure. 🧶💀 I’ve carefully broken down each step to ensure your Horseman turns out perfectly—ready to gallop through misty nights and add a touch of eerie elegance to your collection! 🌙 So grab your hooks, choose deep, shadowy yarn colors, and let’s stitch up a ghostly legend that will send shivers down spines! 👁️🔥
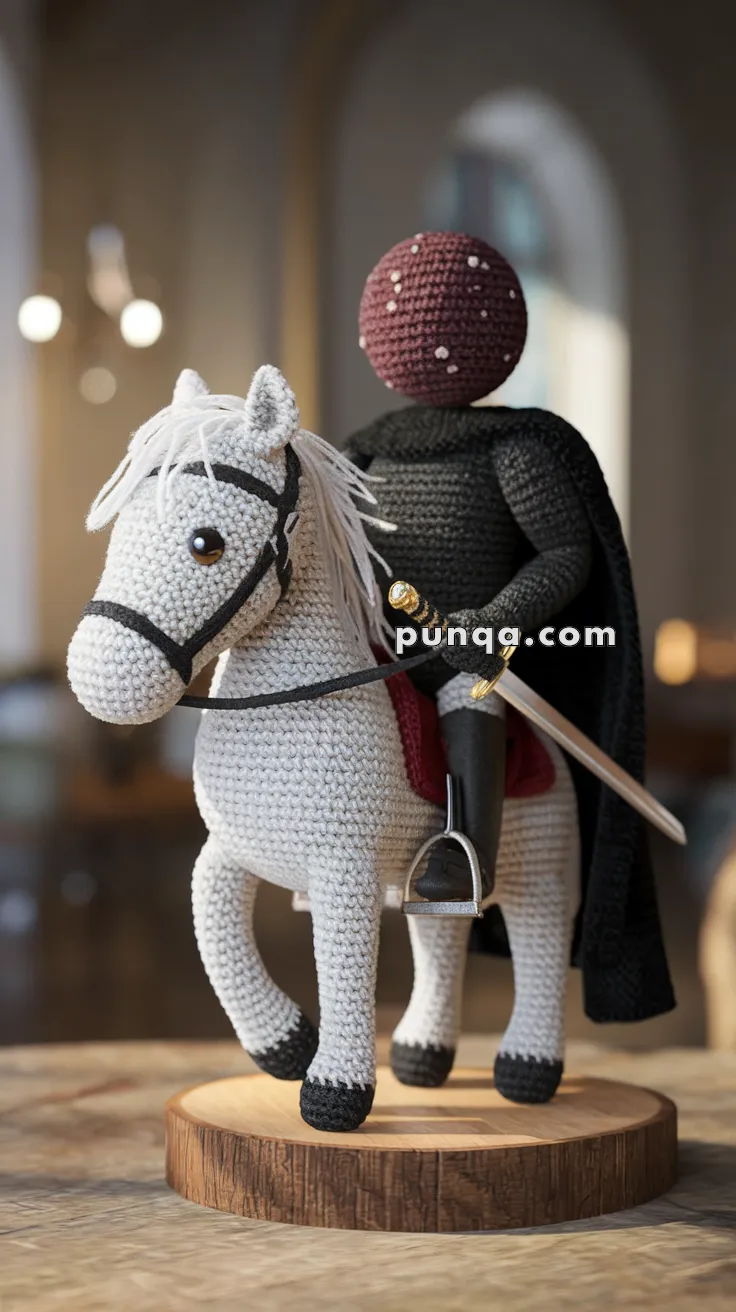
🎃 Amigurumi Headless Horseman & Horse Crochet Pattern
This haunting figure gallops in from legends and folklore—complete with a cloaked rider, sword, and a faithful steed. A fun and slightly spooky project for intermediate crafters.
🧶 Skill Level
Intermediate – Includes color changes, shaping, basic sculpting, and sewing parts.
📏 Finished Size
Approximately 30 cm (12 inches) tall with horse and rider combined, when using worsted weight yarn and a 3.5 mm hook.
✂️ Materials
-
Worsted weight yarn in:
-
White (horse body)
-
Black (hooves, cloak, bridle)
-
Burgundy (head)
-
Skin tone or dark beige (rider hands)
-
Grey or silver (mane, sword, stirrups)
-
Red (saddle)
-
-
3.5 mm crochet hook
-
Stuffing
-
10–12 mm safety eyes (for horse)
-
Stitch markers, scissors, tapestry needle
-
Small dowel or pipe cleaner for sword (optional)
🧵 Abbreviations (US Terms)
-
MR – Magic Ring
-
sc – Single Crochet
-
inc – Increase
-
dec – Decrease
-
ch – Chain
-
sl st – Slip Stitch
-
BLO – Back Loops Only
-
FO – Fasten Off
🐎 Horse Body
With white yarn:
-
MR, 6 sc
-
inc x6 (12)
-
(sc, inc) x6 (18)
-
(2 sc, inc) x6 (24)
-
(3 sc, inc) x6 (30)
6–15. sc around (30) -
(3 sc, dec) x6 (24)
-
(2 sc, dec) x6 (18)
-
sc around (18)
Stuff firmly and FO.
🐎 Legs (x4)
Start with black for hooves:
-
MR, 6 sc
-
inc x6 (12)
3–5. sc around (12)
Change to white:
6–13. sc around (12)
Stuff and FO. Sew evenly to underside.
🐎 Head
-
MR, 6 sc
-
inc x6 (12)
-
(sc, inc) x6 (18)
-
(2 sc, inc) x6 (24)
5–9. sc around (24) -
(2 sc, dec) x6 (18)
-
(sc, dec) x6 (12)
Insert safety eyes between Rnds 6–7. Stuff and FO.
🐎 Ears (x2)
-
MR, 4 sc
-
(sc, inc) x2 (6)
-
sc around (6)
-
Flatten, FO and sew to head.
🐎 Mane
Use grey yarn.
Cut 10–12 strands of yarn (about 6 cm), fold in half and attach along head/neck with lark’s head knot. Trim evenly.
🐎 Tail
Make a small bundle of grey strands and knot. Sew to back of horse.
🪑 Saddle & Bridle
Saddle (red):
-
ch 10, sc in 2nd ch from hook and across (9)
2–5. sc across, FO
Sew to horse’s back.
Bridle (black):
Chain approx. 30 and sew over snout and sides of head as shown.
🧝 Rider Body (Headless)
With black yarn:
-
MR, 6 sc
-
inc x6 (12)
-
(sc, inc) x6 (18)
4–10. sc around (18) -
(2 sc, dec) x4, sc 2 (14)
12–15. sc around (14)
Stuff and FO.
🧤 Arms (x2, with skin tone)
-
MR, 6 sc
-
sc around
-
(sc, inc) x3 (9)
4–8. sc around (9)
FO, sew to torso.
🧥 Cloak
With black yarn:
-
ch 25
-
sc across (24)
-
ch 1, turn, sc across
Repeat until piece measures desired length (approx. 10 cm).
Optional: chain and attach for collar or tie. Wrap around shoulders.
🎯 Pumpkin Head (Detachable)
With burgundy yarn:
-
MR, 6 sc
-
inc x6 (12)
-
(sc, inc) x6 (18)
-
(2 sc, inc) x6 (24)
5–8. sc around (24) -
(2 sc, dec) x6 (18)
-
(sc, dec) x6 (12)
-
dec x6 (6)
Stuff firmly, FO and sew closed.
Use white yarn to embroider spots for “face” features.
🗡️ Sword
-
ch 12, turn
-
sl st back along chain for blade
-
ch 6, sl st across for crossguard
Wrap hilt in black or grey yarn and glue to hand or side.
🧩 Assembly
-
Sew legs to bottom of horse.
-
Attach head and ears.
-
Add mane, tail, saddle, and bridle.
-
Sew rider torso to top of saddle.
-
Attach arms and cloak.
-
Position and attach sword.
-
Place or sew head to lap or hand.
This fearsome mini rider is ready to haunt any shelf or spooky display. Have fun crafting this eerie but charming duo!