Oh, the joy of crafting amigurumi! There’s something incredibly satisfying about bringing a little ball of yarn to life, and when it comes to creating a haunted tree pattern, the thrill only multiplies. Imagine conjuring up a spooky little tree with its gnarled branches and ghostly charm, perfect for Halloween or just for some whimsical home decor. I love how, with just a few stitches, a simple skein of yarn can transform into a delightful character that tells its own story. The process is both meditative and exhilarating, as each loop and knot brings the tree closer to its final form. 🌳✨
Creating a haunted tree amigurumi is like embarking on a magical journey. I usually start by choosing the perfect yarn in earthy tones, maybe with a hint of sparkle for that extra mystical vibe. The pattern often begins with the trunk, working my way up to the branches, where the real fun begins—adornments like little ghosts or bats can be added for that extra spook! The beauty of amigurumi is that it allows so much room for creativity, whether it’s tweaking the pattern or adding personal touches. Plus, seeing the smiles on friends’ faces when they receive a handmade haunted tree is the ultimate reward! 🎃🌲
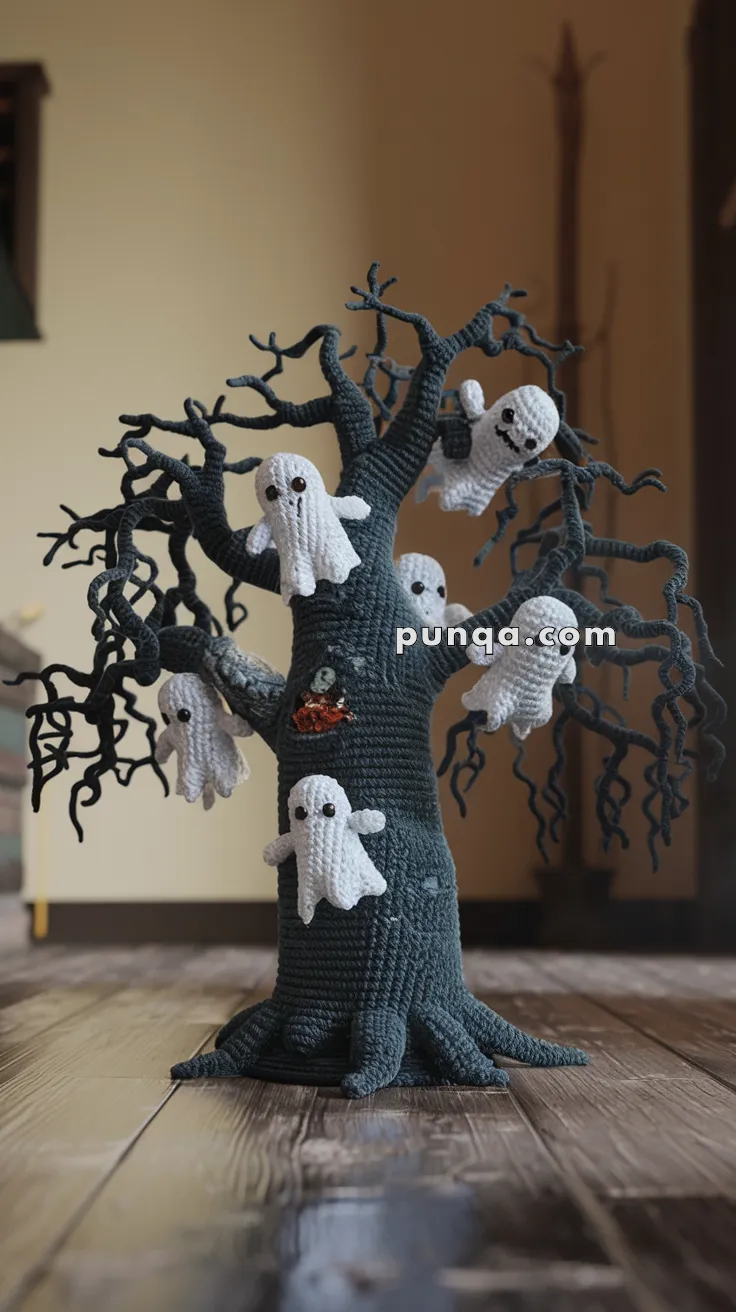
👻 Amigurumi Haunted Tree Crochet Pattern
Bring some spooky charm into your home with this enchanting Haunted Tree adorned with ghostly spirits! This amigurumi project is perfect for Halloween decor, storytelling props, or a gothic woodland display.
🧶 Skill Level
Intermediate – Involves shaping, sculptural crochet, and assembling multiple parts.
📏 Finished Size
Approximately 14–18 inches (35–45 cm) tall depending on yarn and tension.
✨ Materials
-
Yarn Colors:
-
Charcoal or dark grey (tree trunk & branches)
-
White (ghosts)
-
Small amounts of black (eyes & mouths)
-
Optional: orange or brown (mini pumpkins, base detail)
-
-
Hook: 2.5 mm or 3.0 mm crochet hook
-
Polyfill stuffing
-
Black felt or embroidery thread (for faces)
-
Yarn needle
-
Wire (optional) for branch shaping
-
Stitch markers
🧵 Abbreviations (US terms)
-
MR – Magic Ring
-
sc – Single Crochet
-
inc – Increase (2 sc in one stitch)
-
dec – Decrease (sc two stitches together)
-
ch – Chain
-
sl st – Slip Stitch
-
st(s) – Stitch(es)
-
FO – Fasten Off
🌲 Tree Trunk (in dark grey)
-
MR, 6 sc
-
inc x6 (12)
-
(1 sc, inc) x6 (18)
-
(2 sc, inc) x6 (24)
-
(3 sc, inc) x6 (30)
-
(4 sc, inc) x6 (36)
-
(5 sc, inc) x6 (42)
-
(6 sc, inc) x6 (48)
9–35. sc around (adjust height as needed) -
Begin shaping top with (6 sc, dec) x6 (42)
-
sc around
-
(5 sc, dec) x6 (36)
– FO and stuff firmly
🌳 Tree Roots (Make 5–7)
-
MR, 6 sc
2–12. sc around (6)
– FO and stitch around base of trunk in outward-curved positions
🌿 Tree Branches (Make 6–8, different lengths)
Thicker Branch:
-
MR, 6 sc
2–15. sc around
– Lightly stuff, insert wire if desired
– Make variations: some 10 rows, some 20
– Sew to top and sides of tree in organic, twisting positions
Optional: Crochet some “wiggly” branch ends
-
ch 12, sc back along (optional use FLO to curl)
👻 Mini Ghosts (Make 5–8)
Head & Body (in white):
-
MR, 6 sc
-
inc x6 (12)
-
(1 sc, inc) x6 (18)
4–6. sc around -
(1 sc, dec) x6 (12)
8–10. sc around -
Start arms: ch 5, sl st back along, attach to next st
-
Repeat for second arm opposite the first
-
Work sc around body
-
Make wavy bottom: (sc, ch 2, sc in next) repeat around
– FO and lightly stuff
Face Options:
-
Use small felt circles or embroidery for eyes/mouth
-
Add blush for a cute look or open mouths for spooky vibe
🪵 Optional Tree Face or Door
-
Cut a small oval of black or brown felt and embroider a door outline
-
Sew or glue onto tree front
🧵 Assembly
-
Attach branches around the top of the trunk in different directions
-
Sew mini ghosts onto branches and trunk
-
Pose ghosts in playful or spooky flying angles
-
Add any extra spooky details: mini pumpkins, spiders, bats!
🕸️ You’re Done!
Your Haunted Tree is now ready to become the spooky centerpiece of your Halloween decorations. Set it by a window, on a mantle, or add fairy lights for eerie ambiance!