Oh, the joy of crafting! 🎨 There’s something incredibly rewarding about making something with your own two hands, isn’t there? One of the most delightful experiences I’ve encountered is creating amigurumi—those adorable crocheted or knitted stuffed toys that have captured the hearts of crafters worldwide. And what could be more charming than a hanging sloth amigurumi? 🦥 These little critters are perfect as gifts or as whimsical decorations for your home. Just imagine a cute, smiling sloth dangling from a plant or shelf, bringing a touch of joy and a smile every time you pass by.
Now, let’s dive into the process of creating one of these cuties! The beauty of amigurumi lies in its simplicity, making it accessible for both seasoned crafters and beginners alike. 🧶 To start, you’ll need just a few basic materials: yarn in your favorite sloth colors, a crochet hook, stuffing, and some safety eyes to give your sloth that adorable gaze. The process involves stitching in rounds, which forms the sloth’s body and limbs, and the pattern is wonderfully repetitive, almost meditative. With each stitch, your sloth begins to take shape, and before you know it, you’re sewing on the final details and voilà—a hanging sloth ready to charm everyone who sees it! Preparing to embark on this crafting adventure is just as exciting as the final product itself. 😊
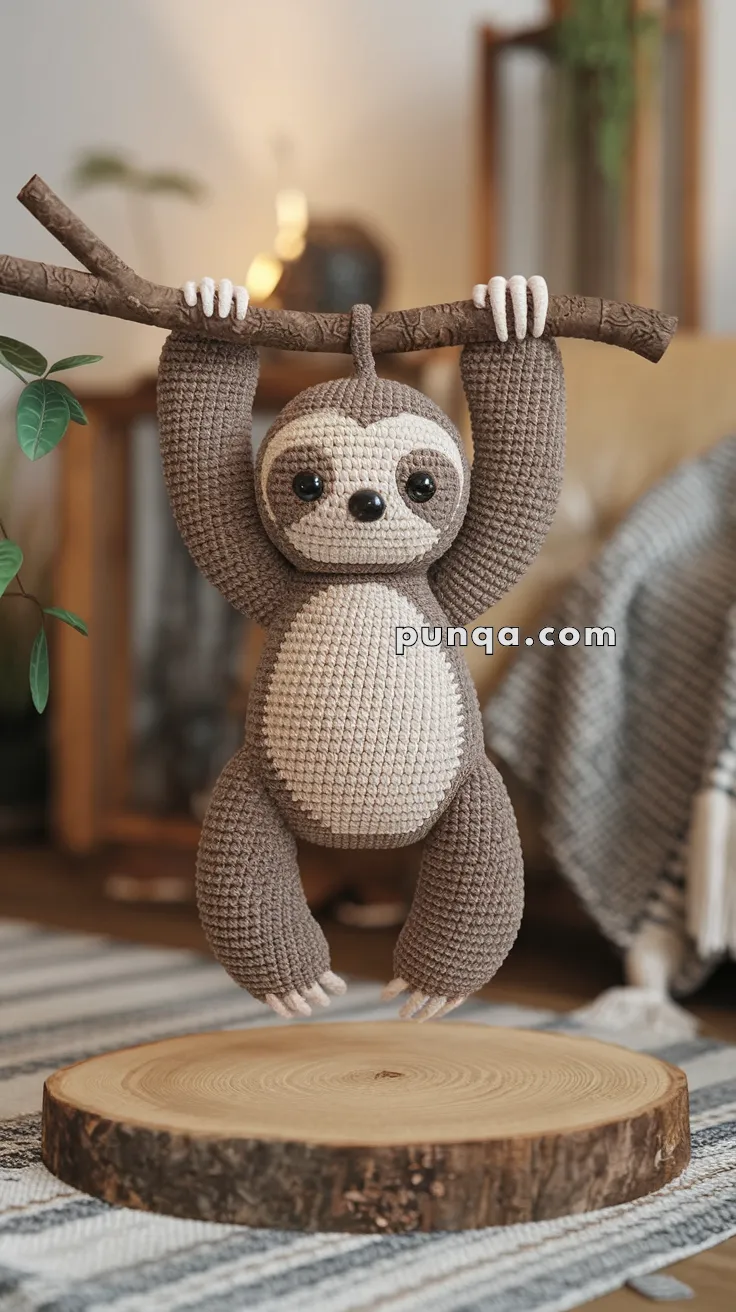
🦥 Amigurumi Hanging Sloth – FREE Crochet Pattern
This cozy and cuddly sloth is the ultimate slow-living companion! Designed to hang from a branch or shelf, this amigurumi sloth is perfect for nurseries, nature-themed rooms, or just a quirky gift for sloth lovers.
🧶 Materials:
-
Yarn in medium brown, cream, and white
-
2.5 mm or 3.0 mm crochet hook
-
12 mm safety eyes
-
Black safety nose or black yarn for embroidery
-
Fiberfill stuffing
-
Yarn needle
-
Stitch marker
-
Optional: real or crocheted stick/branch for hanging
✨ Abbreviations (US Terms):
-
MR – Magic Ring
-
sc – Single Crochet
-
inc – Increase
-
dec – Decrease
-
ch – Chain
-
sl st – Slip Stitch
-
FO – Fasten Off
🧠 Skill Level:
Intermediate – Includes shaping, limb placement, and some embroidery.
✂️ Pattern Instructions:
🔸 Head:
-
With cream, MR, sc 6
-
Inc evenly to 42 sts
-
Switch to brown, work even rounds for head shape
-
Insert safety eyes and nose
-
Lightly stuff and close
-
Embroider eye patches using brown yarn and sew to face
🔹 Body:
-
With cream, MR, sc 6
-
Inc to 12, 18, 24… up to 48
-
Work even for several rounds
-
Shape sloth belly using color changes to brown
-
Continue rounds for bottom shaping
-
Stuff firmly and FO
🔸 Arms (Make 2):
-
With brown, ch 2, sc into 1st ch
-
Work in continuous rounds (approx. 30–35 rounds long)
-
Shape lightly, insert wire if desired for poseable arms
-
Stuff lightly and FO
🔹 Legs (Make 2):
-
Begin like arms, but slightly shorter and wider
-
Work ~20 rounds
-
Stuff lightly and sew to bottom of body
🔸 Face Patch & Claws:
-
Face Patch: Use cream yarn, crochet an oval and sew around the eyes
-
Claws (Make 6 total): With white, ch 4, sl st back to form hook
-
Sew 3 claws per hand/foot
🧵 Assembly:
-
Sew head to body
-
Attach arms high on the sides of the body, raised for “hanging” pose
-
Sew legs underneath in seated or curved hanging position
-
Add claws and embroider any final face details
🌿 Display Tip:
-
Secure the hands around a wooden stick or dowel to hang your sloth from a shelf or curtain rod
-
Optional: Attach loops or magnets inside the hands for extra hanging stability
✨ Finishing Touches:
-
Use a slicker brush or your fingers to fluff the yarn for a furry effect
-
Add a little blush for a whimsical look
-
For baby sloth vibes, scale the pattern down using thinner yarn