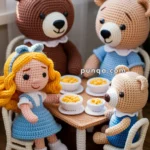
Celebrate the warmth of storytelling and family bonds with this heartwarming Amigurumi Grandma & Grandchild Reading crochet pattern! This cozy scene captures a tender moment between a loving grandmother and her curious grandchild, both nestled together with a shared book and gentle smiles. Whether you’re crafting a gift for a book lover, honoring a special grandparent, or simply adding a touch of nostalgia to your handmade collection, this project brings comfort, connection, and charm to every stitch. 🧶👵📖👧
Designed for detail and emotion, this pattern invites you to explore expressive features, soft yarns, and sweet extras like tiny glasses, a cozy armchair, or even a miniature bookshelf. Customize their outfits to reflect your own family or favorite storytime memories, and add embroidered details to the book for a personal touch. Whether perched on a shelf, nestled in a gift basket, or starring in a handmade reading nook, this Grandma & Grandchild Amigurumi is a joyful and satisfying project—perfect for stitching up a little handmade love, one loop at a time! 💖✨📚
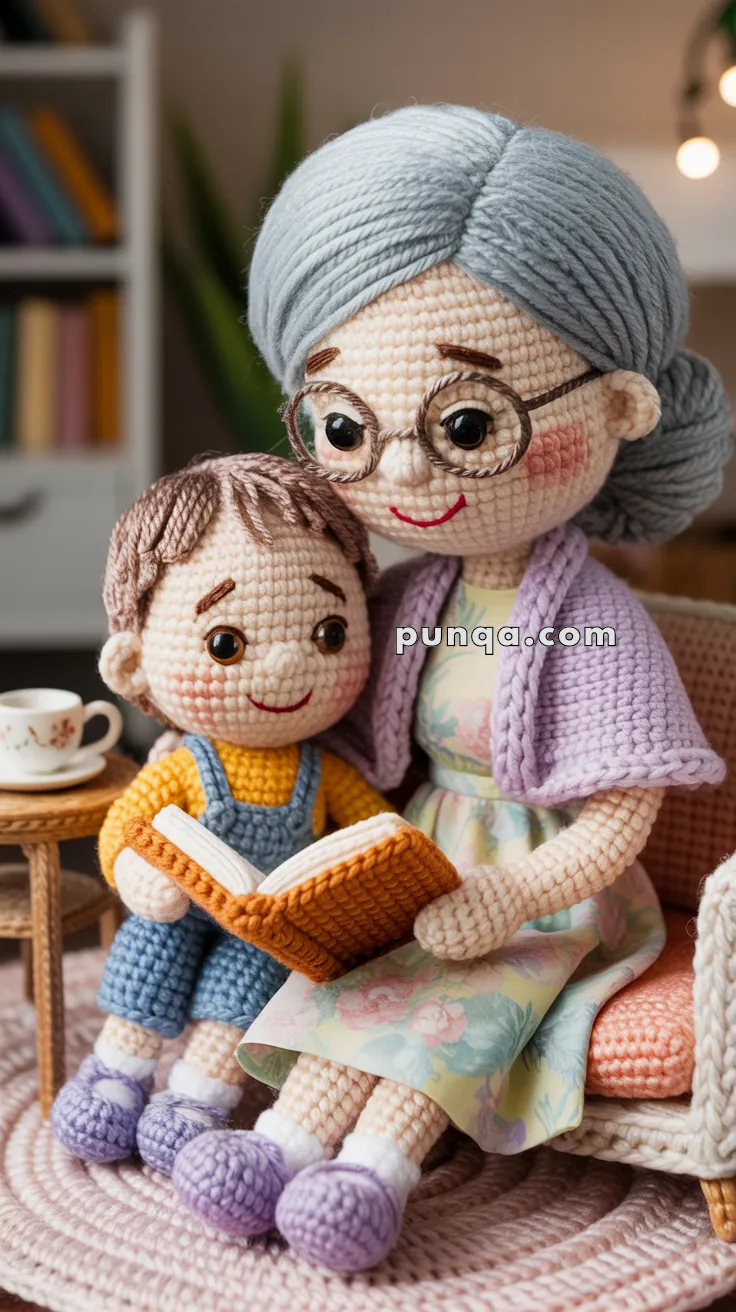
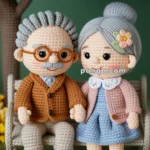
👵 Grandmother & Grandchild Reading Together Amigurumi Pattern
Create this tender scene of a grandmother and child sharing a storybook moment. This detailed pattern captures their cozy embrace, warm smiles, and the joy of reading together.
✨ Skill Level
Intermediate – involves shaping, color changes, clothing construction, and fine details
📏 Finished Size
- Grandmother: ~22 cm (8.5 inches) tall when seated
- Child: ~16 cm (6.5 inches) tall when seated
- Floor cushion: ~15 cm diameter
🧶 Materials
Yarn: DK weight cotton or acrylic blend
Colors needed:
- Skin: light beige or peach
- Grandmother’s hair: light gray or silver
- Child’s hair: medium brown
- Grandmother’s cardigan: soft lilac/purple
- Grandmother’s dress: pastel floral fabric or mint green yarn
- Child’s shirt: golden yellow/mustard
- Child’s overalls: denim blue
- Shoes: lavender purple and white
- Book cover: burnt orange
- Book pages: cream/ivory
- Floor cushion: dusty pink or coral
- Embroidery thread: black, pink, brown, red
Other supplies:
- 2.5 mm crochet hook
- Stitch markers
- Polyester fiberfill stuffing
- Yarn needle
- 4 black safety eyes (8-10 mm)
- Thin wire or pipe cleaners (for glasses)
- Brown embroidery thread (for glasses frames)
- Fabric scraps (optional, for grandmother’s dress)
- Pink chalk or pastel (for cheeks)
🧵 Abbreviations (US Terms)
- MR – Magic Ring
- sc – Single Crochet
- inc – Increase (2 sc in same stitch)
- dec – Invisible Decrease
- ch – Chain
- sl st – Slip Stitch
- BLO – Back Loop Only
- FLO – Front Loop Only
- FO – Fasten Off
- st(s) – Stitch(es)
👵 GRANDMOTHER DOLL
Head
With skin color:
Round 1: MR, 6 sc (6)
Round 2: inc x6 (12)
Round 3: (1 sc, inc) x6 (18)
Round 4: (2 sc, inc) x6 (24)
Round 5: (3 sc, inc) x6 (30)
Round 6: (4 sc, inc) x6 (36)
Rounds 7-15: sc around (36)
Insert safety eyes between Rounds 11-12, about 6-7 stitches apart.
Round 16: (4 sc, dec) x6 (30)
Round 17: (3 sc, dec) x6 (24)
Round 18: (2 sc, dec) x6 (18)
Stuff head firmly.
Round 19: (1 sc, dec) x6 (12)
Round 20: dec x6 (6)
FO, close hole with yarn needle.
Ears (make 2)
With skin color:
Round 1: MR, 6 sc (6)
Round 2: sc around (6)
FO, leave long tail. Sew to sides of head between Rounds 10-12, positioned slightly behind where eyes sit.
Nose
With skin color:
Round 1: MR, 5 sc (5)
FO, leave tail. Sew centered below eyes, between Rounds 12-13.
Hair – Wrapped Turban Style
With light gray yarn:
Round 1: MR, 6 sc (6)
Round 2: inc x6 (12)
Round 3: (1 sc, inc) x6 (18)
Round 4: (2 sc, inc) x6 (24)
Round 5: (3 sc, inc) x6 (30)
Round 6: (4 sc, inc) x6 (36)
Rounds 7-11: sc around (36)
FO, leaving long tail for sewing.
Creating the wrapped turban effect:
- Position cap on head
- Using same gray yarn, create 3-4 long twisted “ropes” by making chains of 35-40 stitches
- Wrap these chains around the head horizontally and diagonally to create turban texture
- Cross them over the front and sides for voluminous wrapped appearance
- Secure with small stitches as you wrap
- Tuck ends at back
Back Bun
With gray yarn:
Round 1: MR, 6 sc (6)
Round 2: inc x6 (12)
Round 3: (1 sc, inc) x6 (18)
Round 4: sc around (18)
FO, stuff lightly, sew to back of head at lower portion.
Glasses
Frame method 1 (wire):
- Cut thin wire or brown pipe cleaner, about 12 cm
- Form two circles (each about 2 cm diameter) for lenses
- Twist together in center to create bridge
- Shape ends to curve around ears
- Wrap brown embroidery thread around wire for texture
- Position on face and secure with tiny stitches
Frame method 2 (embroidered):
- Use brown or black embroidery thread
- Stitch two circles around the eyes
- Connect with bridge stitch across nose
- Add side pieces extending toward ears
Body
With skin color:
Round 1: MR, 6 sc (6)
Round 2: inc x6 (12)
Round 3: (1 sc, inc) x6 (18)
Round 4: (2 sc, inc) x6 (24)
Rounds 5-7: sc around (24)
Switch to pale yellow or mint (undershirt):
Rounds 8-14: sc around (24)
For fabric dress:
- Cut floral fabric strip approximately 8 cm x 25 cm
- Gather one long edge
- Wrap around body at Round 14
- Hand-stitch or hot-glue in place
- Allow fabric to drape naturally
Continue with skin color for legs (worked from body):
Round 15: (in BLO) (2 sc, dec) x6 (18)
Switch to white (sock/slipper cuff):
Round 16: sc around (18)
Round 17: sc around (18)
Stuff body firmly. FO, leave tail for attaching head.
Legs & Feet (make 2)
Start with lavender purple (slipper):
Round 1: MR, 6 sc (6)
Round 2: inc x6 (12)
Round 3: sc around (12)
Round 4: (4 sc, dec) x2 (10)
Switch to white (cuff):
Rounds 5-6: sc around (10)
Switch to skin color:
Rounds 7-11: sc around (10)
FO, stuff lightly. Sew legs to bottom front of body at Round 17, angled slightly outward for seated position.
Arms (make 2)
Start with skin color:
Round 1: MR, 6 sc (6)
Round 2: (1 sc, inc) x3 (9)
Rounds 3-5: sc around (9)
Add thumb detail:
- At end of Round 5, ch 3, sl st in 2nd ch from hook, sl st in next ch, sl st to arm to form small thumb bump
Switch to lilac/purple (cardigan sleeve):
Rounds 6-13: sc around (9)
FO, stuff lightly. Sew to shoulders, angled forward to hold book.
Cardigan Front Panels (make 2)
With lilac yarn:
Row 1: ch 5, sc in 2nd ch from hook, sc across (4)
Rows 2-14: ch 1, turn, sc across (4)
FO. Sew one panel to each side of front body to create open cardigan look.
👦 CHILD DOLL
Head
With skin color:
Round 1: MR, 6 sc (6)
Round 2: inc x6 (12)
Round 3: (1 sc, inc) x6 (18)
Round 4: (2 sc, inc) x6 (24)
Round 5: (3 sc, inc) x6 (30)
Rounds 6-12: sc around (30)
Insert safety eyes between Rounds 9-10, about 5-6 stitches apart.
Round 13: (3 sc, dec) x6 (24)
Round 14: (2 sc, dec) x6 (18)
Stuff firmly.
Round 15: (1 sc, dec) x6 (12)
Round 16: dec x6 (6)
FO, close hole.
Ears (make 2)
With skin color:
Round 1: MR, 5 sc (5)
Round 2: sc around (5)
FO, sew to sides of head between Rounds 8-9.
Nose
With skin color:
Round 1: MR, 4 sc (4)
FO, sew centered below eyes.
Hair Cap
With medium brown:
Round 1: MR, 6 sc (6)
Round 2: inc x6 (12)
Round 3: (1 sc, inc) x6 (18)
Round 4: (2 sc, inc) x6 (24)
Round 5: (3 sc, inc) x6 (30)
Rounds 6-9: sc around (30)
FO, sew onto head.
Bangs/Fringe
Cut 15-20 strands of brown yarn, each about 3 cm long. Using latch hook method or needle, attach across front of hair cap at Rounds 6-7. Trim to desired length (about 1 cm).
Body
With skin color:
Round 1: MR, 6 sc (6)
Round 2: inc x6 (12)
Round 3: (1 sc, inc) x6 (18)
Rounds 4-5: sc around (18)
Switch to golden yellow (shirt):
Rounds 6-9: sc around (18)
Switch to denim blue (overalls):
Round 10: sc around (18)
Rounds 11-13: sc around (18)
Stuff body. FO, leave tail for attaching head.
Overall Straps (make 2)
With denim blue:
Ch 12, sc in 2nd ch from hook, sc across (11)
FO. Sew one end to front of overalls and other end to back, crossing over shoulders.
Legs & Feet (make 2)
Start with lavender purple:
Round 1: MR, 6 sc (6)
Round 2: inc x6 (12)
Round 3: sc around (12)
Round 4: (4 sc, dec) x2 (10)
Switch to white:
Rounds 5-6: sc around (10)
Switch to skin color:
Rounds 7-9: sc around (10)
FO, stuff lightly. Sew to bottom of body in seated position.
Arms (make 2)
Start with skin color:
Round 1: MR, 6 sc (6)
Round 2: (1 sc, inc) x3 (9)
Rounds 3-4: sc around (9)
Switch to yellow (shirt sleeve):
Rounds 5-10: sc around (9)
FO, stuff lightly. Sew to shoulders, positioned to hold book.
📖 OPEN BOOK
Inner Pages (make 2)
With cream/ivory yarn:
Row 1: ch 10, sc in 2nd ch from hook, sc across (9)
Rows 2-6: ch 1, turn, sc across (9)
FO both pages.
Book Cover
With burnt orange yarn:
Row 1: ch 20, sc in 2nd ch from hook, sc across (19)
Rows 2-7: ch 1, turn, sc across (19)
FO.
Assembly:
- Fold cover in half lengthwise
- Place one ivory page on left inside, one on right inside
- Stitch along center fold to bind pages into cover
- Optional: add 2-3 stitches on each page to suggest text lines using brown thread
- Position book between grandmother and child, with each holding one side
- Stitch hands to book to secure
🛋️ FLOOR CUSHION
With dusty pink or coral:
Round 1: MR, 6 sc (6)
Round 2: inc x6 (12)
Round 3: (1 sc, inc) x6 (18)
Round 4: (2 sc, inc) x6 (24)
Round 5: (3 sc, inc) x6 (30)
Round 6: (4 sc, inc) x6 (36)
Round 7: (5 sc, inc) x6 (42)
Round 8: (6 sc, inc) x6 (48)
Rounds 9-11: sc around (48)
Round 12: (6 sc, dec) x6 (42)
Round 13: (5 sc, dec) x6 (36)
Round 14: (4 sc, dec) x6 (30)
Begin stuffing.
Round 15: (3 sc, dec) x6 (24)
Round 16: (2 sc, dec) x6 (18)
Round 17: (1 sc, dec) x6 (12)
Round 18: dec x6 (6)
FO, close hole. This creates a plump floor cushion/pillow.
✂️ ASSEMBLY & FINISHING
Face Details
Both dolls:
- Embroider smile with red or pink thread using backstitch
- Create curved smile between nose and chin
- Apply pink chalk or yarn for rosy cheeks
- Grandmother: Add small lines at outer eye corners for gentle crow’s feet (optional)
Positioning
- Seat grandmother on floor cushion with legs extended forward
- Position child next to grandmother, slightly in front
- Angle bodies so they’re facing each other slightly
- Place open book between them
- Position grandmother’s right arm and child’s left arm to hold book together
- Stitch hands firmly to book
- Use pins to test positioning before final stitching
- Sew bottom of each doll to cushion for stability
Final Touches
- Adjust hair strands and turban wrapping
- Ensure glasses sit securely on nose
- Check that dress fabric drapes naturally
- Fluff and shape stuffing as needed
- Add small details like embroidered patterns on book cover if desired
💡 Display Ideas
- Place on shelf with miniature books nearby
- Add tiny reading lamp or tea cup as accessories
- Create small bookshelf backdrop
- Use as centerpiece for family gatherings
- Photograph and frame as keepsake
- Personalize book cover with family name or date
This heartwarming amigurumi captures the timeless bond between generations, perfect as a gift or treasured decoration. 💜📚✨