Oh, the whimsical world of amigurumi! 🌟 There’s something incredibly charming about transforming a simple ball of yarn into delightful little creatures, and creating a goblin king amigurumi ranks high on the list of fun projects. The appeal lies in the magic of merging the fantastical with the cute, taking inspiration from tales of goblins and their mischievous adventures, and breathing life into those characters with just a crochet hook and yarn. It’s like weaving a fairytale one stitch at a time. The goblin king, with his mischievous grin and whimsical attire, always stands out as a playful, enchanting figure to recreate.
Embarking on the journey to crochet a goblin king is both exhilarating and rewarding. First, I gather my materials: plush yarn in hues of green, some sparkly threads for his royal robes, and the all-important wobbly eyes. 👀 I start with the head, shaping those distinctive pointed ears and mischievous smile. As I work my way down, crafting his regal cape and tiny crown, I can’t help but feel a sense of pride at each completed piece. The process is like an adventure in creativity, with each stitch building this miniature monarch’s story. Before you know it, he’s ready to take his place on the shelf, a testament to the magic of imagination and the joy of crafting. 🧶
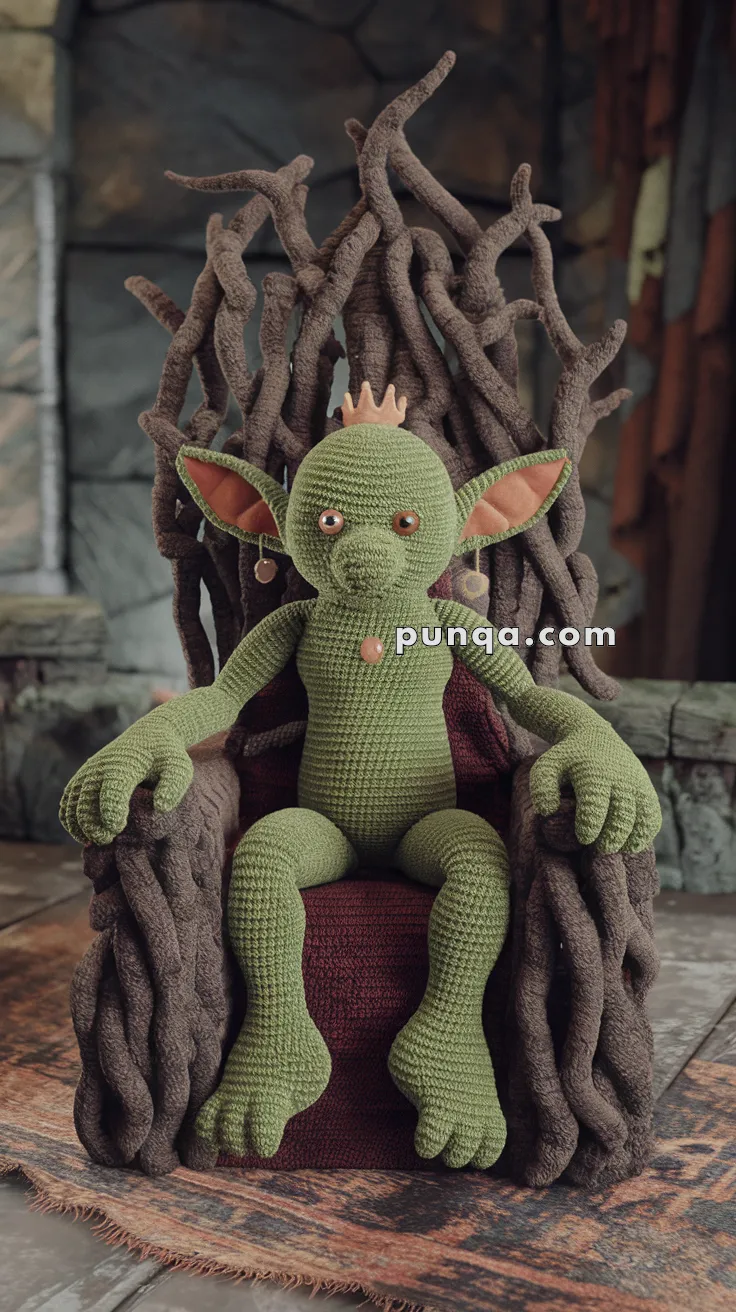
👑 Amigurumi Goblin King Crochet Pattern
Bring a touch of fantasy to your crochet world with this regal and mischievous Goblin King! From his oversized ears and button eyes to his towering throne of twisted roots, this piece makes a magical display for fantasy lovers, RPG fans, or collectors of mythical creatures.
🧵 Skill Level
Advanced
📏 Finished Size
Approx. 14–16 inches (35–40 cm) tall when seated
(Throne optional)
🧶 Materials
-
DK or worsted weight yarn in:
-
Olive green (body)
-
Light pink (inner ears)
-
Brown (throne/tree branches)
-
Burgundy (seat cushion)
-
Beige or light gold (crown)
-
-
Crochet hook: 2.5–3.5 mm
-
Safety eyes or brown buttons
-
Stitch markers
-
Fiberfill stuffing
-
Tapestry needle
-
Jewelry rings or charms (optional for ear accents)
-
Wire (optional for finger shaping)
✨ Abbreviations (US Terms)
-
MR – Magic Ring
-
sc – Single Crochet
-
inc – Increase
-
dec – Decrease
-
ch – Chain
-
sl st – Slip Stitch
-
FO – Fasten Off
-
BLO/FLO – Back/Front Loop Only
🧠 Head (Green)
-
MR, 6 sc
-
inc x6 (12)
-
(1 sc, inc) x6 (18)
-
(2 sc, inc) x6 (24)
-
(3 sc, inc) x6 (30)
-
(4 sc, inc) x6 (36)
7–18. sc around (36) -
(4 sc, dec) x6 (30)
-
(3 sc, dec) x6 (24)
-
(2 sc, dec) x6 (18)
– Insert safety eyes or buttons between Rounds 12–14
– Stuff firmly, FO
🦶 Body (Green)
-
MR, 6 sc
-
inc x6 (12)
-
(1 sc, inc) x6 (18)
-
(2 sc, inc) x6 (24)
5–15. sc around (24) -
(2 sc, dec) x6 (18)
17–21. sc around (18) -
(1 sc, dec) x6 (12)
– Stuff and FO
✋ Arms (Make 2 – Green)
-
MR, 5 sc
-
inc x5 (10)
3–14. sc around (10)
– Optional: Add wire inside for shaping
– Stuff lightly, FO, sew to shoulders
🦶 Legs (Make 2 – Green)
-
MR, 6 sc
-
inc x6 (12)
3–6. sc around (12) -
(2 sc, dec) x3 (9)
8–12. sc around (9)
– Stuff and sew to base of body in seated position
👂 Ears (Make 2 – Green & Pink inner)
-
ch 7
-
sc in 2nd ch from hook and across (6)
-
turn, inc in each stitch (12)
-
sl st around for border
– Use green for outer ear and pink for inner ear
– Sew to sides of head, curve tips slightly
👑 Crown (Beige/Gold)
-
ch 24, join
-
sc around
-
(sl st, ch 3, sl st) repeat for points
– FO and place between ears
🪑 Throne (Optional – Brown, Burgundy)
-
Work multiple tree root tubes:
-
MR, 6 sc
-
sc around until desired length
-
Bend and stitch together into backrest shape
-
-
Seat cushion:
-
Create a circle base: inc each round until ~3.5″ wide
-
sc rows upward to form seat depth
-
FO and stuff
-
-
Back & armrest:
-
Stitch tree roots around edges
-
Add curves and texture with twisted placements
-
🪡 Assembly
-
Attach arms and legs securely to the torso
-
Sew head to body
-
Add ears and crown
-
Attach earrings or charms to ears if desired
-
Position onto throne and stitch in place or use hidden wire for support
✨ Final Touches
-
Embroider small nostrils or a goblin grin
-
Add blush or shading under the eyes
-
Use dark brown thread to define claws
-
Optionally embroider robe details or add shoulder cape