Welcome to the wonderful world of fantasy-inspired amigurumi! ✨ Today, I’m thrilled to share with you my free crochet pattern for a mischievous little Goblin, straight from the depths of folklore and imagination! 🔮 Whether you’re a tabletop gaming enthusiast, fantasy creature collector, or simply love creating quirky handmade characters, this pattern will guide you through creating your very own pocket-sized troublemaker complete with pointy ears, toothy grin, and impish charm! 💚
This pattern uses classic stitches and straightforward techniques, making it perfect for crafters looking for a magical project! 🧙♂️ I’ve broken down each step with detailed instructions to ensure your Goblin turns out just right. 👌 So grab your hooks and yarn, and let’s bring this cave-dwelling trickster to life one stitch at a time! 🌑 This little rascal might try to steal your shinies, but will definitely capture your heart with its cheeky personality! 💰
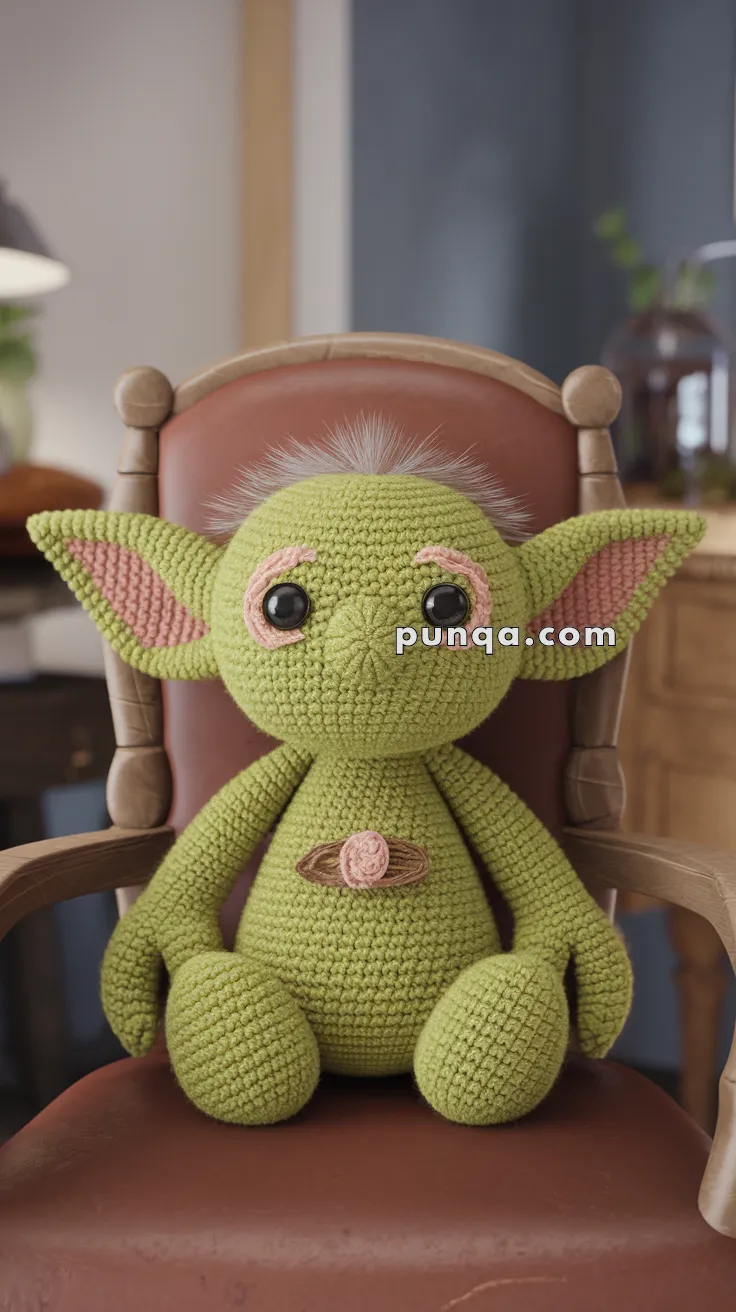
This endearing little goblin features big ears, a pointy nose, and a curious charm. With his pastel accents and stitched rose medallion, he’s perfect for fantasy lovers or whimsical shelf decor.
🧶 Skill Level
Intermediate – Includes shaping, basic embroidery, and multiple piece assembly.
📏 Finished Size
Approximately 28 cm (11 inches) when using worsted-weight yarn and a 3.5 mm hook.
✂️ Materials Needed
Worsted-weight yarn in:
Light green (main body)
Pink (eyelids, inner ears, rose)
Brown (rose base band)
3.5 mm crochet hook
12 mm black safety eyes
Yarn needle
Stitch marker
Scissors
Fiberfill stuffing
Optional: fine white faux fur or brushed yarn for head fuzz
🧵 Abbreviations (US Terms)
MR – Magic Ring
sc – Single Crochet
inc – Increase (2 sc in same st)
dec – Decrease (sc 2 together)
ch – Chain
sl st – Slip Stitch
FO – Fasten Off
🧠 Head
With light green:
MR, 6 sc
inc x6 (12)
(sc, inc) x6 (18)
(2 sc, inc) x6 (24)
(3 sc, inc) x6 (30)
(4 sc, inc) x6 (36) 7–12. sc around (36)
(4 sc, dec) x6 (30)
(3 sc, dec) x6 (24)
(2 sc, dec) x6 (18)
(sc, dec) x6 (12)
dec x6 (6) FO and close. Stuff firmly.
🦶 Legs (Make 2)
With light green:
MR, 6 sc
inc x6 (12)
(sc, inc) x6 (18) 4–6. sc around (18)
(4 sc, dec) x3 (15) 8–12. sc around (15) FO and stuff. Sew both legs side by side at the base.
🧸 Body
Start in green and join legs:
sc around first leg (15), then around second leg (15) – 30 2–10. sc in each (30)
(3 sc, dec) x6 (24)
(2 sc, dec) x6 (18)
(sc, dec) x6 (12) FO and stuff. Sew to the head.
✋ Arms (Make 2)
With light green:
MR, 6 sc
inc x6 (12) 3–5. sc around (12)
(2 sc, dec) x3 (9) 7–12. sc around (9) Stuff lightly and FO. Sew to body sides.
👂 Ears (Make 2)
With light green:
MR, 6 sc
(sc, inc) x3 (9)
(2 sc, inc) x3 (12)
(3 sc, inc) x3 (15)
(4 sc, inc) x3 (18) 6–9. sc around (18) Flatten and FO. Sew to either side of the head, curving slightly.
👁️ Eyelids (Make 2)
With pink:
ch 6
sc across (5), ch 1, turn
dec, sc, dec (3) FO and sew over top of each safety eye for sleepy look.
🌹 Chest Medallion
Rose (Pink):
ch 15
In 2nd ch from hook: (sl st, sc, hdc, dc, hdc, sc) repeatedly along chain FO, roll into a spiral and stitch into a rosette shape.
Band (Brown):
ch 16
sl st in each st FO. Attach around rose base and sew whole piece to chest.
🧷 Assembly
Sew head onto body securely.
Attach arms angled slightly downward at the sides.
Sew ears on both sides of the head, pointing outward.
Position and glue or stitch safety eyes in place, then add eyelids above them.
Sew the chest medallion in the center.
Lightly brush faux fur or yarn and stitch onto top of head for hair.
Finish your goblin with a touch of magic and personality by adjusting the brows or hair! He’s perfect for fantasy fans and makes a delightful handmade gift.