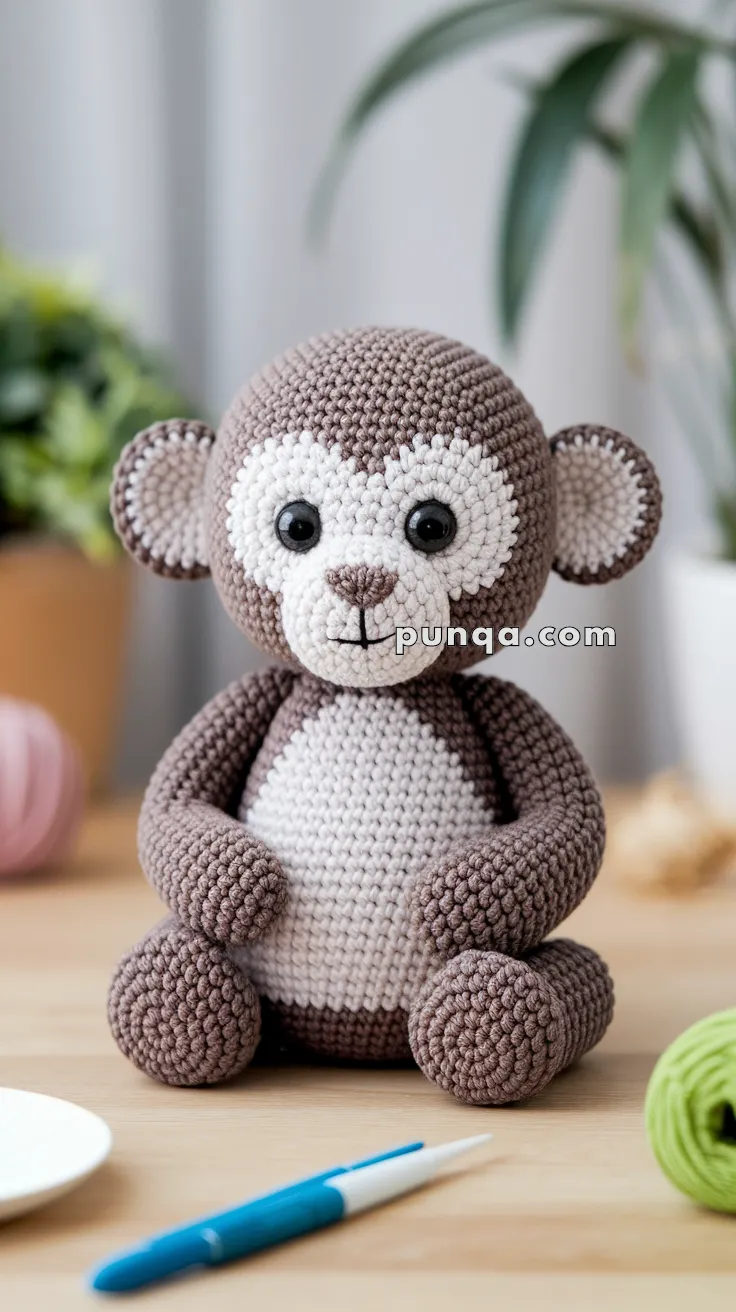
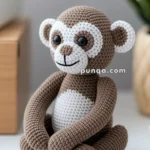
🐵 Amigurumi Gibbon Baby Crochet Pattern
Make your very own adorable gibbon baby with this versatile crochet pattern! Whether you love the ease of no-sew projects or prefer the classic construction with separate parts, this pattern has you covered. Designed with clean color transitions and a chubby shape, this little primate makes a charming handmade gift or nursery addition.
✨ Skill Level
Beginner to Intermediate – Involves shaping, color changes, and optional sewing.
📏 Finished Size
Approx. 23–25 cm (9–10 in) tall when seated, using DK/light-worsted yarn and a 2.75–3.25 mm hook.
🧶 Yarn and Materials
DK or Light Worsted (smooth cotton or cotton-blend preferred):
-
Warm Brown (head, limbs, body, outer ear) – approx. 70–85 g
-
Off-White (face mask, belly patch, inner ear) – approx. 35–45 g
Other materials:
-
10–12 mm glossy black safety eyes
-
Brown embroidery thread (nose)
-
Black embroidery thread (mouth)
-
Stuffing
-
Tapestry needle
-
Stitch marker
Use tight single crochet to achieve the dense grain visible in the photo.
🧵 Abbreviations (US Terms)
MR – magic ring
sc – single crochet
inc – increase (2 sc in same st)
dec – invisible decrease
sl st – slip stitch
ch – chain
FO – fasten off
Work in continuous spirals unless stated.
🍫 Head (Brown Base)
The head is a round, full sphere with eyes placed slightly lower than center and spaced widely.
With brown yarn:
R1: MR, 6 sc
R2: inc x6 (12)
R3: (sc, inc) x6 (18)
R4: (2 sc, inc) x6 (24)
R5: (3 sc, inc) x6 (30)
R6: (4 sc, inc) x6 (36)
R7: (5 sc, inc) x6 (42)
R8–R19: sc around (42)
Attach safety eyes between R13–R14, spaced approximately 8 stitches apart.
Continue:
R20: (5 sc, dec) x6 (36)
R21: (4 sc, dec) x6 (30)
R22: (3 sc, dec) x6 (24)
Begin firm stuffing.
R23: (2 sc, dec) x6 (18)
R24: (sc, dec) x6 (12)
R25: dec x6 (6)
FO and weave tail through remaining stitches to close.
Stuff very densely to maintain the smooth, dome-like curvature shown in the image.
🤍 White Face Mask (Teardrop Oval, Sewn On)
This piece defines the monkey’s personality: tall, wide-bottomed, slightly narrowed at the top.
With off-white:
R1: MR, 6
R2: inc x6 (12)
R3: (sc, inc) x6 (18)
R4: (2 sc, inc) x6 (24)
R5: (3 sc, inc) x6 (30)
R6: (4 sc, inc) x6 (36)
R7–R8: sc around (36)
Lightly shape the upper edge into a gentle dip/top point between the eyes by tugging and pinning before sewing.
Center the mask between the eyes.
Edges must be crisp, lying perfectly flat on the head.
Stitch the perimeter with tiny, matching loops so the border looks clean and seamless like the photo.
🐽 Nose and Mouth
Using brown thread:
Using black thread:
-
Embroider a short vertical line downward from center nose base.
-
Add two tiny curves forming a subtle U-shaped smile.
Linework must be minimal, thin, and neat.
👂 Ears (2 identical pieces)
The inner white circle is large, leaving only a slim brown rim — a key detail in the photo.
Start with off-white:
R1: MR, 6
R2: inc x6 (12)
R3: (sc, inc) x6 (18)
Switch to brown:
R4–R5: sc around (18)
Flatten the circle into a semicircle.
FO, leaving a long tail.
Positioning:
🧸 Body (Brown Torso)
A firm oval with a flat front where the belly patch sits.
With brown:
R1: MR, 6
R2: inc x6 (12)
R3: (sc, inc) x6 (18)
R4: (2 sc, inc) x6 (24)
R5: (3 sc, inc) x6 (30)
R6–R12: sc around (30)
R13: (3 sc, dec) x6 (24)
R14–R16: sc around (24)
Begin stuffing firmly.
R17: (2 sc, dec) x6 (18)
R18: (sc, dec) x6 (12)
R19: dec x6 (6)
FO and close.
🤍 Tall White Belly Patch (Sewn On)
Proportions visible in the photo show a slender vertical oval nearly the full body height.
With off-white:
R1: MR, 6
R2: inc x6 (12)
R3: (sc, inc) x6 (18)
R4: (2 sc, inc) x6 (24)
R5: (3 sc, inc) x6 (30)
R6–R9: sc around (30)
Flatten gently with blocking if needed.
Placement:
-
Top meets under chin area
-
Bottom curve sits close to body base
-
Width narrower than body circumference
-
Fully centered front-to-back
Sew carefully for a clean edge.
💪 Arms (2 pieces)
Short, rounded shape with a small palm bulb — they rest over the belly in the photo.
With brown:
R1: MR, 6
R2: (sc, inc) x3 (9)
R3–R6: sc around (9)
R7: (sc, dec) x3 (6)
R8–R10: sc around (6)
Stuff lightly in the hand area only. Keep upper arm softer to allow slight bend.
Sew on sides of body so hands nearly touch at belly center.
🦵 Legs (2 pieces)
Bulbous, rounded feet with short upper legs — proportionally larger than arms.
With brown:
R1: MR, 6
R2: inc x6 (12)
R3: (sc, inc) x6 (18)
R4: (2 sc, inc) x6 (24)
R5–R7: sc around (24)
R8: (3 sc, dec) x6 (30)
R9: (2 sc, dec) x6 (24)
R10: (sc, dec) x6 (18)
R11–R12: sc around (18)
Stuff firmly through foot and slightly into the leg segment.
FO and sew legs to lower edges of body, angled naturally so feet rest flat on surface in seated position.
🧵 Assembly Guide
-
Sew the white face mask first, ensuring top edge meets eye line and bottom overlaps muzzle area slightly.
-
Add nose and mouth embroidery.
-
Attach ears symmetrically, slightly forward-tilted.
-
Sew head onto body firmly.
-
Attach belly patch centered and tall.
-
Sew legs to lower sides of the body so feet sit flat.
-
Sew arms so palms angle inward, nearly touching on the belly.
Stuffing should be firm enough to give smooth curves without dents or slack areas.
This amigurumi gibbon baby is fun to make and even more fun to squish! Whether you choose the seamless no-sew version or enjoy stitching together separate parts, it’s the perfect project to add some monkey magic to your day! 🐒🌿